
Add a new Magento 2 admin account with no effort
Being one of the best ecommerce platforms, Magento takes care of different aspects essential to online businesses such as inventory and order management, marketing activities, content management, and many others. As Magento developers have a profound understanding of e-merchant needs, they pay special attention to the management of store admin accounts.
When a Magento store is first installed, there’s a default admin account having full admin access. The best thing that you can do is to create another admin account with the same rights and keep one of these accounts untouched in case of an emergency.
You may create an admin account for each member of your team, this way simplifying store management. Magento also allows for easy access permission management by assigning a user role with preset access rights to the admin user.
How to Create a New Admin User
To add a new Magento 2 admin account, log in to the Admin panel and go to System > Permissions > All Users.
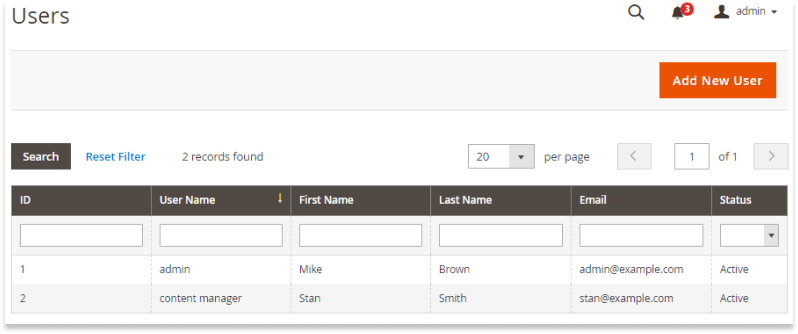
Hit the ‘Add New User’ button in the upper-right corner to start creating a new admin user account.
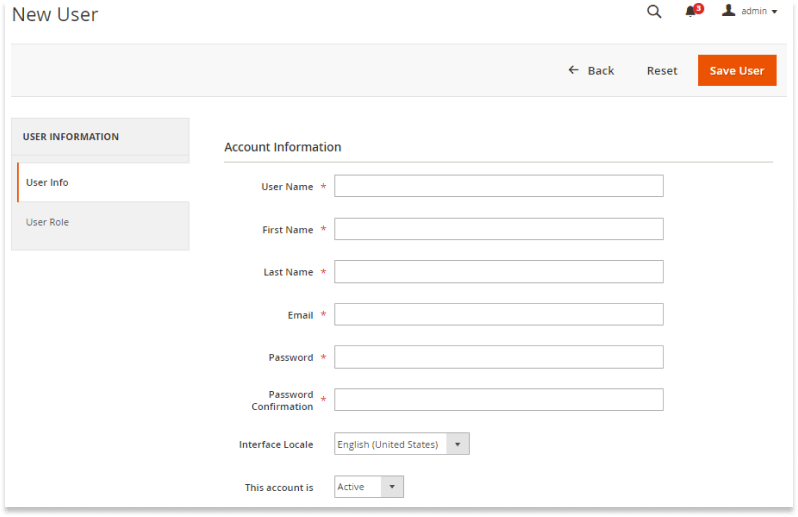
Add a user name of the account (e.g., marketing manager or Lucy). Enter a name and a surname of the new user and an email address. Please note that the email address mustn’t be different from the one in the original account.
Enter a password that will be associated with the account. Make sure that it’s at least seven characters long and includes both letters and numbers. Verify the password in the next field.
If your store is configured for multiple languages, you can set the interface locale to the language preferred by the new admin user.
Set ‘This account is’ to active to enable the new account. In the ‘Current User Identity Verification’ section, enter your password.
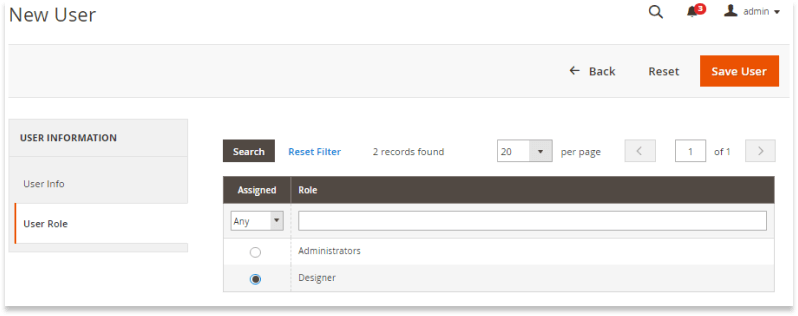
Proceed with setting a user role for the admin user to assign specific access rights to the admin account. Save the new user to activate the account.
Admin User Access Rights Management
When it comes to admin panel resources management, you can restrict access rights of an admin user by assigning to it a role with the appropriate level of permissions.
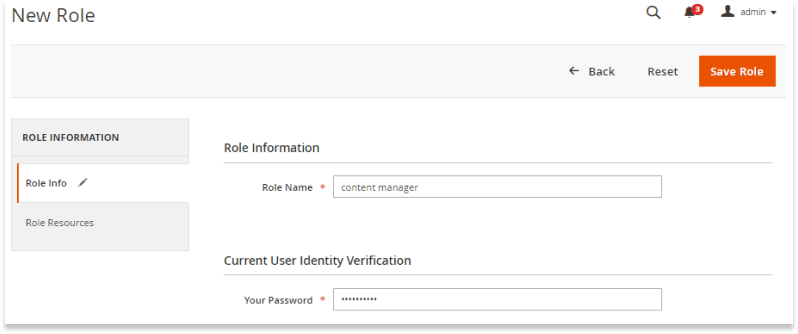
To set up a user role, navigate to System > Permissions > User Roles. Click the ‘Add New Role’ button and fill in all the necessary fields in the ‘Role Info’ section.
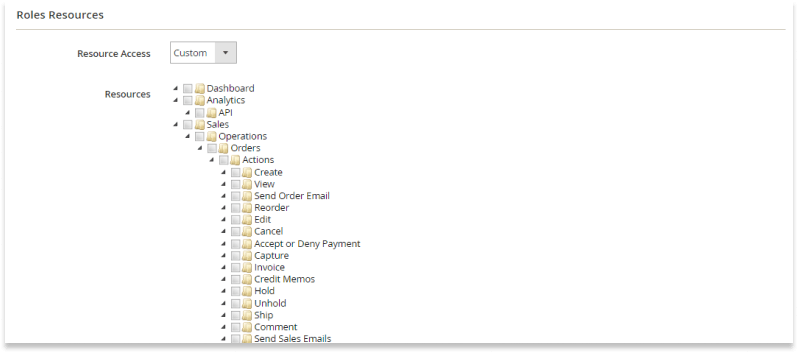
Go to the ‘Role Resources’ section and set the ‘Resource Access’ scope to ‘Custom’ to configure role resources and mark the checkbox near each resource the role can access. Make sure to disable access to the permissions if you’re creating a role given role with limited access. Then tap the ‘Save Role’ button to save the role.
Advanced Access Permissions Management
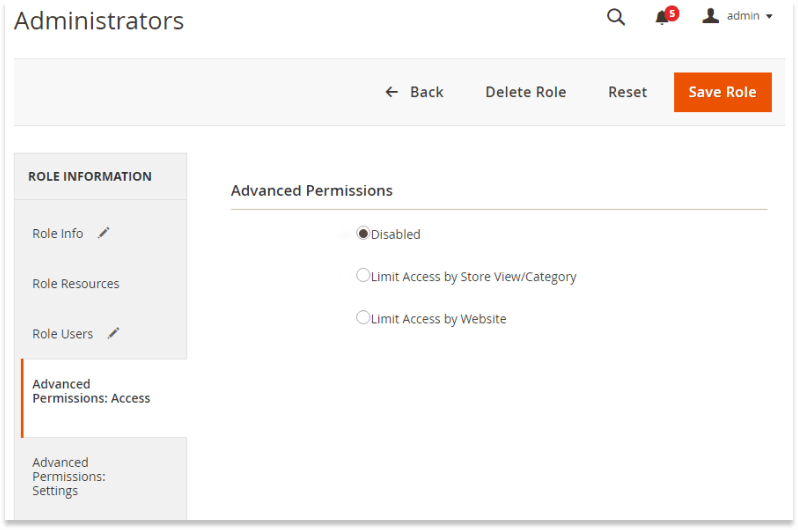
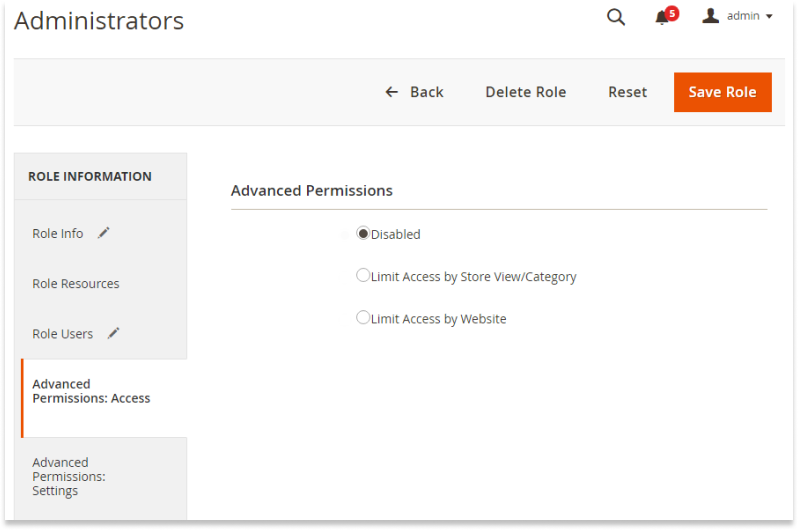
To make the Magento admin panel even more secure, you can leverage Magento 2 Advanced Permissions, an Aitoc’s extension. Using this module you can restrict user role access to specific websites, Store Views, and product categories.
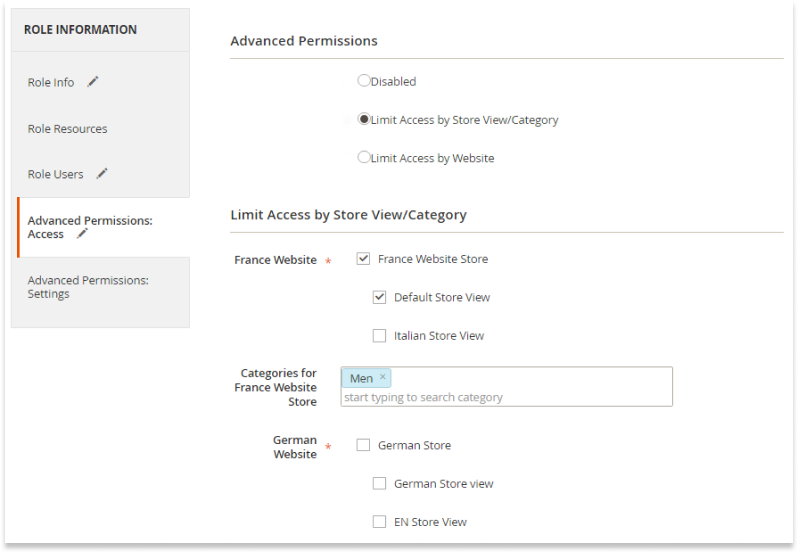
For instance, you allow the user role to access just one product category.
And that’s not all! With the extension, you may hide customers and products without categories, disable deleting products, their images, and content, and much more. These settings can be configured installation-wise and adjusted per user role when needed.
Final Words
Magento is a great platform that gives store owners great flexibility. The ability to create multiple user roles and configure their access permissions is one of its best features. To enhance the security of the Admin panel, you can take advantage of Magento 2 extensions such as Advanced Permissions by Aitoc.
