
Make customers flock into your store with Magento 2 customer engagement tools
Engaged customers are the dream and major aim of any business, as such clients turn into a continuous source of new orders and often become brand ambassadors. Almost 80% of customers in the US only consider the companies that show them that they care. That's why online and offline stores put much effort into engaging their customers at every step of their journey.
Magento 2 provides a range of essential tools that allow creating new opportunities for customers to interact with a store and share their experience with each other. In this article, we share some of the most effective approaches to increase customer engagement and explain how to set them up Magento 2. Let's start!
Email a Friend
Email sharing makes it easy for online shoppers to send links to your products to others. You can configure it for the whole installation or only for specific Websites or Store Views if needed.
To set up the ‘Email to a Friend’ functionality, log in to the store’s backend and navigate to Stores > Settings > Configuration. Proceed to the ‘Catalog’ Section on the left panel and expand it to access the ‘Email to a Friend’ subsection.
To activate this functionality, set the ‘Enabled’ field to ‘Yes’. In the ‘Select Email Template’ dropdown, choose the template you want to use for such emails.
If you don’t like the one available out-of-the-box, you are free to create a new template for your store beforehand.
If you wish to entice online visitors into creating an account, disable sending emails to a friend for non-registered customers. This way you will make them register to take advantage of the ‘Email a Friend’s functionality.
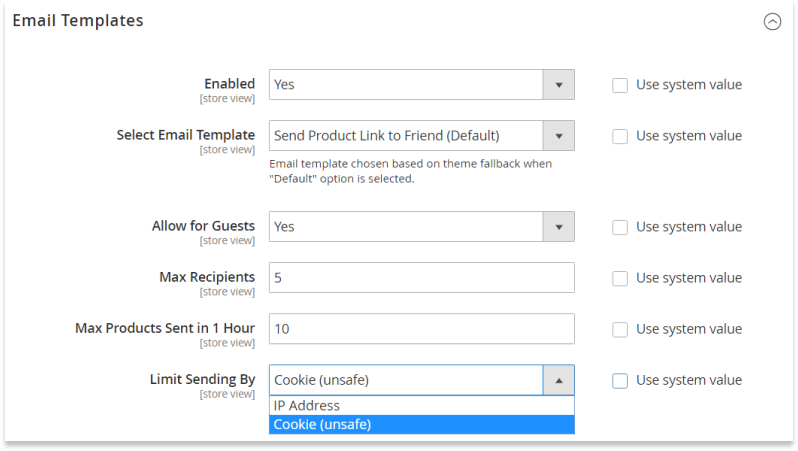
You may also specify the maximum number of recipients allowed for each email and even limit the number of products that can be shared within one hour. These two steps will help you prevent spamming.
Configure the last field to identify the email sender (either by IP or cookie files). Tap the ‘Save Config’ button on the top of the page to save the changes.
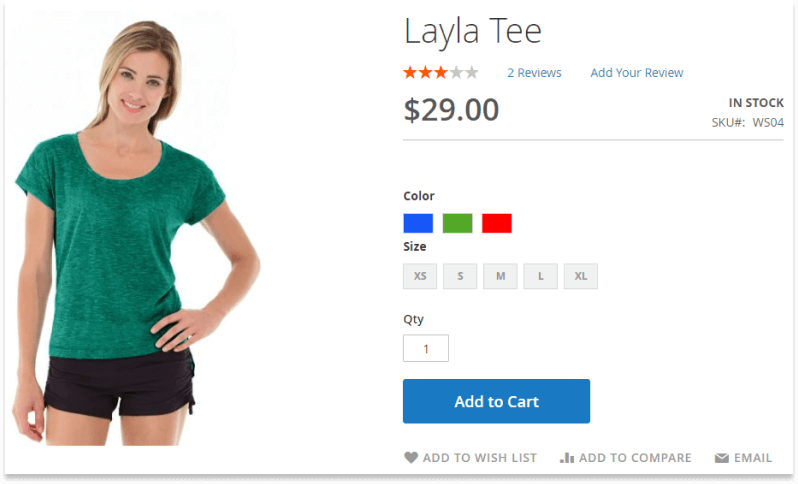
On the storefront, customers need to click the ‘Email to Friend’ icon on the product page to leverage this useful tool.
Wish List
A wish list is a list of your products that a registered user can create and then share with others or transfer to the cart. Not only it improves the overall customer experience with your store, but it also provides for great benefets for you as a store owner. Wish lists allow getting a more in-depth insight into your customers' way of thinking, and actually drive higher traffic to the site. When enabled in Magento 2, it is shown on product and category pages of the store.
To configure the wish list, go to the Stores > Settings > Configuration. On the left panel, proceed to the ‘Customers' subsection and choose ‘Wish List’.
Enable the wish list by setting the first field to ‘Yes’. Select the email sender. His/her name will be used as the message sender.
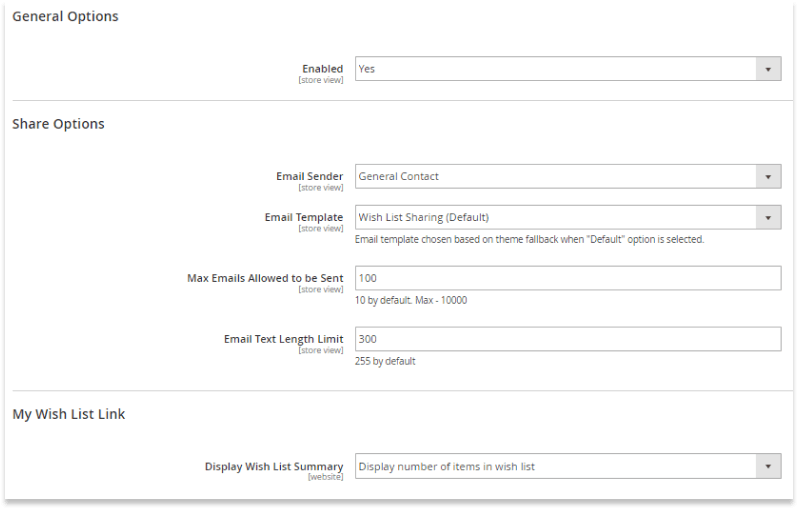
Specify the email template you are going to put to use. If you don't want to deal with spammers, limit the number of emails that can be sent by a person and set the maximum number of emails he/she can send.
You can also manage the size of the message by determining the email text size limit.
Note that all the above-mentioned settings can be configured per Website and Store View.
The last setting (‘Display Wish List Summary’) is configured on a global scope. Utilize it to enable displaying either the number of items or item quantities.
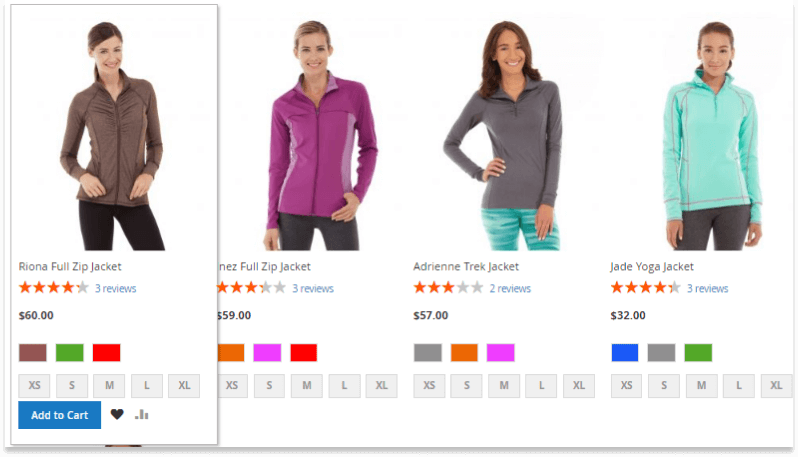
Compare Products Block
This tool enables detailed, side-by-side comparison of different products.
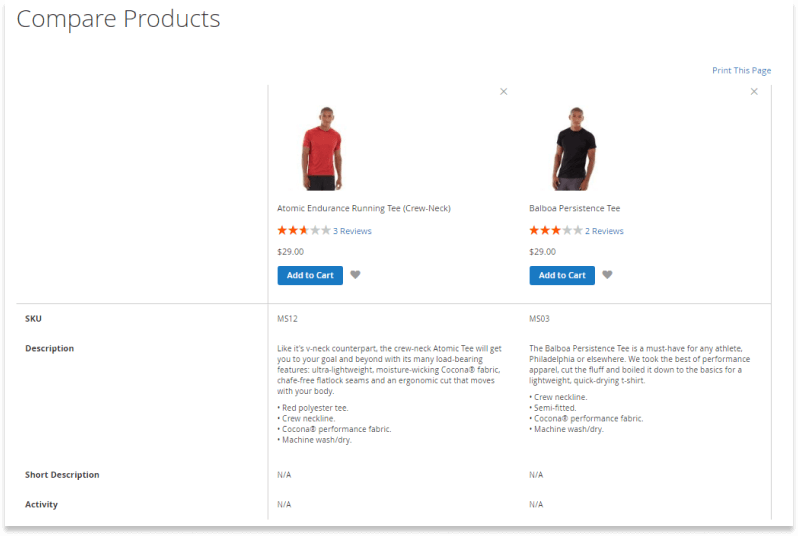
To configure it, go to Stores > Settings > Configuration. Then access the ‘Catalog’ section and select ‘Catalog’.
In the ‘Recently Viewed/Compared Products’ section set ‘Set Show for Current’ for those Websites, Stores or Store Views where you want to apply this configuration. Don’t forget to enter the number into ‘Default Recently Compared Products Count’. This number will determine how many recently compared products will appear on the list.
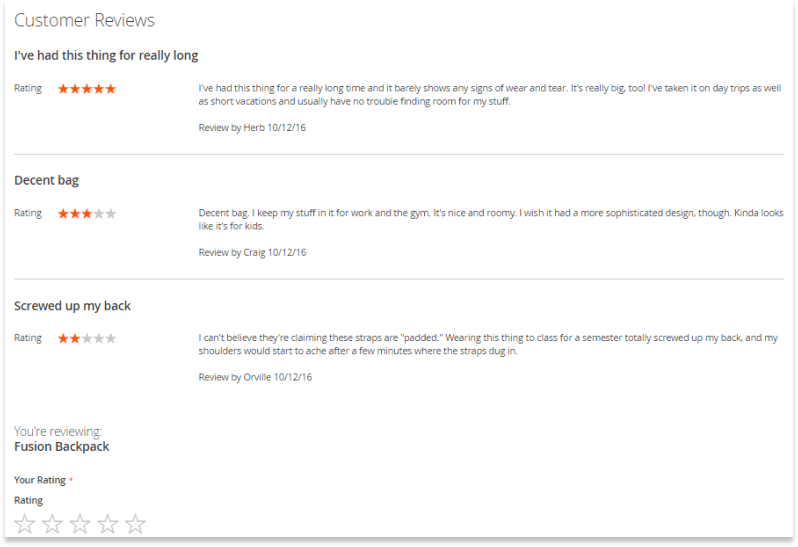
Product Reviews
Product reviews help the store to gain trust, as most people tend to trust such online reviews as much as their friends. Besides, these reviews will help you build a sense of community and rank higher in search engines thanks to unique content added on a regular basis.
In the store’s backend, navigate to Stores > Settings > Configuration > Catalog to start configuring product reviews. Choose ‘Catalog’ and go to the ‘Product Reviews’ section. Make sure to enable guest reviews right now - they can do you store a good turn. If they are bad, you can always disapprove them, right?

When reviewing a product, users rate it using rating parameters they are offered: price, quality, or value. You can add custom ratings if you wish.
To create one, go to Stores > Attributes > Ratings. In the ratings workspace, tap the ‘Add New Rating’ button.
On the new page, add a default title for a new rating. You may also enter titles for each Store View.
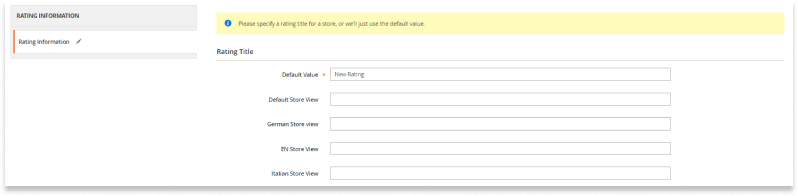
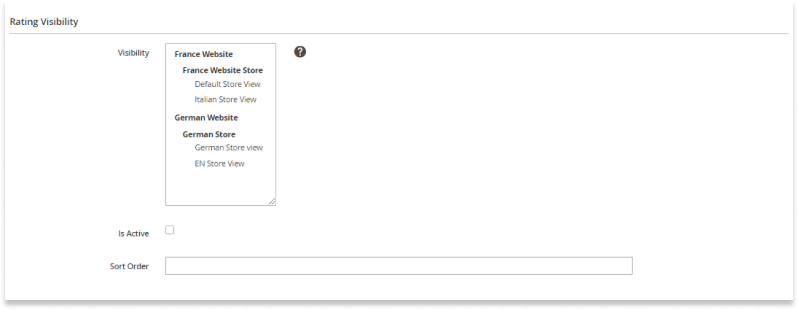
Manage visibility of the new rating by assigning it to different Store Views in the ‘Rating Visibility’ section. You may also configure its sort order and switch the rating on or off.
Click the ‘Save Rating’ button when complete.
If you wish to get even more reviews, customize them or add some extra functionality, we recommend using Product Reviews & Ratings extension by Aitoc.
Final Thoughts
Customer engagement plays a big role in the success of any business, and wise store owners pay much attention to strategies assisting them in making and keeping clients engaged. Luckily, Magento 2 gives online merchants a helping hand by arming them with useful customer engagement tools, we hope that, thanks to our article, you'll use them to your benefit.
