Enhance customer experience at checkout with Magento Checkout Fields Manager
When it comes to ecommerce, the importance of checkout is hard to deny. A positive checkout experience encourages shoppers to make a purchase. It’s also an opportunity for retailers to make a favorable impression on first-time buyers, thus turning them into loyal friends of the brand.
There are multiple ways to create a great checkout UX across the web, but putting existing tips to use requires much time and effort. Checkout Fields Manager, a Magento 2 extension by Aitoc, spares Magento merchants the need to go to the trouble to introduce multiple changes at the checkout page.
This module helps them enhance the customer service, receive instant feedback and even gather marketing data by adding custom fields to the checkout. In this tutorial, we’ll discuss how to configure and use Magento Checkout Fields Manager in detail.
Creating New Checkout Attribute
To add a new checkout field, you have to create a new checkout attribute. To add it, go to System > Extensions > Checkout Fields Manager or navigate to Stores > Attributes > Checkout to access the same page.
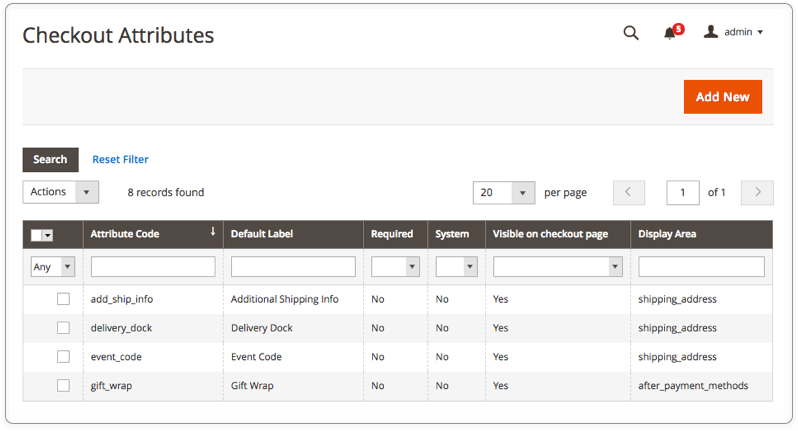
Hit the ‘Add New’ button to create a new checkout field. Add a custom title of the new attribute to the “Default Label” field. The title will be shown to the customer on the storefront. You can use different input types with the attribute:
- Text field
- Text area
- Date
- Yes/No
- Multiple select
- Dropdown list
- Checkbox
- Radio button
- Static text
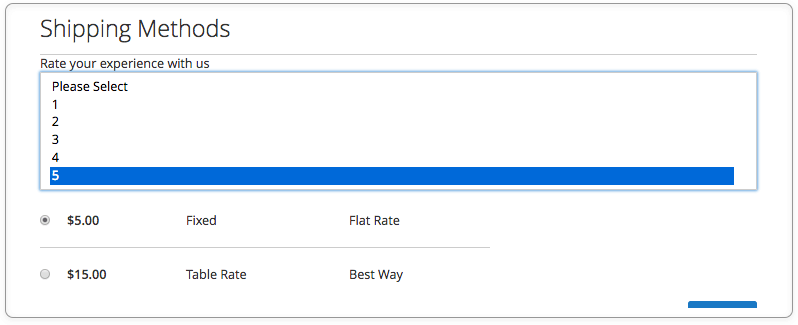
We created the ‘Rate your experience with us’ attribute to show you how to ask customers to rate the quality of services.
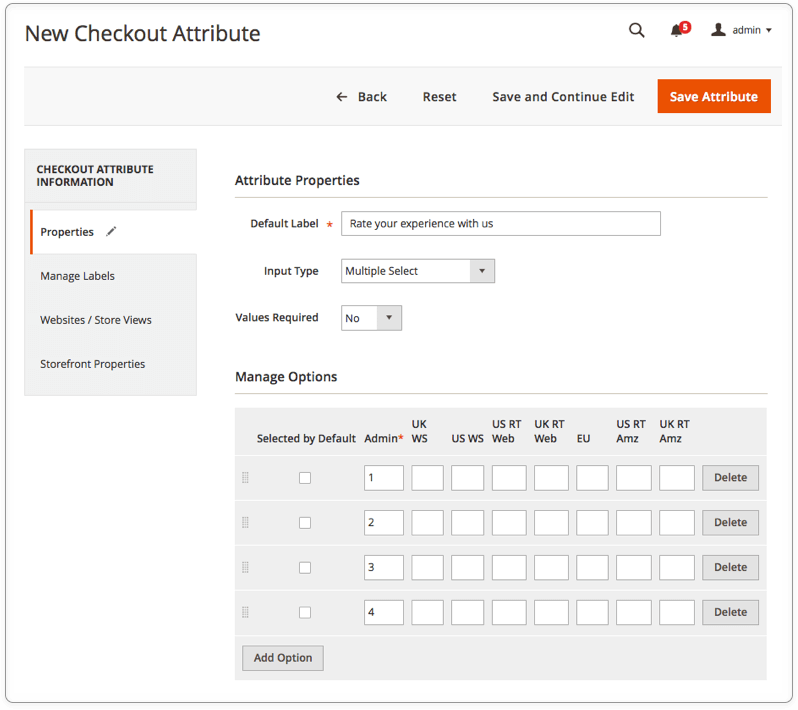
Set the ‘Values Required’ field to ‘Yes’ to make the new field required and leave it unchanged to make it optional.
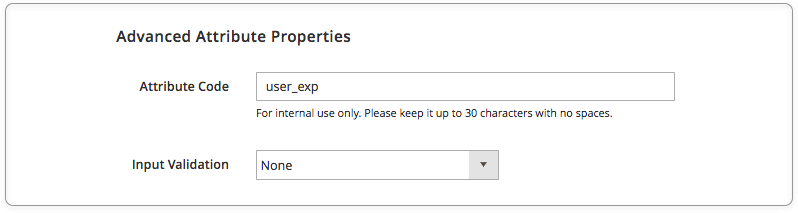
In the ‘Advanced Properties’ subsection, enter the attribute code (for internal reference only).
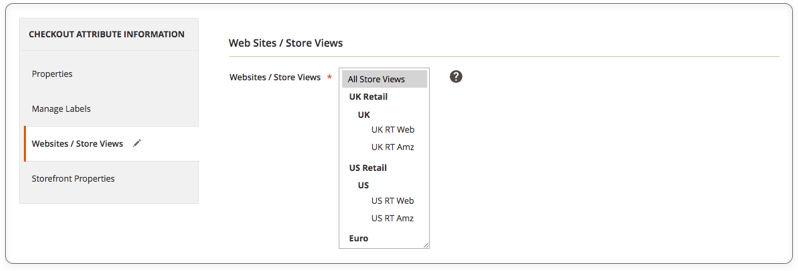
If there are different websites and Store Views in your Magento installation, you can show the new attribute only in specific Store Views/ Websites.
To configure the new field’s position on the checkout page, go to the ‘Storefront Properties’ section.
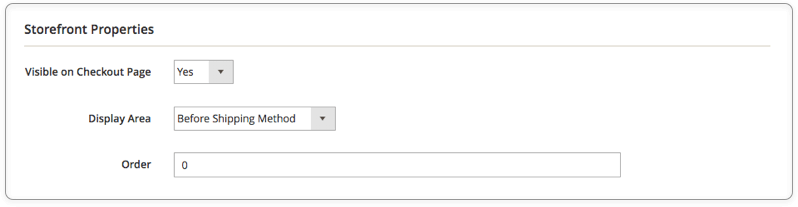
Select the display area first. The following options are available:
- Shipping address
- Before Shipping Method
- Before Payment Methods
- After Payment Methods
You can also determine the order of the attribute on the frontend in case you are going to add two or more new fields to the same location. Remember to set ‘Visible on Checkout Page’ to ‘Yes’ to display the new field on the front-end.
Here is how the rating request looks like on the checkout page:
To access the custom data provided by the buyer, go to the Order page in the admin panel.

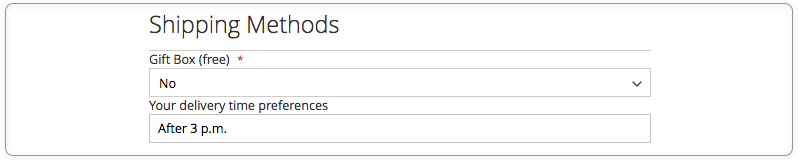
Checkout Field Ideas
We've prepared some inspiring examples of new checkout fields created by Aitoc’s Magento Checkout Fields Manager.
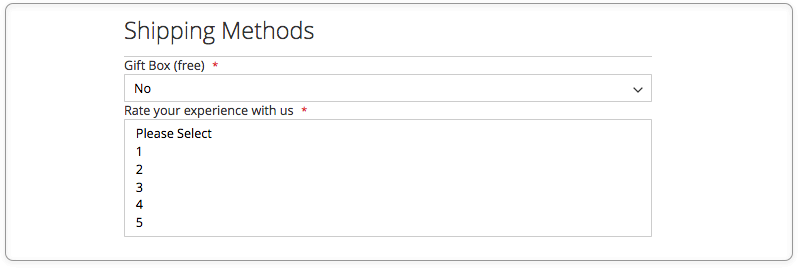
- Free Gift Box
- Delivery Preferences
- Brochure Request

- T-Shirt for Free

- Customer’s Message

Conclusion
With the checkout abandonment rates being high, it’s crucial to ensure a great user experience at checkout. Leverage Magento Checkout Fields Manager to make the checkout process simple and seamless by adding multiple custom fields to the checkout page. Manage the fields with no effort by setting their location on the page and arranging these fields in a specific order.
