Make Magento 2 custom options management as easy as one-two-three
There are many reasons why ecommerce businesses opt for Magento, and efficient product management is not the least of them. Paying close attention to details vital to businesses and aiming at helping web stores win as many customers as possible, Magento developers introduced customizable options.
Leveraging this feature, store admins can add multiple options to the same item, offering shoppers a wide selection of product variations to nudge them towards a purchase. However, this feature has one weak spot: it doesn’t allow admins users to easily apply the same options to multiple products. Though options can be imported from one product to another, this takes much time as admins have to manually search for the product with the necessary options.
With Magento 2 Custom Product Options extension by Aitoc, you can add the identical customizable options to numerous products in less than a minute! Install the module to create a template with Magento 2 custom options and apply this template to any items in your store. Save your time to concentrate on tasks that are more relevant to your business. In this article, we’re going to describe how this extension works in detail.
Enabling Custom Product Options in Magento 2
To install the module, follow these steps:
- Unzip the extension file and paste it into the root folder of your Magento installation.
- Connect to the server by SSH.
- Navigate to the Magento root folder and perform the following command to install the module:
php bin/magento setup:upgrade
- Then reset JavaScript cache by removing all folders in pub/static:
_requirejs; adminhtml; frontend.
Configuring the Extension
Now you can start configuring the extension according to the needs of your store.
To access General Settings of the module, go to Stores > Configuration > Aitoc Extensions.
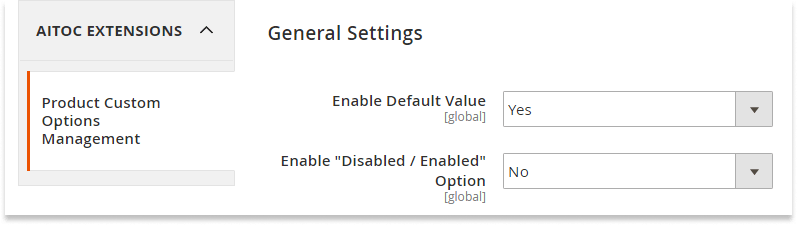
Set the ‘Enable Default Value’ field to ‘Yes’ to make use of default values in the options’ fields. You may also enable/disable option visibility management on the storefront by selecting an appropriate value in the next field.
Creating a New Template
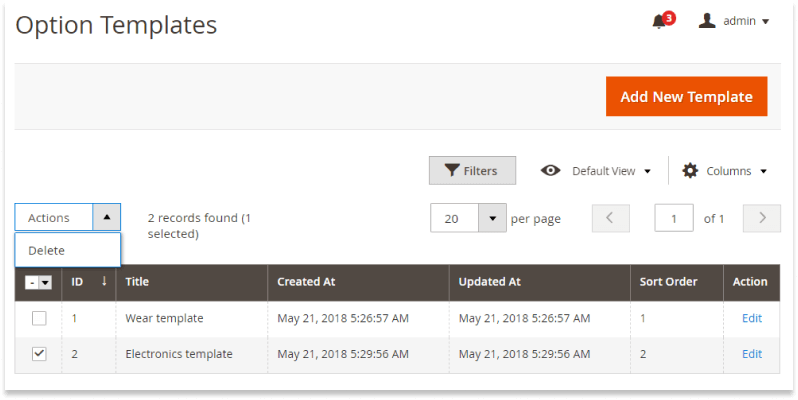
The first step is to navigate to Catalog > Custom Options. You may mass-delete templates in this workspace if you wish. Tap the ‘Add New Template’ button at the top right corner of the page to create a new template with Magento 2 custom options.
All the templates can be configured per Store View. It’s extremely useful, for instance, when it comes to adding option titles in different languages.
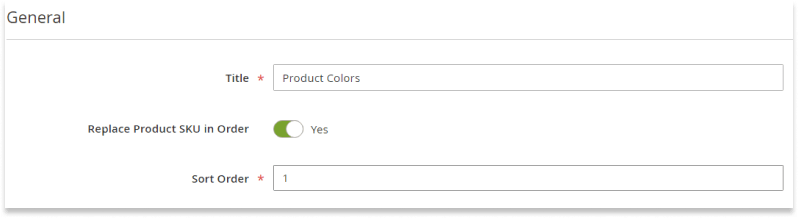
Add a title of the template for internal reference. To introduce custom SKUs for products with custom options by replacing the assigned SKUs with custom options’ SKUs, set the ‘ Replace Product SKU in Order’ field to ‘Yes’. You may also configure the templates’ order on the front-end by entering values in the ‘Sort Order’ field.
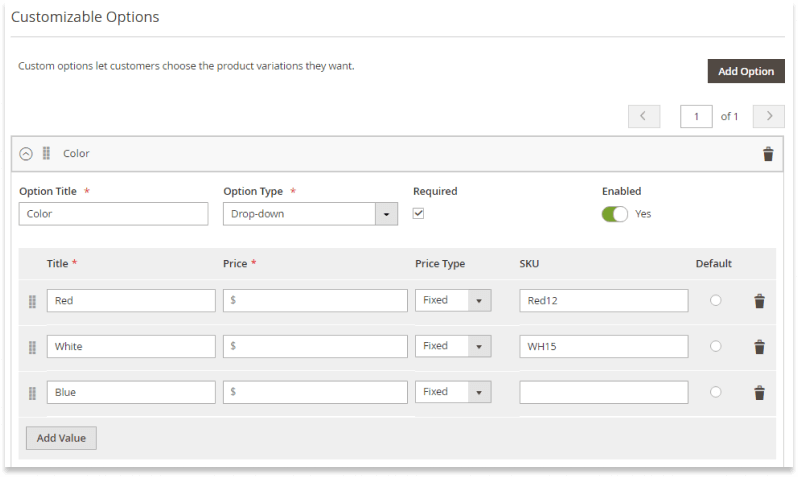
Go to the ‘Options’ section and add any number of options to the template. Check the radio button to make the value default for a certain option.
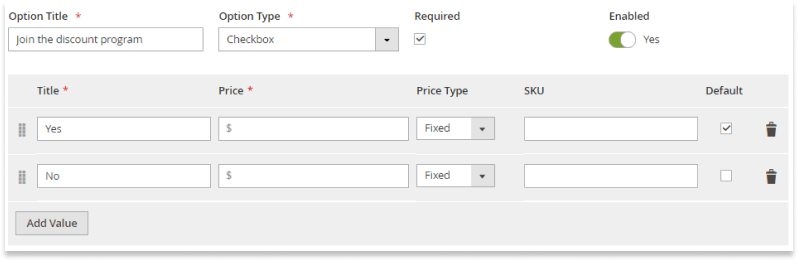
To disable the option on the storefront, set the option-specific ‘Enable’ button to ‘No’. Proceed to the ‘Products’ section to assign products to the template. Save the template after you’ve finished.
As soon as the template has been activated, shoppers will see them on pages of products assigned to the template.
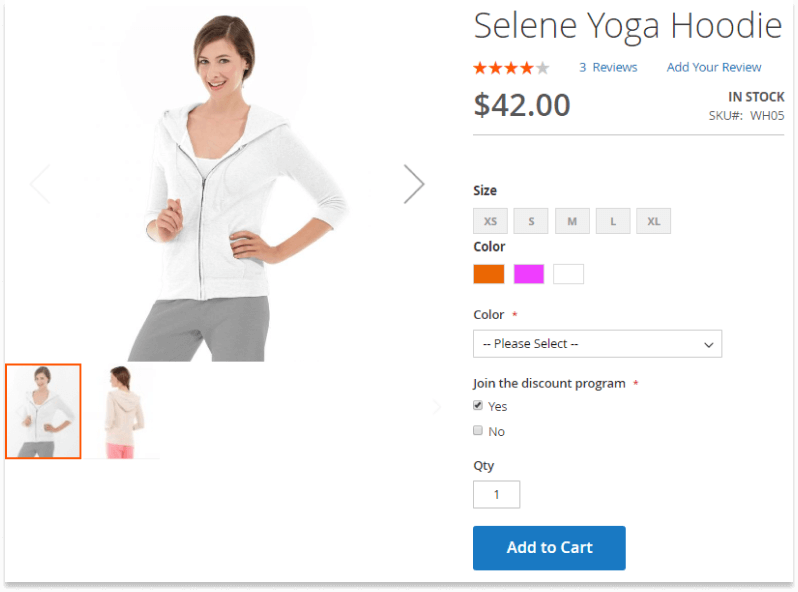
Please note that changes made in the template will be applied to all the products where it is used.
Using Multiple Templates with the Same Product
That’s not all! With Custom Product Options for Magento2, store admins can not only create different templates with multiple options but also use an unlimited number of templates with each product.
To assign templates to the product, open it in the edit mode and scroll down to the ‘Customizable Options’ section. Expand this section to see the list of available templates. You may assign them to the product or disable them for it using the default Magento functionality.
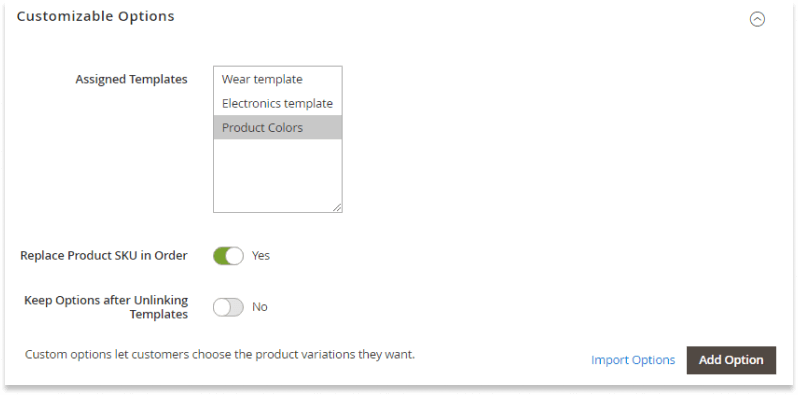
Here is one more great feature that makes this Magento module a great options management tool: you may keep on using customizable options from a template after it has been unassigned from a product. All you need to do is set the ‘Keep Options after Unlinking Templates’ field to ‘Yes’. In a nutshell, this way you turn a template into custom options and may edit these options if necessary, being sure that changes won’t be applied to the template they belonged to.
Summing Up
Magento 2 custom options are a great way to offer online shoppers different variations of the same product and encourage them to hit the ‘Buy Now’ button. Make customizable options management more efficient by putting to use the Product Custom Options Magento 2 extension by Aitoc. If you have any questions about this extension or Magento, feel free to drop us a line any time.
