Today we want to discuss an often overlooked field in Magento that could dramatically increase the accuracy and effectiveness of your marketing efforts – Cost of Goods Sold.
Once enabled for all products, you can find the Cost field for your products under the Prices section of Product Information. It is quietly nestled underneath the often-overshadowing Price field. But make no mistake, adding Cost of Goods Sold data is as important as setting Price when you want to ensure your business operates at peak profitability. Let's go through the value of adding Cost of Goods Sold data as well as the steps for getting started with adding this information in your store.
Why is Product Cost data so important?
It’s pretty obvious that in order to sell products in your store, you have to pay a wholesaler for those products, or pay for the raw materials needed to make your products. Your Cost of Goods Sold equals the amount of money it takes to buy products at wholesale, or to produce a product using those raw materials. And products aren't free.
What's less obvious is that incorporating this information into strategy decisions can help you understand important information about the best channels in which to sell certain products, or how to best allocate marketing spend to specific products. Unfortunately, the price at which your customer buys your product does not represent the profit of that product (wouldn't that be nice!). Without using Cost of Goods Sold data in your everyday processes, you're making decisions with incomplete information and could be leaving profitability on the table.
How does Cost of Goods Sold data help me maintain profitability?
First and foremost, it aligns your numbers with a more accurate representation of your Gross Margin. Gross Margin, also known as Gross Profit, is simply your Revenue less Cost of Goods Sold. The cash you have available after you pay your wholesaler or raw materials suppliers represents cash available for other operating expenses, such as marketing or development expenses. By understanding your Gross Margin, you can ensure that your store’s operating decisions are made using granular levels of cost information.
Secondly, using Cost Data is a smart way to better evaluate the marketing potential of each individual product. Are you generating more Gross Profit by selling a large amount of low-margin items, or be selling a small amount of high-margin items? If you answered that question by only looking at Revenue generated per product, you wouldn’t necessarily have complete information needed to answer that question.
Although it may seem intuitive that spending small amounts of money to market low-Gross Margin items is the right approach, there are instance in which high sales volume for certain products makes those products good candidates for a more aggressive marketing spend. Conversely, just because a high-end electronics product has a $300 Gross Margin doesn't mean you should turn around and spend $250 to market that product using paid search.
By incorporating Cost of Goods Sold information into your day-to-day decisions, you can make better marketing decisions and increase the return you are generating on advertising spend. Here is how to get started.
Get Started in Magento
It's easy to setup Cost of Goods Sold data in Magento. You simply need to enable the attribute for all products and know where to input the cost information.
How to Enable Cost Attributes in Magento and Set Cost Data
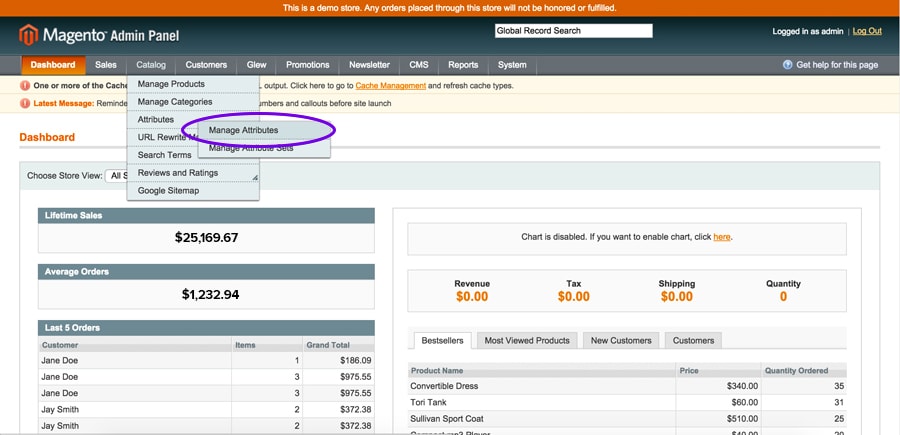
1: The first step is to enable the Cost Attribute field to show up for all product types. Log in to your Magento Admin Panel and go to the Catalog tab, Attributes and then click on Manage Attributes.
 Click for full image preview
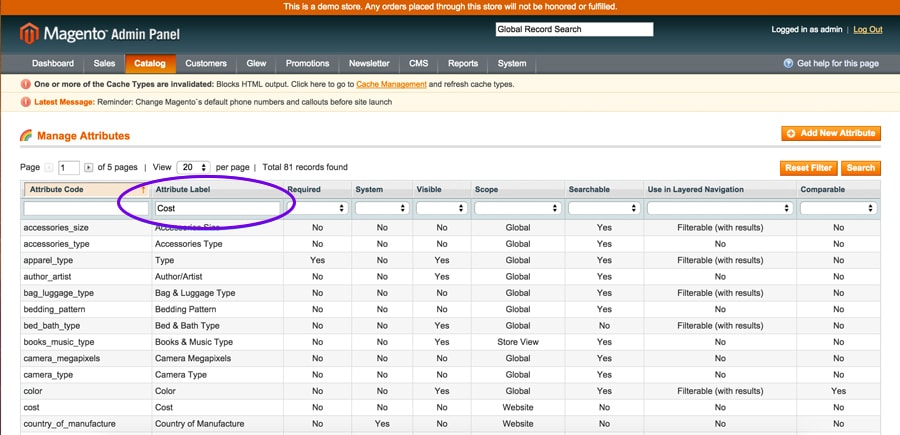
2: Search for 'Cost' under the Attribute Label search bar and click on the row to edit.
 Click for full image preview
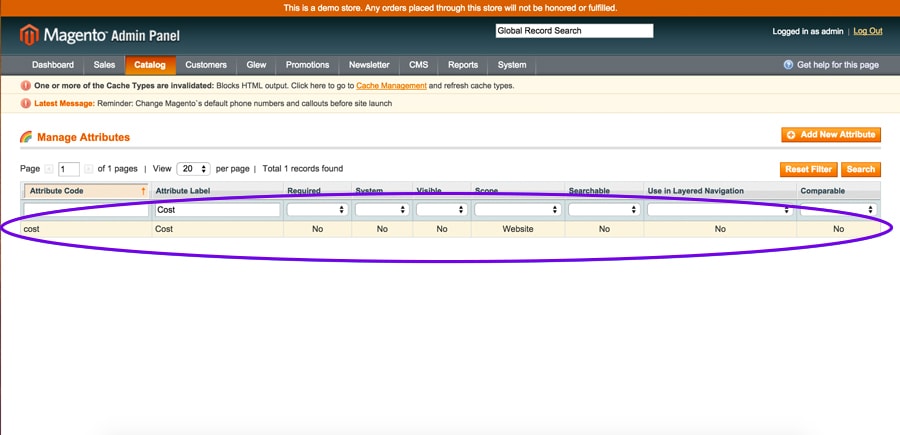 Click for full image preview
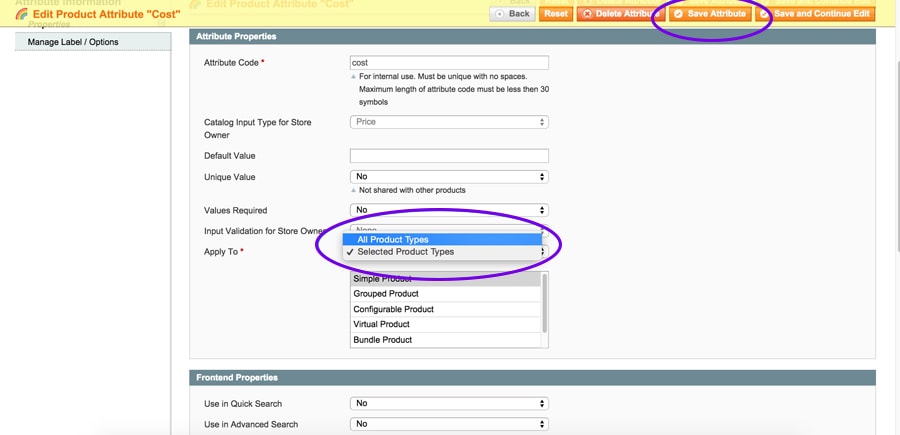
3: Scroll down and change the default setting of 'Apply To' to be enabled for 'All Product Types.' Save your work by clicking 'Save Attribute' in the top bar.
 Click for full image preview
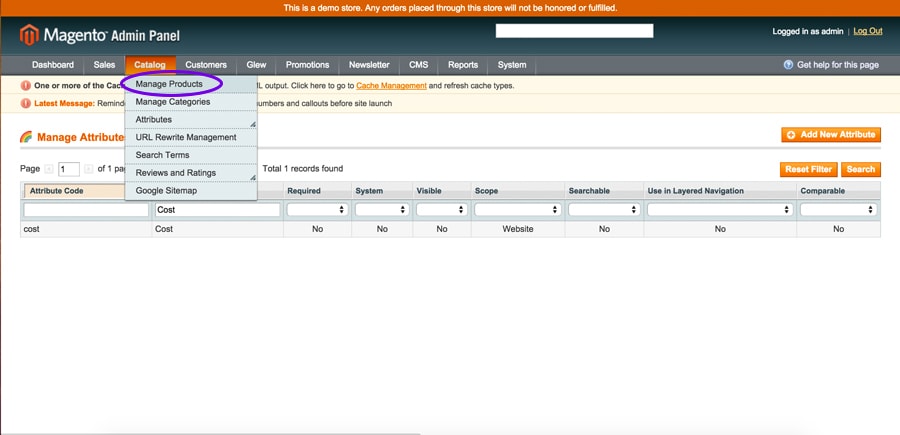
4: Now that this attribute is applied to all product types you can edit the Cost data for each product. To do this, go back to your admin panel and click on the Catalog tab, and go to Manage Products.
 Click for full image preview
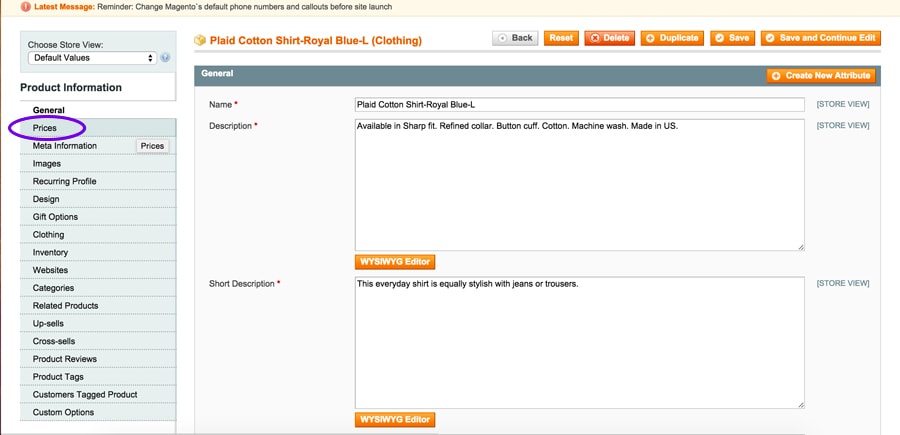
5: Once you've clicked on a product, the Cost field should be available under the Prices section. Type in the Cost associated and then save your work.
 Click for full image preview
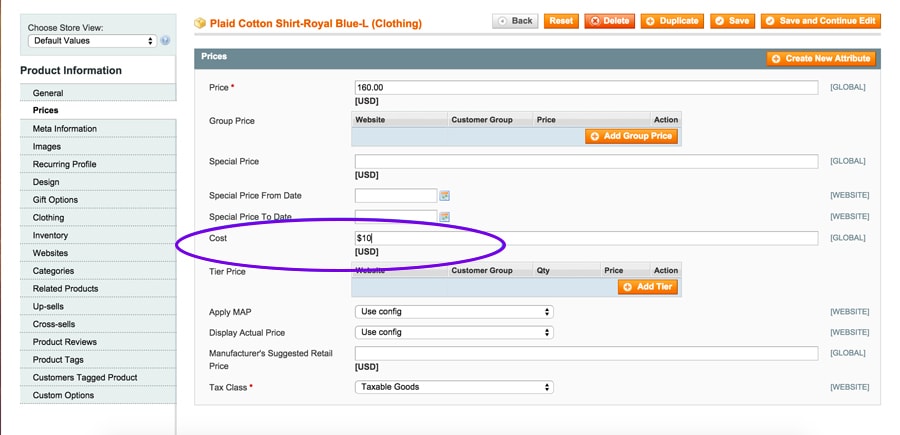 Click for full image preview
That's it!
