
Install a new Magento 2 theme to give your online store polished look and feel
The competition in the ecommerce space is growing, and e-retailers try to seize any chance to draw visitors' attention to their store. People tend to judge a book by its cover, and a beautiful site design can help a web store gain recognition. In this article, we’re going to discuss how to install a Magento 2 theme with almost no effort.
Applying a storefront theme
Let’s imagine that somebody has installed a new Magento 2 theme for you. Your job here is just to apply it to the storefront.
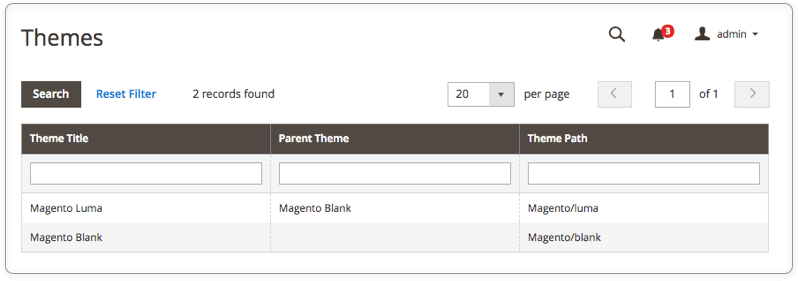
Go to Content > Design > Themes to see the list of all currently available themes. Click the theme to manage its settings.
To apply the theme, navigate to Content > Design > Configuration. Select the Store View and tap ‘Edit’.

Select the Theme you want to use and click the ‘Save Configuration’ button to activate it. That’s it!
Putting a new theme to use is a little bit more difficult task since you need to install it first.
Installing a theme manually
Download the archive that contains the new theme. Unzip it and use a file manager like FileZilla to upload the files to the public root directory of your Magento 2 installation.
Your next step is to log in to the server using SSH. When it's done, run two commands in the command line order. The first command upgrades the setup, and the second one deploys the static content.

The new theme is now installed! You can apply it to your store.
Using Composer to install a theme
The process is no way different to that of installing a Magento 2 extension with Composer.
Here are the major steps you need to make:
- Access the Magento Marketplace and buy the theme you want to install.
- Get the Composer name of the theme you’ve just purchased.
- Go to the Magento root directory and enter the following command:
composer require <vendor>/<name>:<version>
For instance, the command may look like this:
composer require aitoc/theme-new-theme:1.0.0
4. Wait until dependencies are updated.
5. Proceed with the entering of these commands:

6. Log in to the admin panel of your store.
7. Go to Content > Design > Themes to check whether the new theme is added. Activate the new theme whenever you want.
Installing a theme as an extension
This approach is applied when the theme is distributed as an extension. To install such a theme, you should use the Web Setup Wizard.
1. Log in to the Admin panel of the store and navigate to System > Tools > Web Setup Wizard.
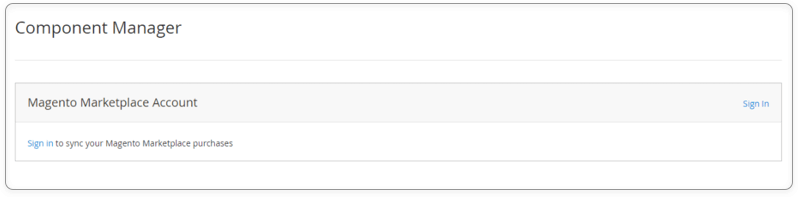
2. Click the ‘Component Manager' and tap the ‘Sign in’ at the top of the page.
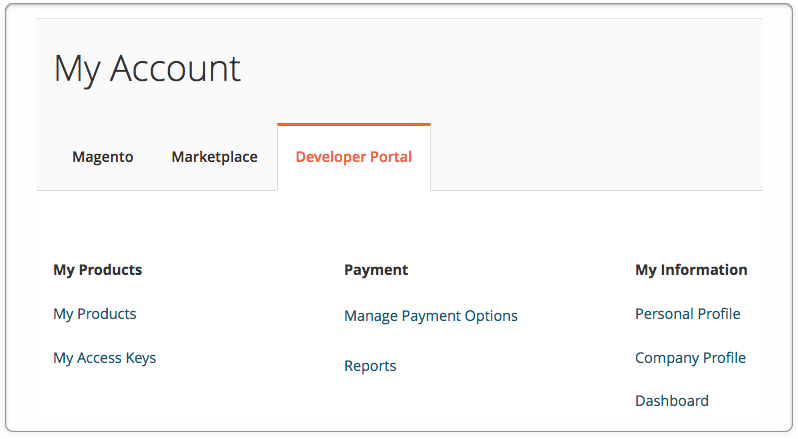
3. Copy Access Keys from your Marketplace account and enter them into the required fields of the popup window.
4. Sync the Manager and the Marketplace by clicking the ‘Sync’ button.
5. Access the Purchases section and tap ‘Install’ under ‘New Purchases’.
6. Select the theme you want to install in the Extensions Grid and click ‘Install’ in the ‘Action’ column to launch the installation process. It is exactly the same as for any other Magento 2 module.
7. Now you can apply the new theme in the store’s settings.
Remember to clear the cache after activating the theme to ensure that everything is working as intended.
Final Words
Installing a third-party storefront theme can do your Magento 2 store a good turn by making it stand out from the others. In this tutorial, we provided a detailed guide to the installation process.
Head over to the Magento marketplace or a website of Magento developers and find a new theme that will enchant your existing and potential customers. Install it easily using our tutorial and, attracted by the new design, online shoppers will soon start flocking to your store.
