SendGrid Extension
Description
SendGrid Extension for Magento 2 allows store owners to quickly automate the SendGrid integration with your Magento 2 store. Thus, you will get a faster way to send, configure and control SendGrid emails. Thanks to Aitoc SendGrid plugin, you will enable the reliable email delivery, easy management, and in-depth analytics of your email marketing activities.
With the help of this extension you can:
- Manage and synchronise contacts for your email campaigns
- Send the emails via SendGrid SMTP
- Track the efficiency of emails via SendGrid reports delivered to Magento 2 system
- Control your subscribers in the backend
- Configure marketing campaigns with friendly settings
Find out how to install the SendGrid Extension for Magento 2 via Composer.
Note
All Aitoc extensions can be customised to fit particular business needs. If you have questions about any customization, please drop a message at [email protected]
Compatibility
SendGrid module is compatible with the following Magento platforms:
| Community Edition (Open Source) | Enterprise Edition (Commerce) | Cloud Edition |
|---|---|---|
| 2.3.0 - 2.4.* | 2.3.0 - 2.4.* | 2.3.0 - 2.4.* |
Installation
Installing module using zip file
- Unzip and paste the extension file into your root Magento folder.
- Connect to your server by SSH.
- Go to your Magento root folder.
- To install the extension, perform this command:
php bin/magento setup:upgrade
php bin/magento setup:di:compile
php bin/magento setup:static-content:deploy
Composer installation
If you haven't installed any Aitoc module before, in that case first you will need to add your Aitoc composer repository. Please go through the document to see how you can add composer repository.
To install the module, you will need to run following commands:
composer require aitoc/send-grid
php bin/magento setup:upgrade
php bin/magento setup:di:compile
php bin/magento setup:static-content:deploy -f
- To switch the extension on/off, perform these commands:
php bin/magento module:enable Aitoc_SendGrid
php bin/magento module:disable Aitoc_SendGrid
- To update the module, use below command:
composer update aitoc/send-grid
SendGrid Integration
Configuration
General Settings
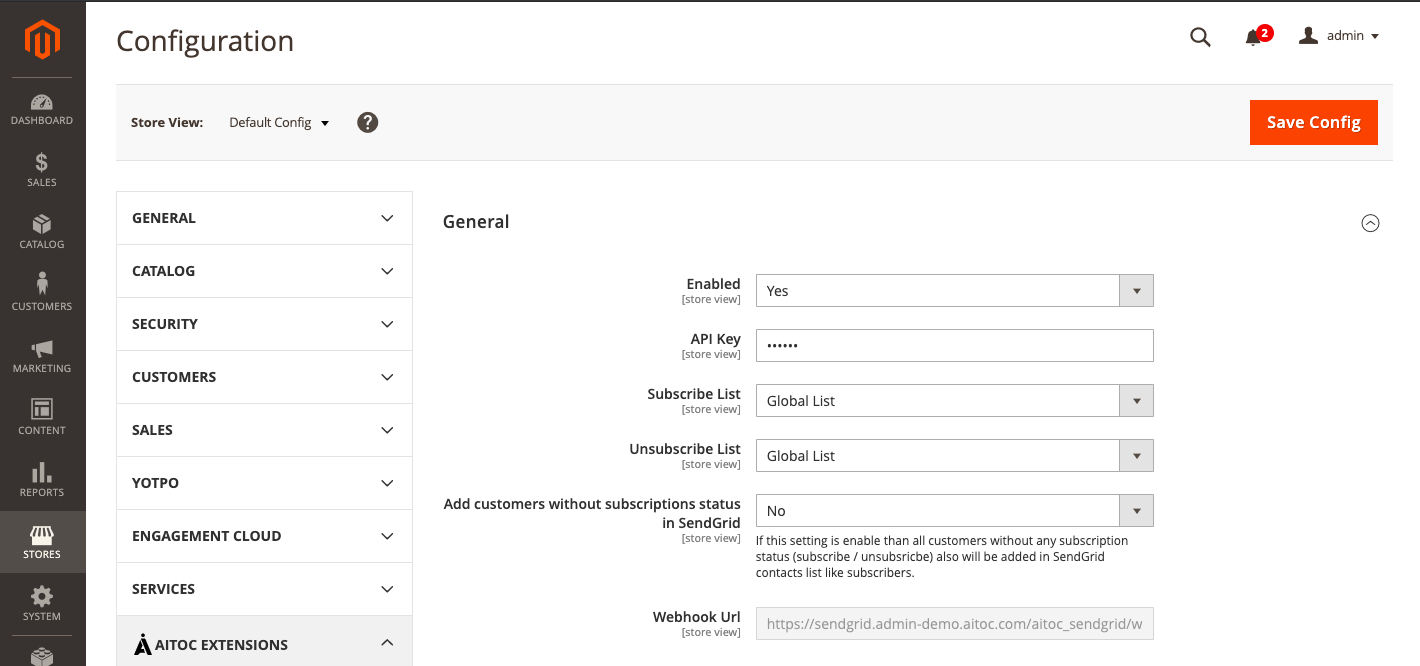
Before using the extension, be sure you’re at Admin Panel and please go to STORES → CONFIGURATION → AITOC EXTENSIONS → SENDGRID INTEGRATION
Choose 'Yes' to enable Aitoc SendGrid Extension on. �
Adding Your API Key
Before connecting SendGrid account to your Magento 2 store, you’ll need to create a SendGrid API Key and add it to your Magento 2 account. �
To add an API key to Magento, please follow these steps:�
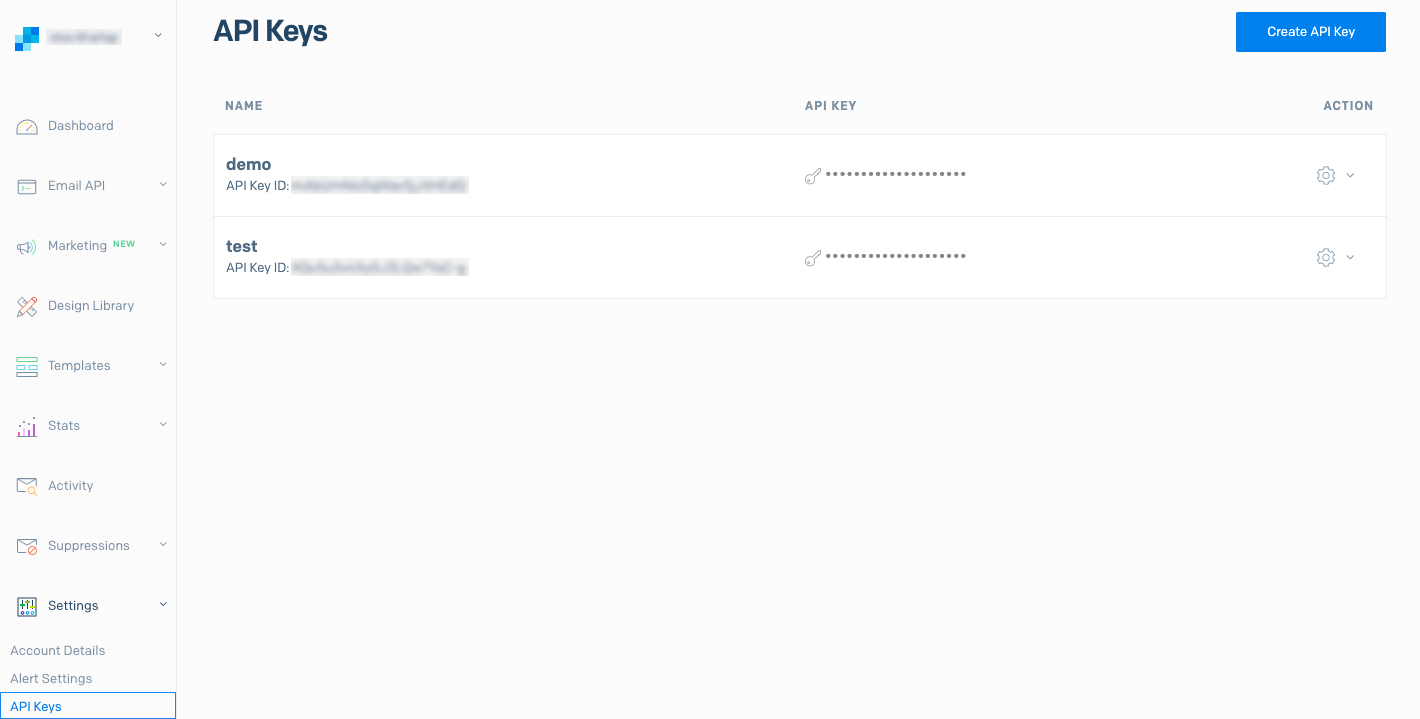
- Go to your SendGrid account and then go to SETTINGS → API KEYS → click CREATE API KEY BUTTON

Here you can add the API Key Name and set the level of access you give to each API Key.
-
Choose from common presets or customise access for your particular needs. There are 3 different types of API keys:�
-
Full Access
- Restricted Access
- Billing Access
| Field | Specification |
|---|---|
| Full Access | Allows the API key to access GET, PATCH, PUT, DELETE and POST endpoints for all parts of your account, excluding billing and Email Address Validation. |
| Restricted Access | Customises levels of access for all parts of your account, excluding billing and Email Address Validation. |
| Billing Access | Allows the API key to access billing endpoints for the account. |
Note
- We recommend you to choose Full Access to be sure that the module will work correctly.
- If you choose Restricted Access, we can’t guarantee the correct work of the extension.
- Click the Create & View button to create a new API Key.
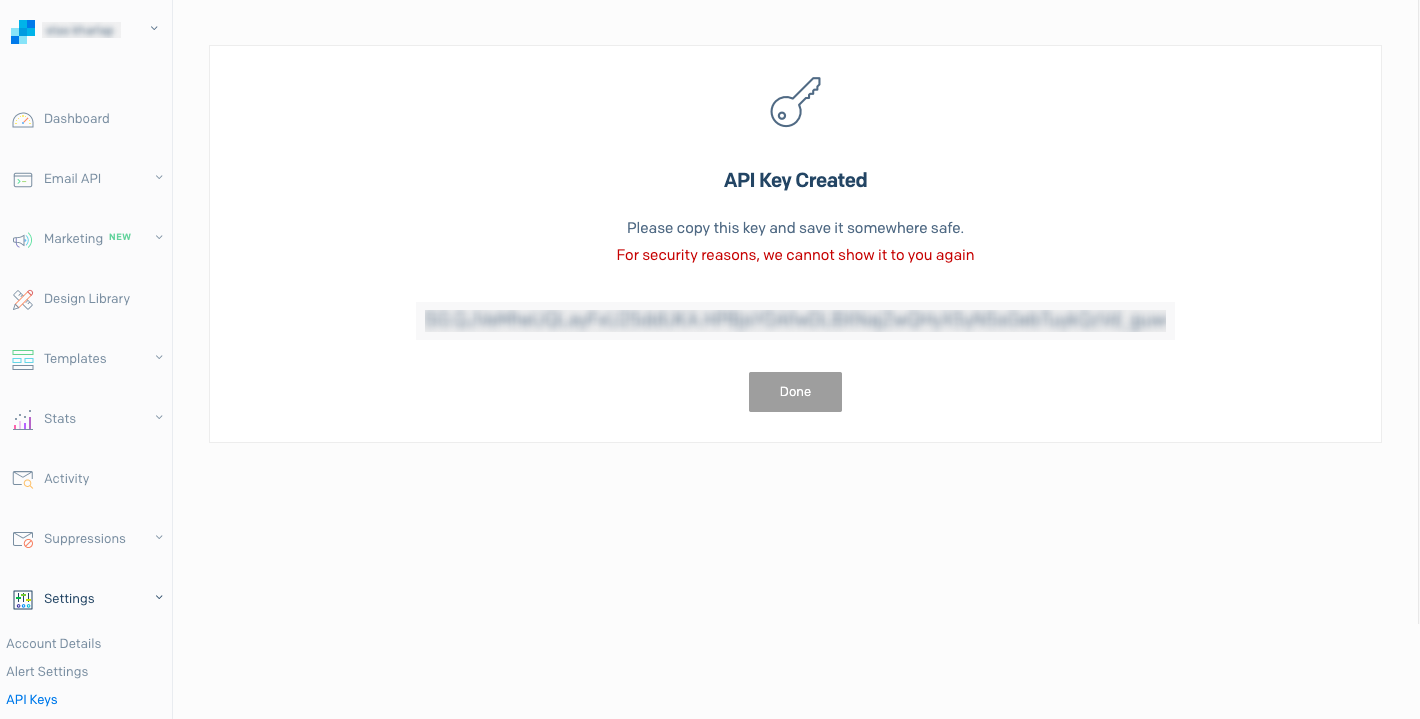
Here you can see your new API Key.
- Please copy this key and then go to your Magento 2 Admin Panel.

- Paste your new API Key to API key field.
Now your store will use this API Key to authenticate access to SendGrid service. �
Note
The protection of your personal data is guaranteed by Magento.
Also on General settings you can find:
| Field | Specification |
|---|---|
| Subscribe List | Choose a required list of your subscribers. |
| Unsubscribe List | Choose a required list of your unsubscribers. |
| Add customers without subscriptions status in SendGrid | If this setting is enabled, all customers without any subscription status (subscribe / unsubscribe) will be added in the SendGrid contacts list like subscribers. When you choose ‘Yes’ for this field, the new List for New Customer fields will appear. Here you can select a required list for the customers without subscriptions status. |
Adding the Webhook URL
To add your Webhook Url, please follow these steps:

-
Go to your SendGrid account and then go to SETTINGS → MAIL SETTINGS → EVENT NOTIFICATIONS �
-
To activate the configuration, select ‘ON’ on the switch selector.
-
Please copy the HTTP POST URL and then go to your Magento 2 Admin Panel.
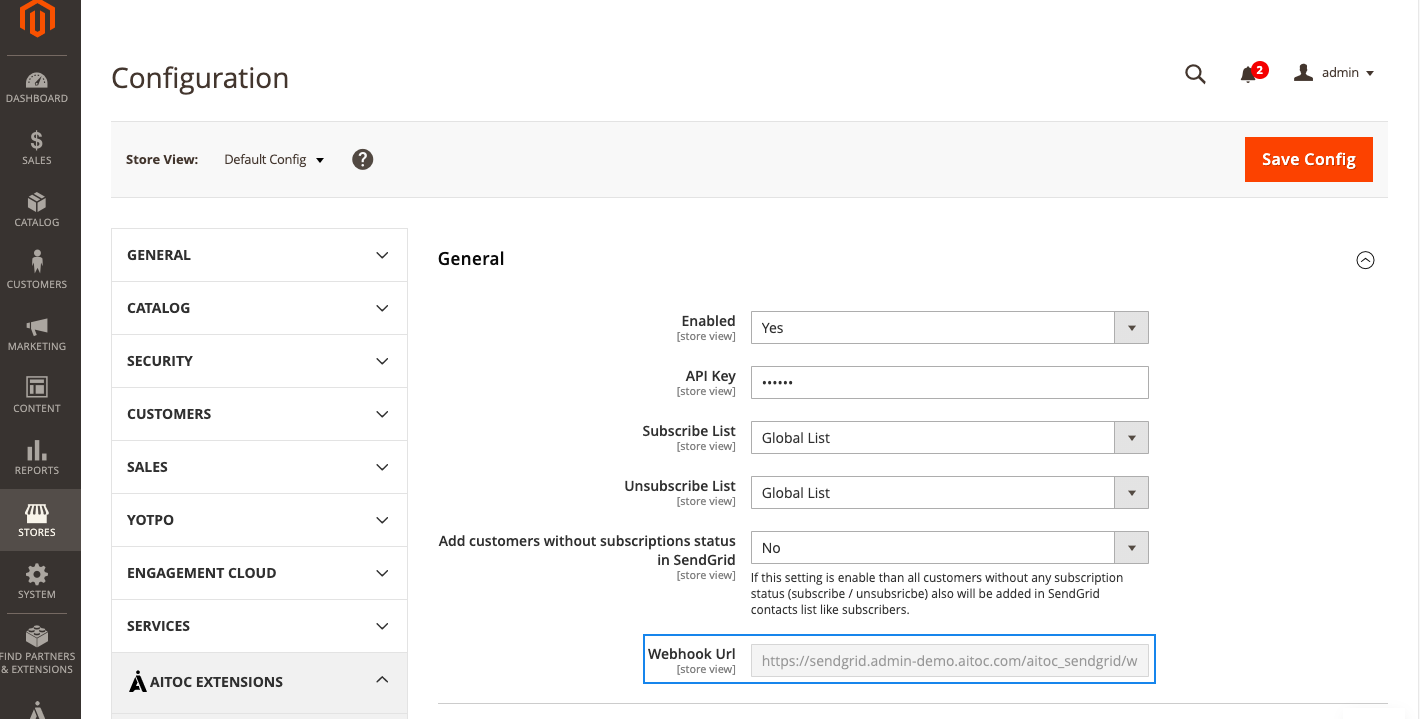
- Paste your HTTP POST URL to Webhook Url field.
Now your website is connected to your SendGrid account. Also, SendGrid Event Notifications for Unsubscribe List and Magento Event Notifications for Unsubscribe List are synchronised. �
Sync all contacts
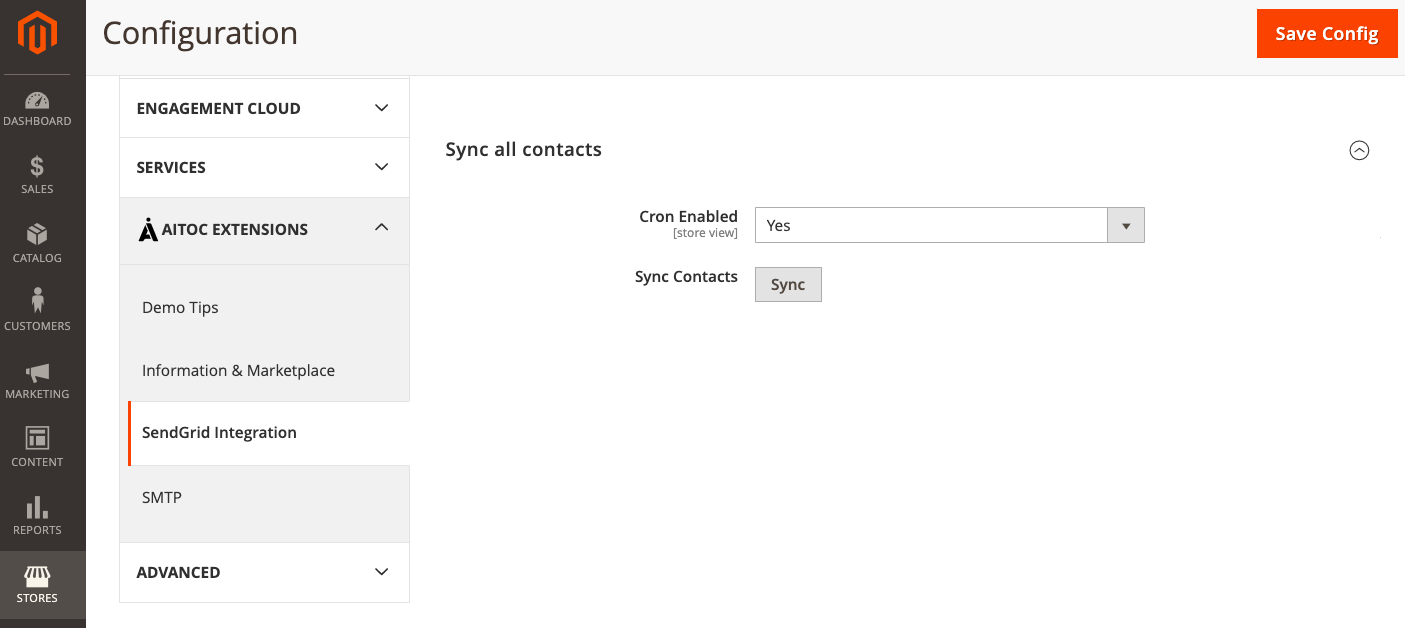
To automatically synchronise all contacts from your SendGrid account with the contacts from your Magento 2 store, choose ‘Yes’ to Cron Enabled field.�
Then click to the Sync button. �
After this, your contacts will be synchronised. �
Note
When you try the extension for the first time, the contacts synchronisation is highly recommended.
Click the Save Config button to complete the configuration.
Single Sends
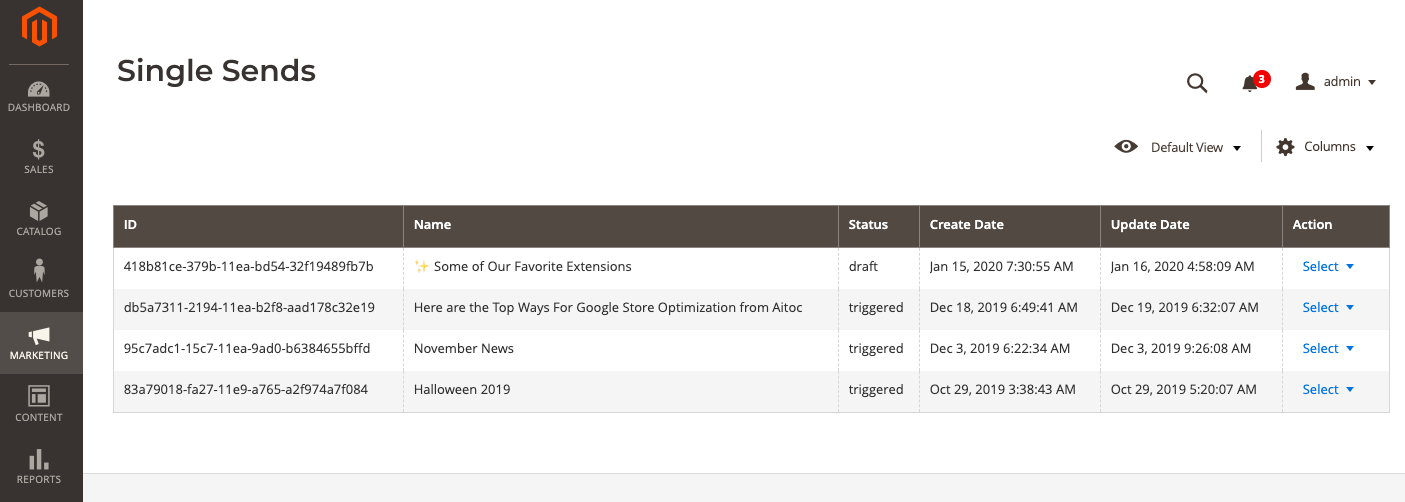
Go to MARKETING → SENDGRID → SINGLE SENDS
Here you can see all your SendGrid email campaigns. On this handy grid you can find:
- ID (of the email campaign)
- Name
- Status
- Create Date
- Update Date
- Action
| Field | Specification |
|---|---|
| ID (of the email campaign) | Here you can see the ID for each SendGrid email campaign. |
| Name | In this column you can find the title for each SendGrid email campaign. |
| Status | This column shows the status of the SendGrid single sends (draft, triggered, etc) |
| Create Date | Here you can see the single send date of creation. |
| Update Date | Here you can find the updating of your single sends. |
| Action | In this column you can preview/edit/duplicate a single send. |
SendGrid Statistics
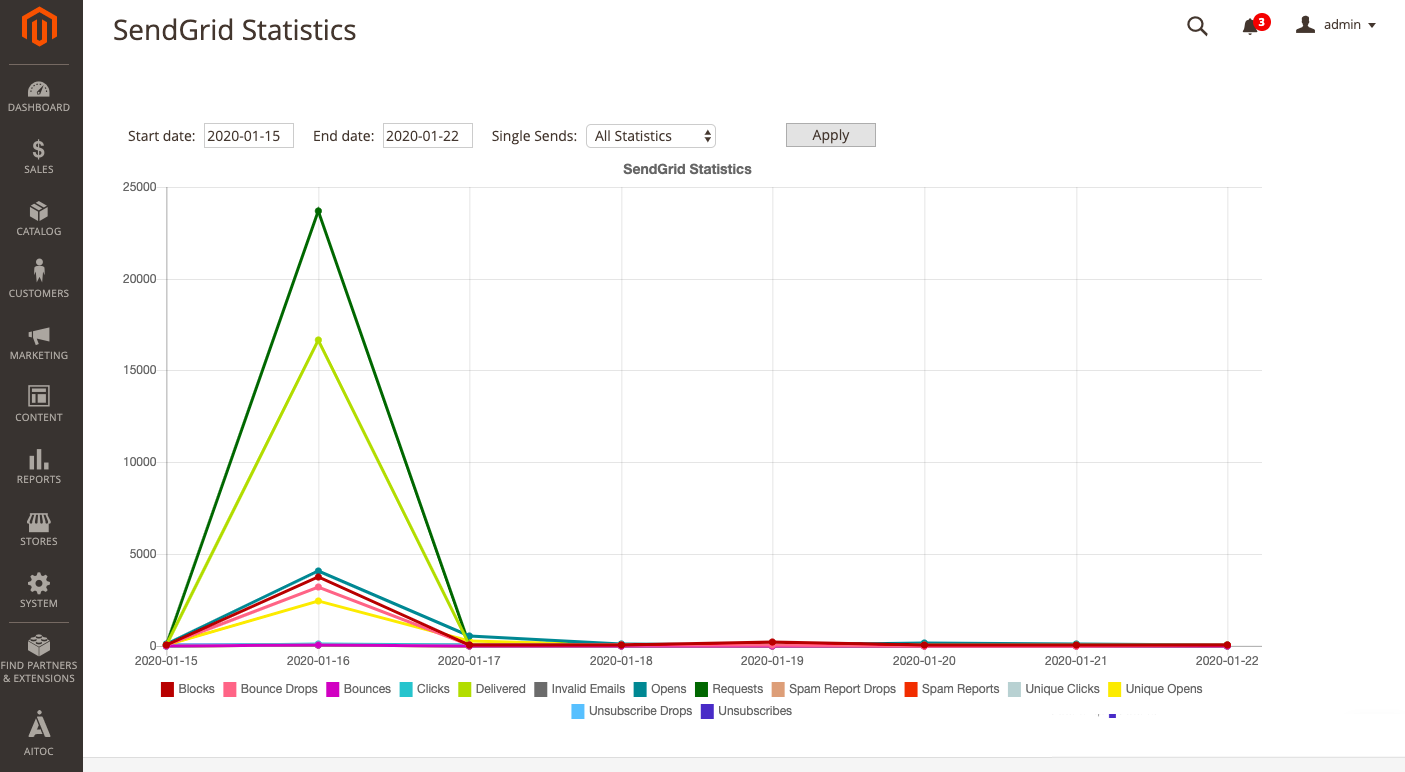
Go to REPORTS → SENDGRID → STATISTICS�
The module allows you to see detailed reports for each email campaign and track statistics of delivered, opened, and bounced emails.
You can set Start Date and End Date for SendGrid Single Sends statistics.
SMTP
Configuration
General Settings

Please go to STORES → CONFIGURATION → AITOC EXTENSIONS → SMTP�
The module allows you to use SendGrid as SMTP server to send your email campaigns from Magento via SendGrid.�
Choose 'Yes' to enable SMTP Email Configuration for Aitoc SendGrid Extension on. When the option is disabled, the module will not impact on email sendings.�
SMTP Settings
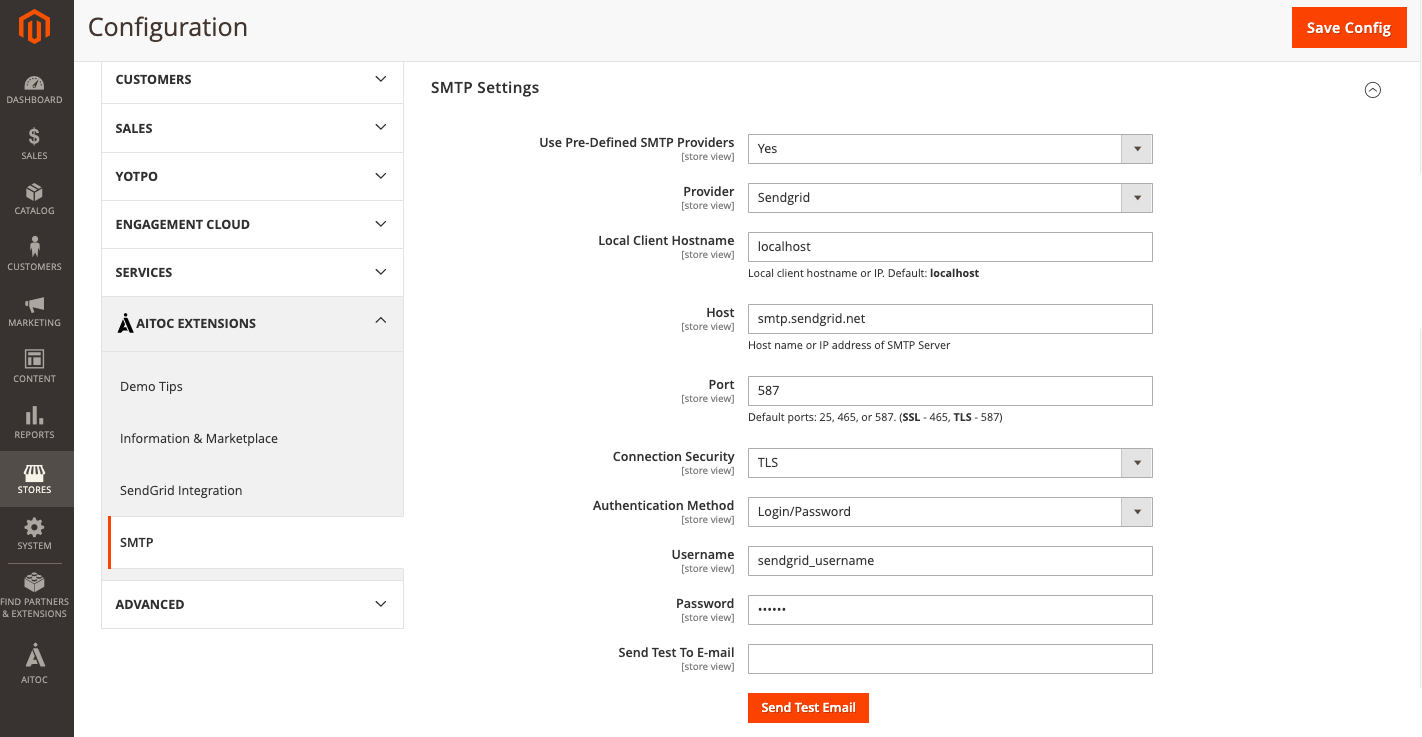
Here you can adjust the SMTP setting which are highly recommended for correct work of the extension.�
To configure the SMTP settings, please follow these steps:
- Choose ‘Yes’ for the Use Pre-Defined SMTP Providers field.�
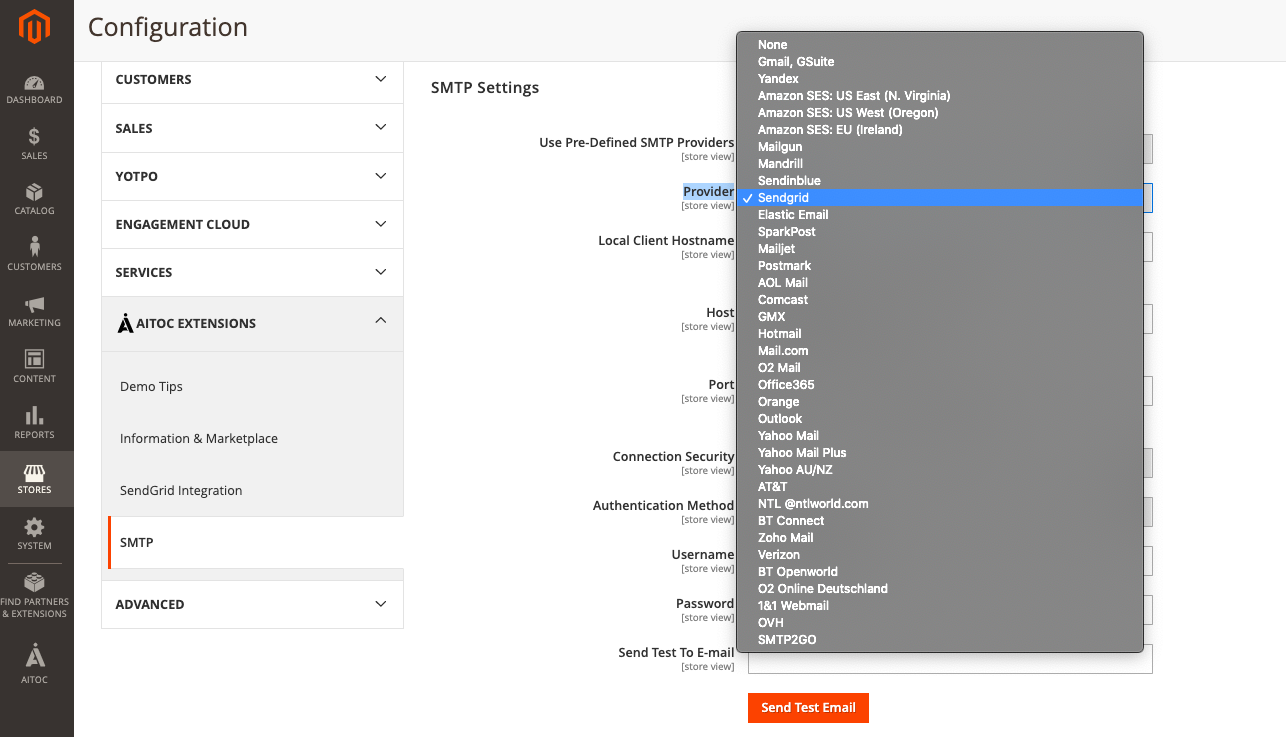
-
For the new Provider field, please choose ‘SendGrid’. After this other required fields will autofill.�
-
Then, please fill your Username and Password in the relevant fields.
Now your store will use SendGrid as SMTP server to send your email campaigns from Magento via SendGrid.
Note
For more detailed settings, please go to the SMTP Email Configuration for Magento 2 guide.
Emails Log
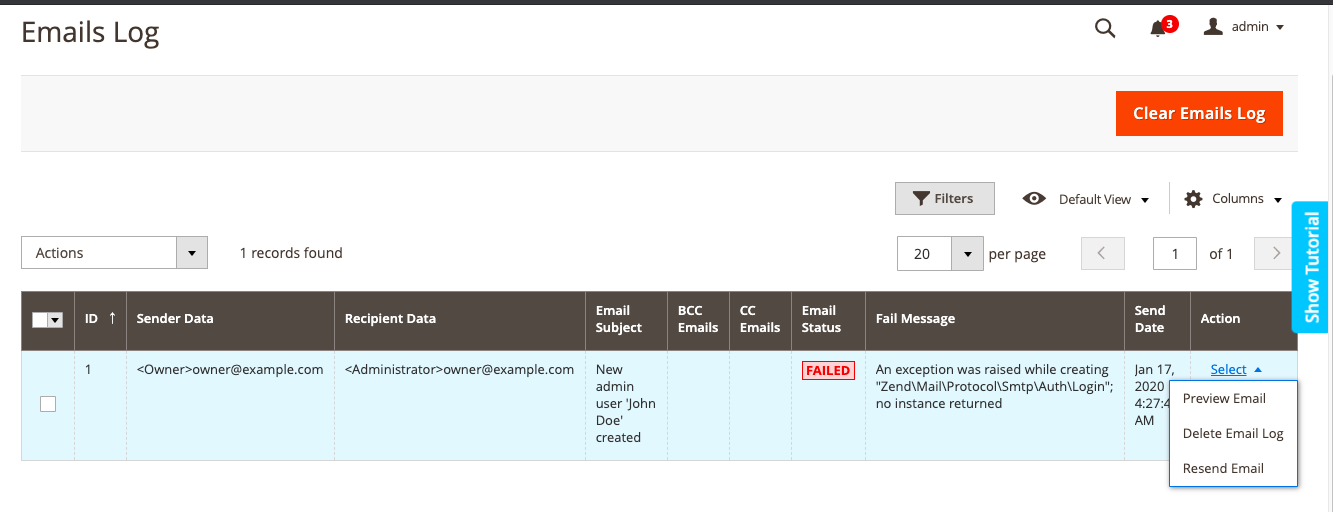
Go to REPORTS → SMTP → EMAILS LOG
From here you can look back all the sent emails from the server to customers.
By clicking ‘Select’ in each mail, you can have a general looking at the display which how your email will reach customers’ eyes. Hit the ‘Clear Emails Log’ button to clear all the archived emails after checking carefully.
THANK YOU FOR CHOOSING AITOC EXTENSIONS