Increase customer engagement by adding Magento social sharing to your store
The immense power of social media networks is undeniable. Smart e-retailers build strong social media presence to gain a competitive advantage and topple their rivals.
Online merchants also leverage social media plugins to make it easy for shoppers to share their products on social media and ‘like’ them, thus increasing engagement and boosting traffic.
Magento store owners can also benefit from social media plugins. Some stores install specialized extensions to enable them, but Magento admin users can add all these plugins manually in the admin panel. In this tutorial, we’ll show you how to implement social plugins in the Magento 2 installation.
Adding Facebook Plugins
Generating the Code
You need to generate a Facebook button code first. Go to this page and proceed to the ‘Like Button Configurator’ section. In the ‘URL to Like’ field, enter the URL of your store’s page where you want to use the Facebook’s button.
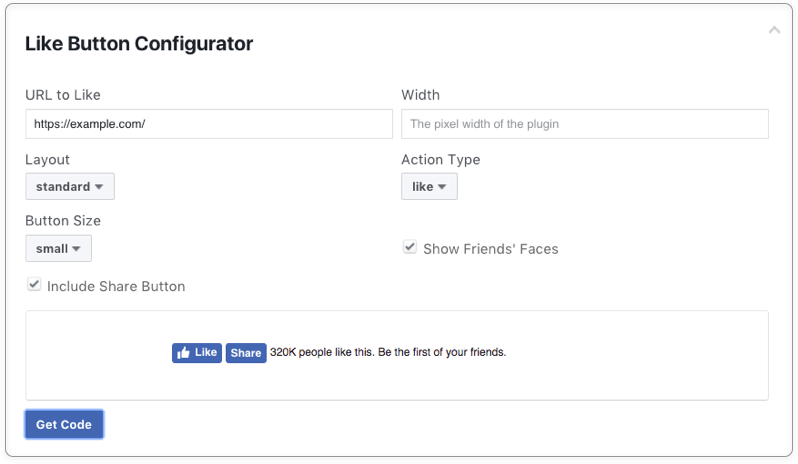
Select the appropriate width, layout, button size, and action type. Check the ‘Include Share Button’ option if you want to enable the Share button on the site. Then tab the ‘Get Code’ button to generate the code.
Copy code snippets or keep the page open to copy the generated code a little bit later on.
Creating New Block
Log in to the Magento Admin Panel and navigate to Content > Elements > Blocks.
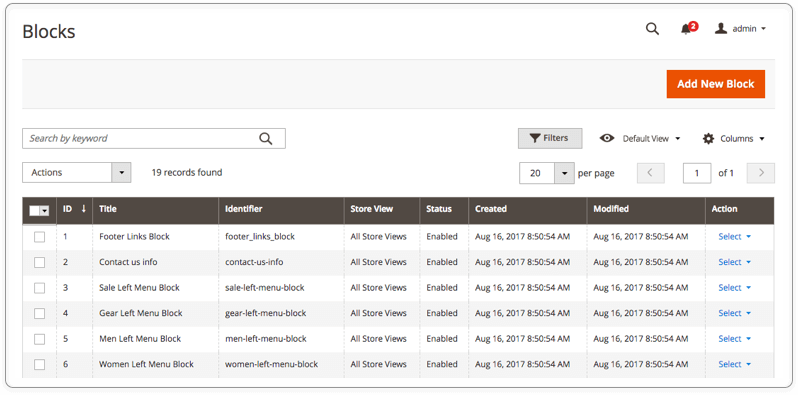
On the Blocks page, click the ‘Add New Block’ button. Enter a title of the new block (e.g., FB block). Then assign an identifier to the block. Make sure to use all lowercase characters and underscores. Select Store Views where you want to enable the block. To make it available everywhere, choose ‘All Store Views’.
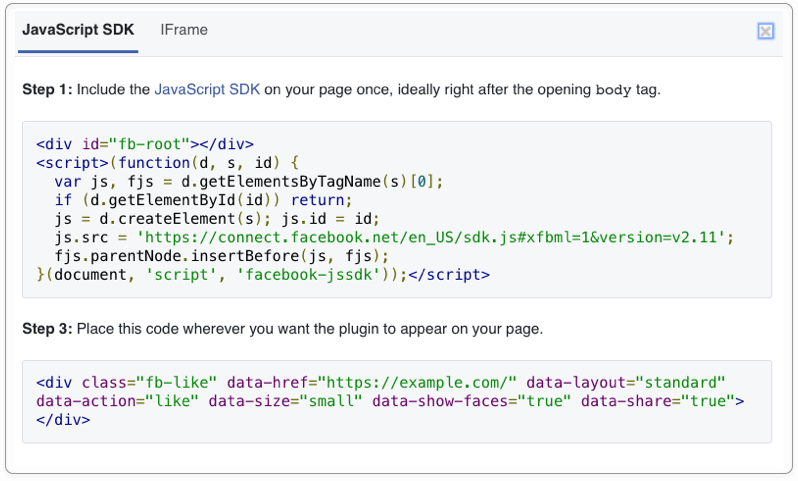
Paste the code generated by Facebook in the content field and set the ‘Enable Block’ field to ‘Yes’. Now you can save the block.
Adding New Widget
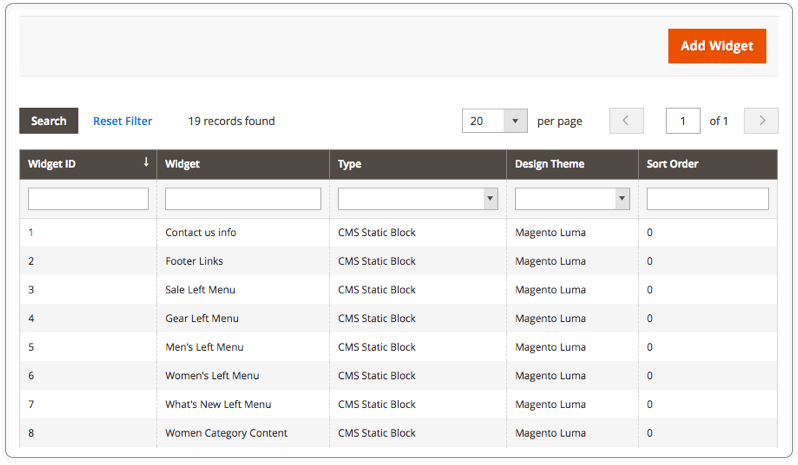
To place the Facebook block on the website, you should add a new widget. Go to Content > Elements > Widgets.
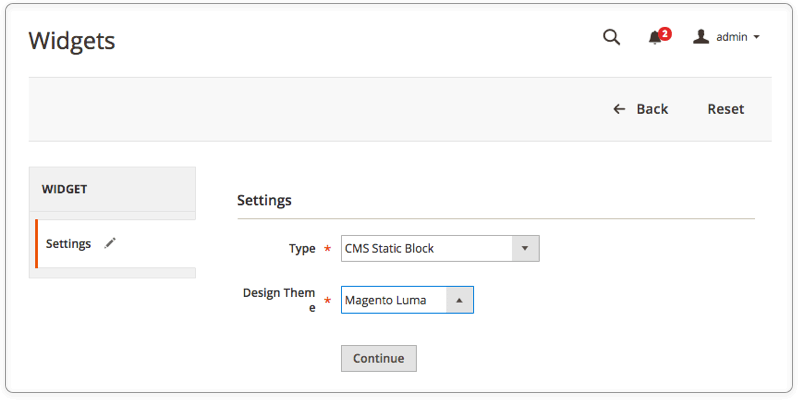
In the ‘Settings’ section, set the ‘Type’ field to ‘CMS Static Block’ and select the current theme in the ‘Design Theme’ field. Tap ‘Continue’ to save the changes.
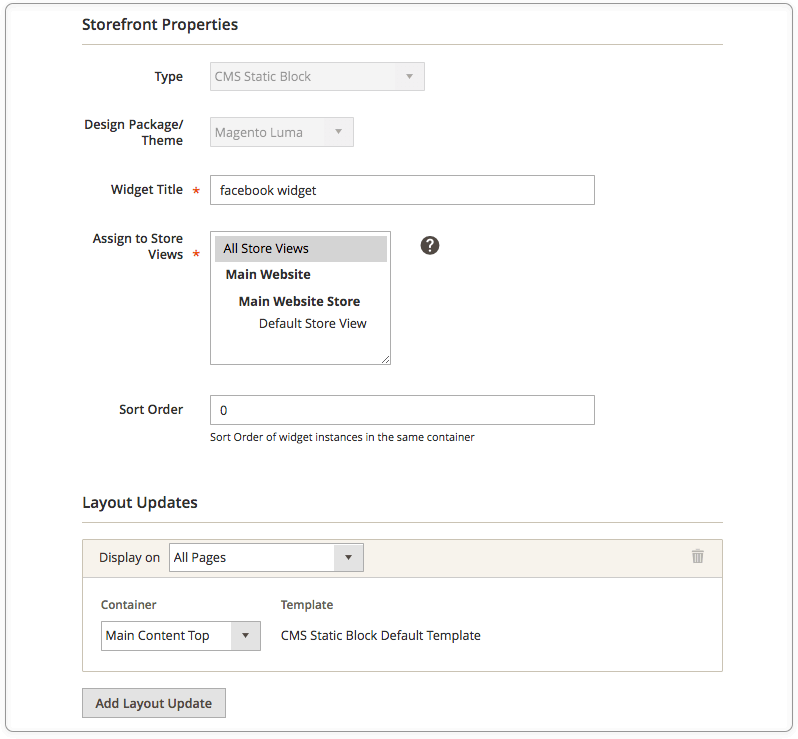
In the ‘Storefront Properties’ section, enter a title of the new widget. Assign the widget to required store views or enable it everywhere.
Enter a number in the ‘Sort Order’ field to determine the order of the block on the front-end in case it has the same location as other elements.
In the ‘Layout Updates’ subsection, you can specify store pages where you want to enable the Facebook button. You can add the buttons to all pages, one page, product pages, etc.
Here is how settings look when all pages are selected.
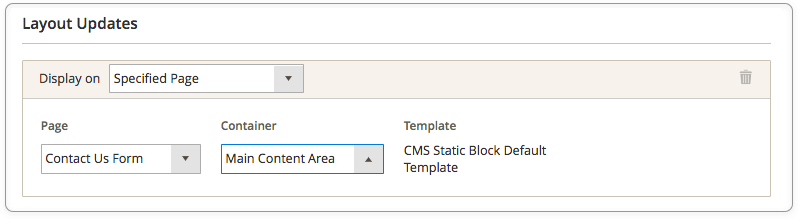
If you want to add the Facebook plugin to only one page, set the ‘Display On’ field to ‘Specified Page’. Choose the destination page in the ‘Page Field’ and select the widget’s position on the page in the ‘Container’ field.
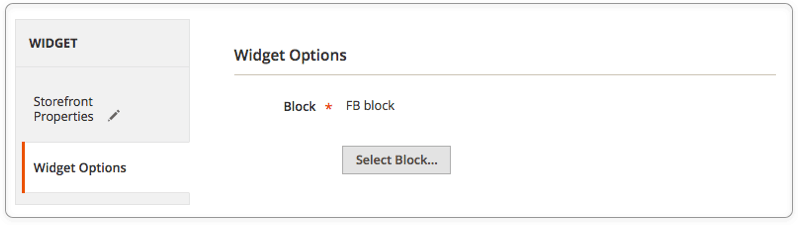
Navigate to the ‘Widget Options’ section and select the block you’ve just created.
Click the ‘Save’ button to activate the widget. Double-check that the Facebook plugin is properly placed on the storefront and make necessary changes if needed.

Enabling Other Social Media Buttons
Other social media plugins can be added in the same way as you did it for the Facebook plugin. Head over to the following pages to generate codes for new blocks:
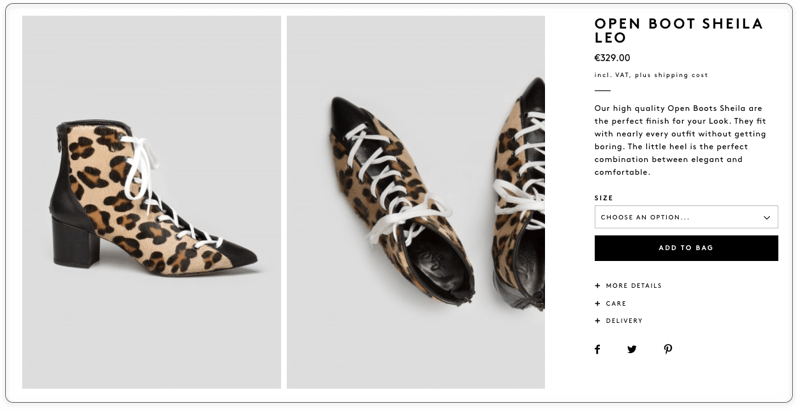
lala Berlin is a bright example of Magento store with social media buttons.
Final Words
Social media buttons can turn into an effective marketing tool for an online store. Magento merchants can avail themselves of opportunities provided by social media plugins too. Use our tutorial to enable Magento social sharing at your website and increase brand awareness through the word-of-mouth marketing.
