
On this page
Custom Order Status Change
Description
Custom Order Status Change allows store owners to send notifications to defined email addresses when the order status is changed. With the module's help, you can notify specific persons about the change of order status without giving them access to your store.
Compatibility
Custom Order Status Change module is compatible with the following Magento platforms:
| Community Edition (Open Source) | Enterprise Edition (Commerce) | Cloud Edition |
|---|---|---|
| 2.3.0 - 2.4.* | 2.3.0 - 2.4.* | 2.3.0 - 2.4.* |
Installation
Installing module using zip file
- Unzip and paste the extension file into your root Magento folder.
- Connect to your server by SSH.
- Go to your Magento root folder.
- To install the extension, perform this command:
php bin/magento setup:upgrade
php bin/magento setup:di:compile
php bin/magento setup:static-content:deploy
Composer installation
If you haven't installed any Aitoc module before, in that case, first, you will need to add your Aitoc composer repository. Please review the document to see how you can add the composer repository.
To install the module, you will need to run the following commands:
composer require aitoc/custom-order-status-change
php bin/magento setup:upgrade
php bin/magento setup:di:compile
php bin/magento setup:static-content:deploy -f- To switch the extension on/off, perform these commands:
php bin/magento module:enable Aitoc_CustomOrderStatusChange
php bin/magento module:disable Aitoc_CustomOrderStatusChange- To update the module, use below command:
composer update aitoc/custom-order-status-changeManaging Custom Order Status Change events and campaign
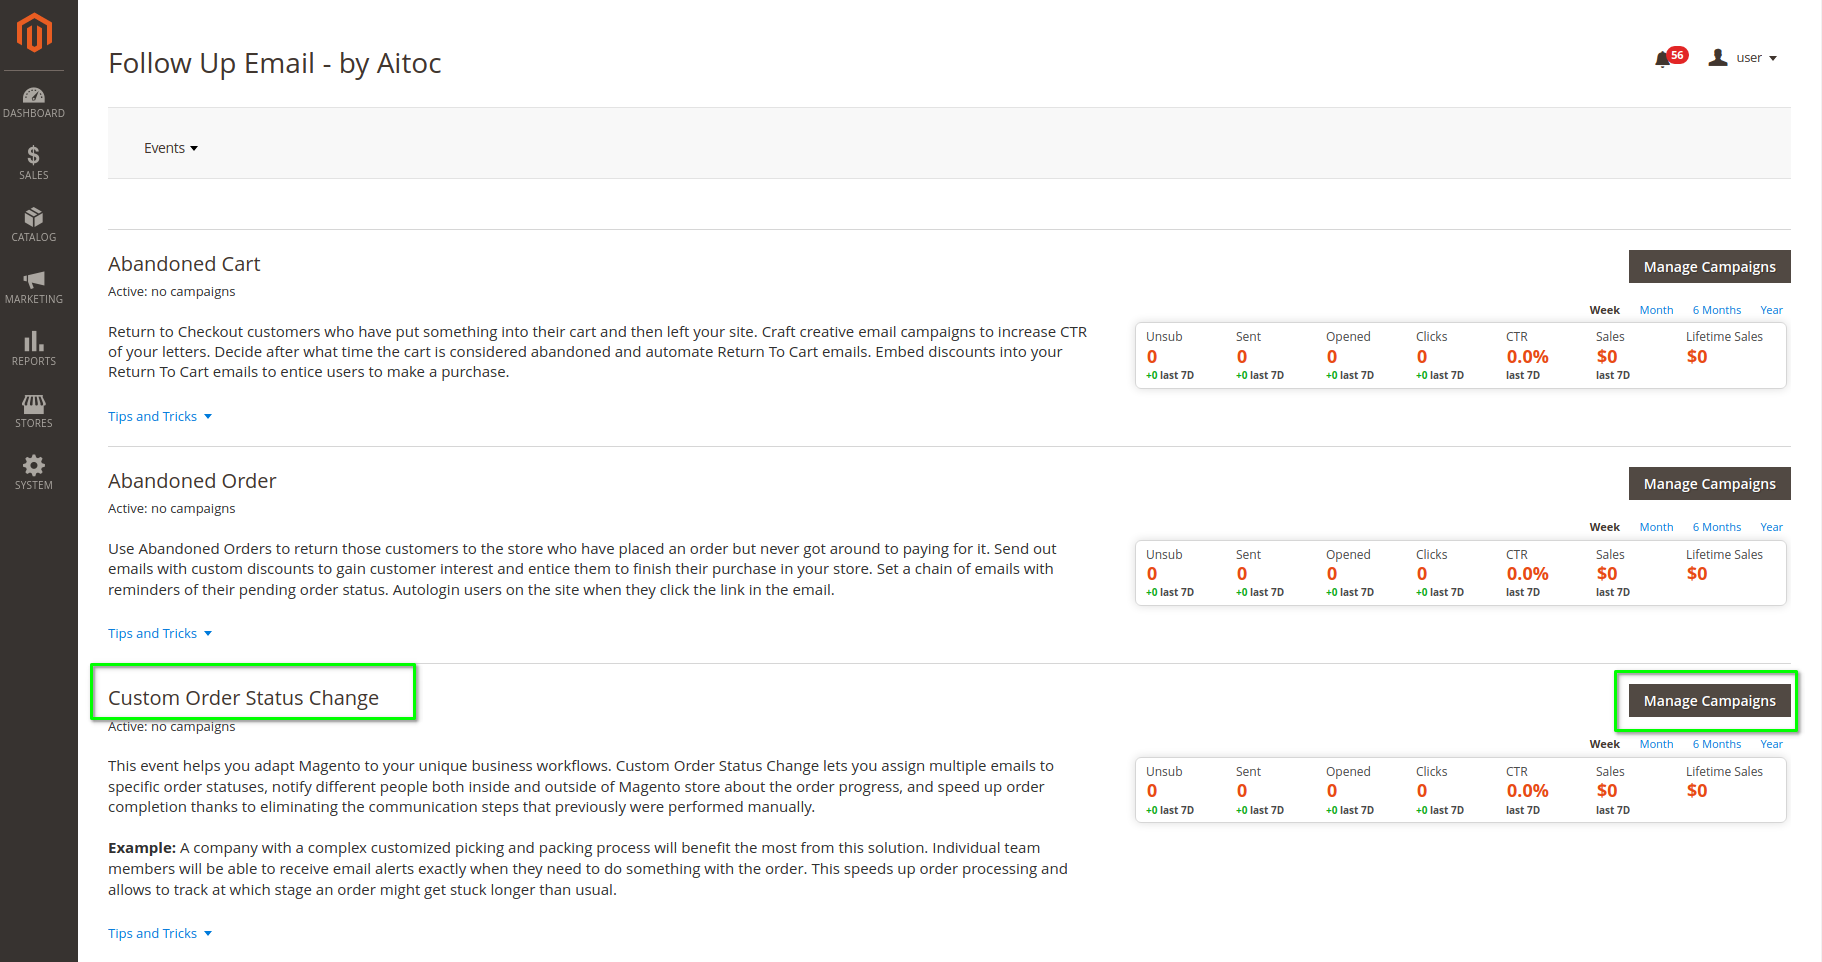
Once you have installed and enabled the module, you need to go to Admin > Aitoc > Follow-Up Emails > Events. Here, you will find the "Custom Order Status Change" event.
First, you need to set up the campaign and make it active.
Managing Campaign
For the Custom Order Status Change event under the Follow-Up Email grid, click on the "Manage Campaign" button. Here, you will also see a default campaign, as you can create a new one. You can set up multiple email notifications for each campaign that will trigger on different durations.
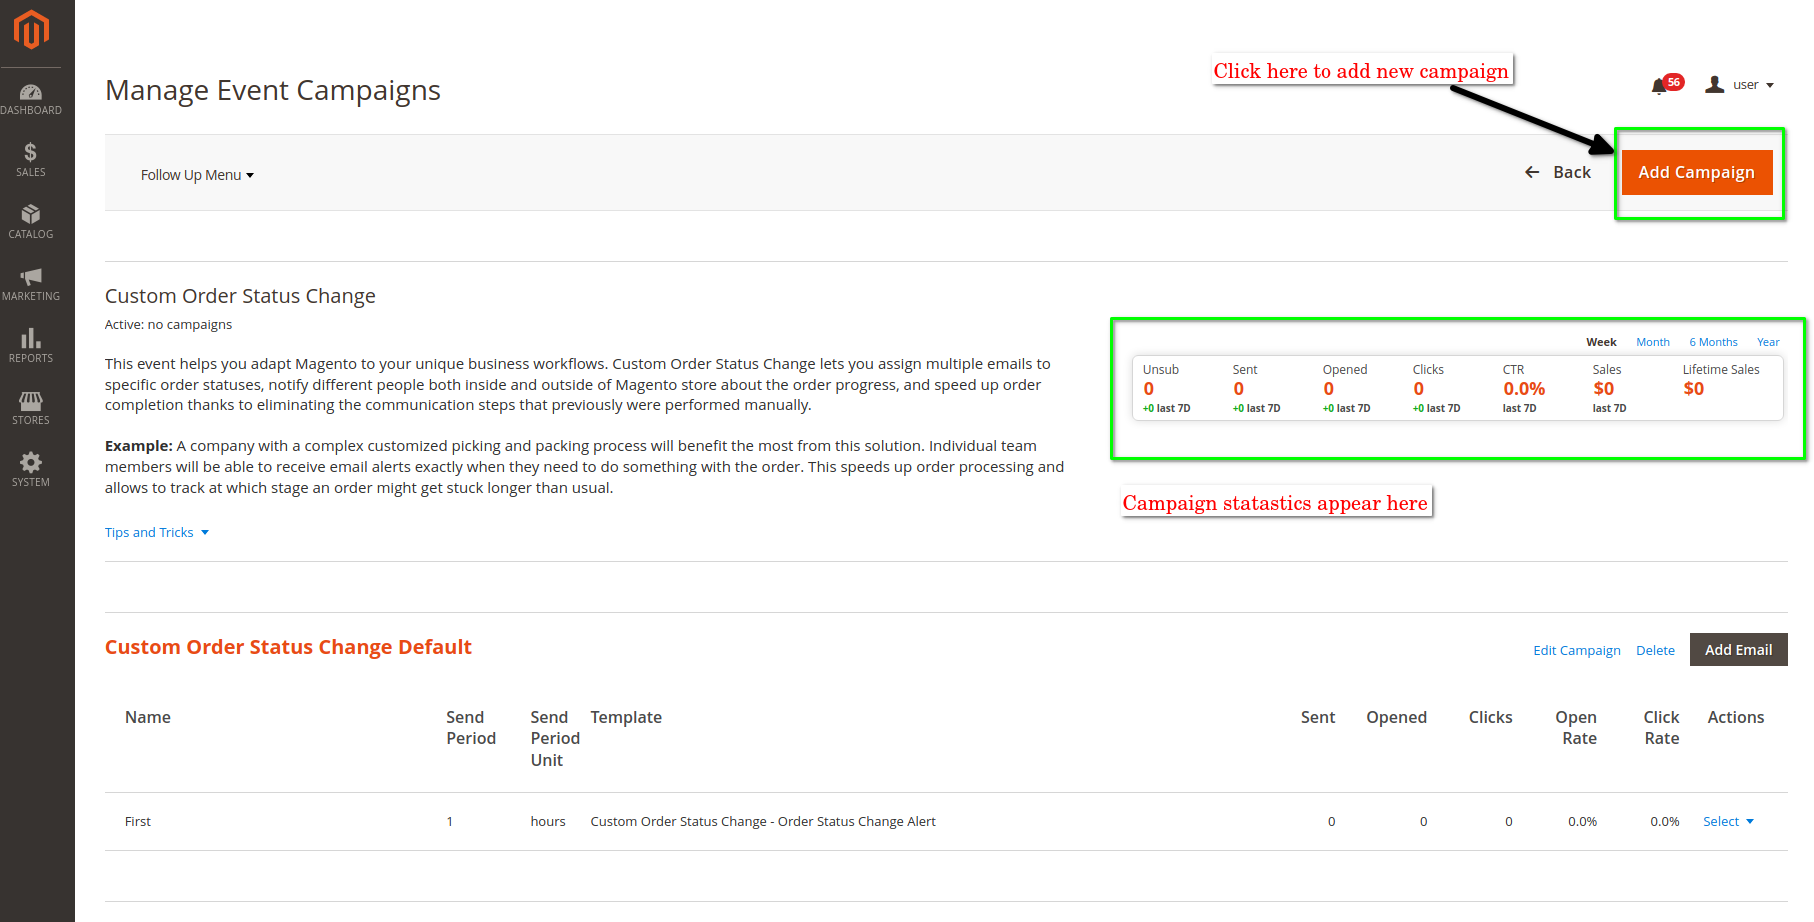
Now edit the default campaign email to setup the email template and start the campaign.
Editing Campaign Email Template
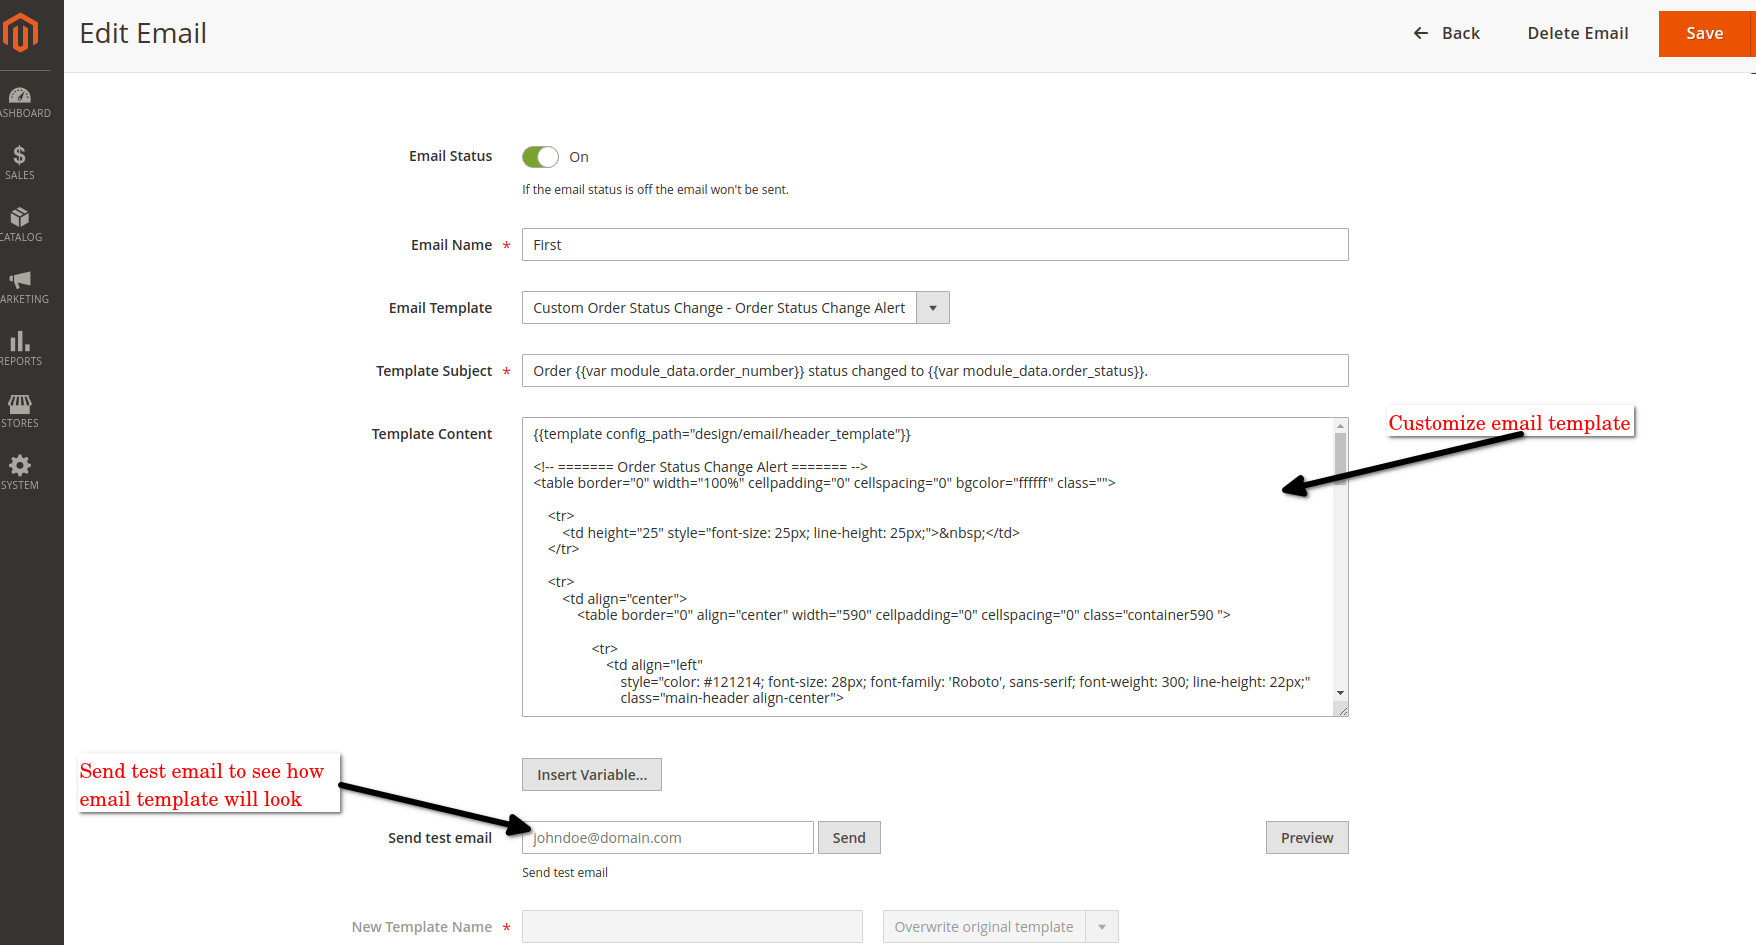
The module provides a default email template that you can customize as per your need. Also, you can set the delay period for sending the email. You can define the delay Period in minutes, hours and days. Based on the set delay period, the customer will receive an email.
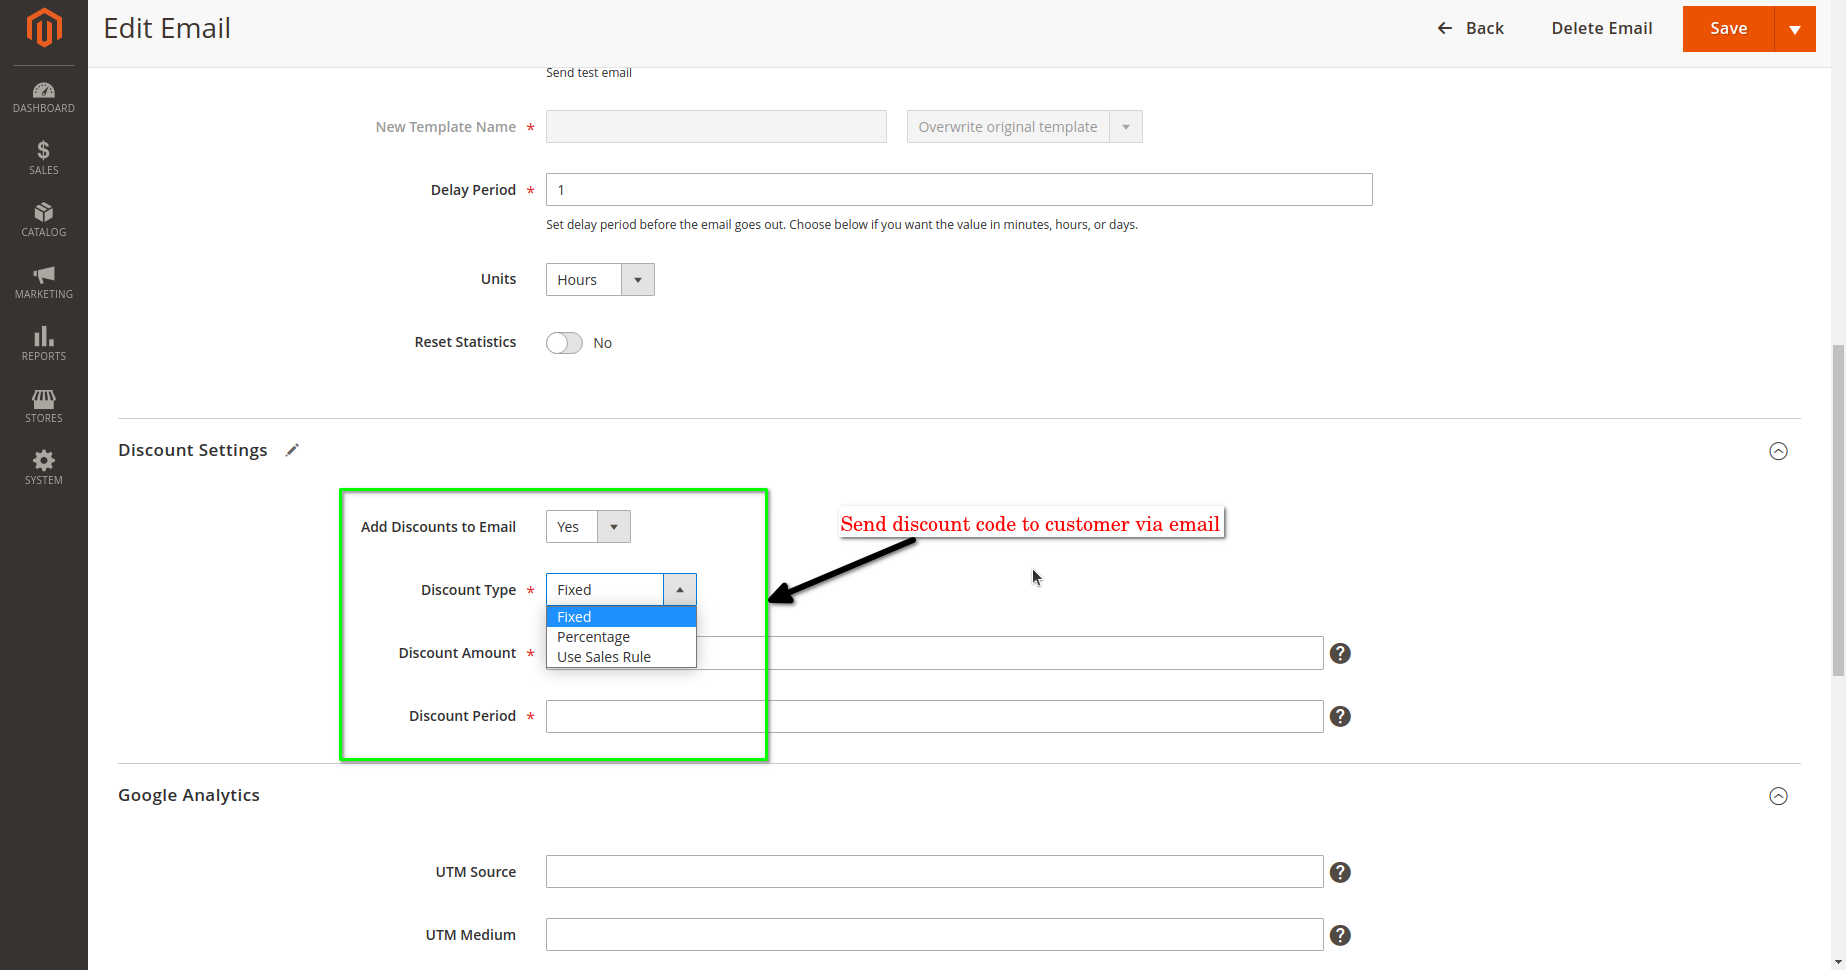
The module also allows you to send the discount code in the email. You can manually set the discount amount, and the auto-generated coupon will be sent to the customer. Also, you can use the existing Cart Price rule to send customers discounts.
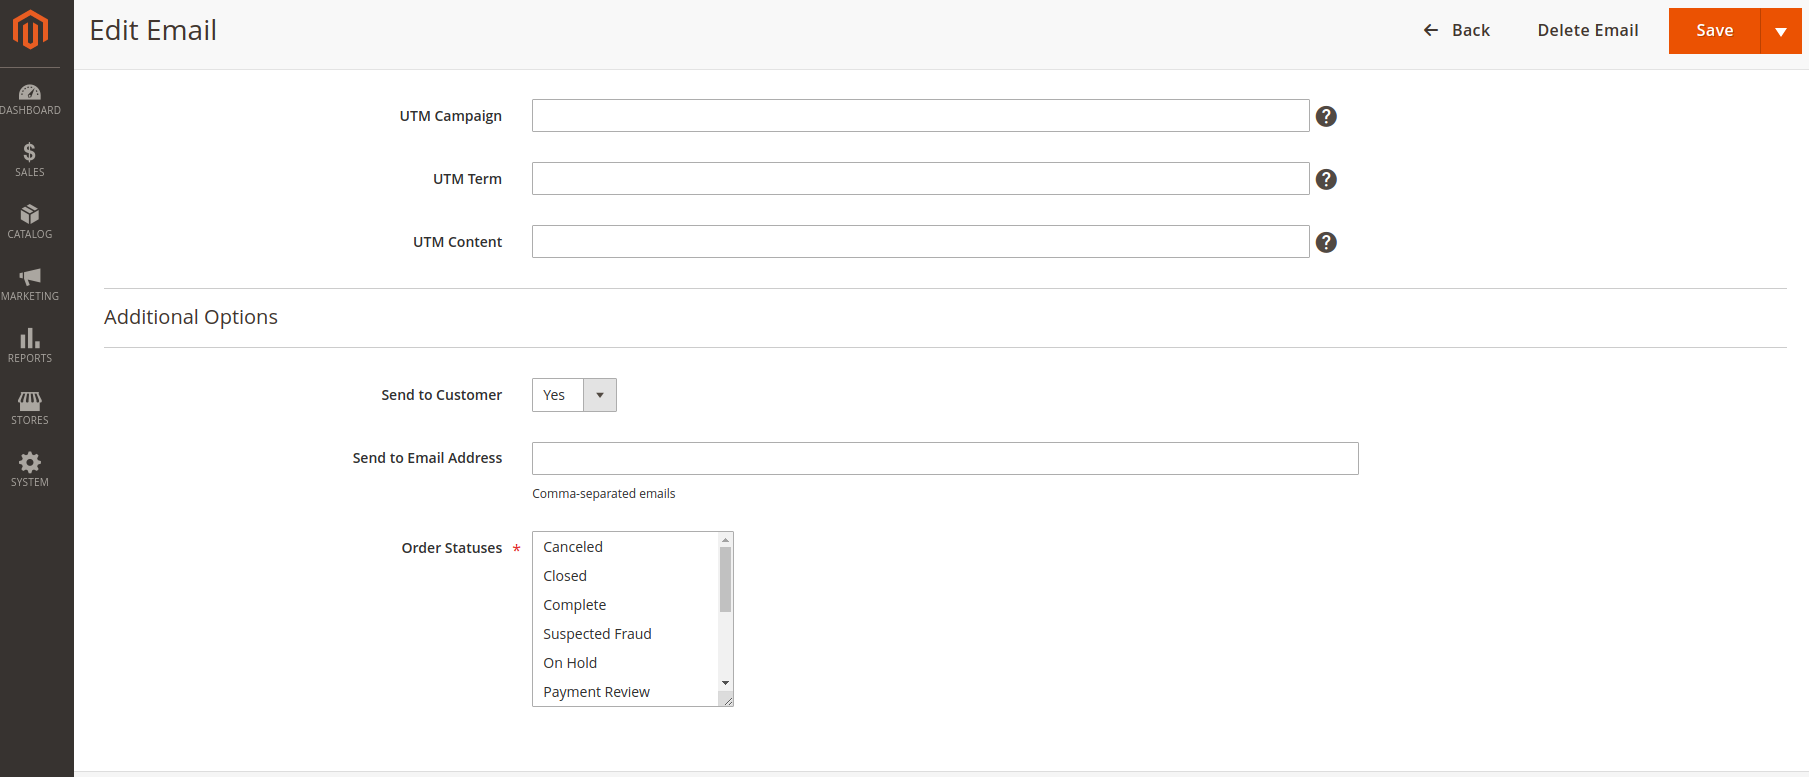
Under the "Additional Information" tab, you can define the email addresses to which the email will be notified when the order status changes. Also, you can select specific order statuses to trigger the email.
Editing Campaign detail
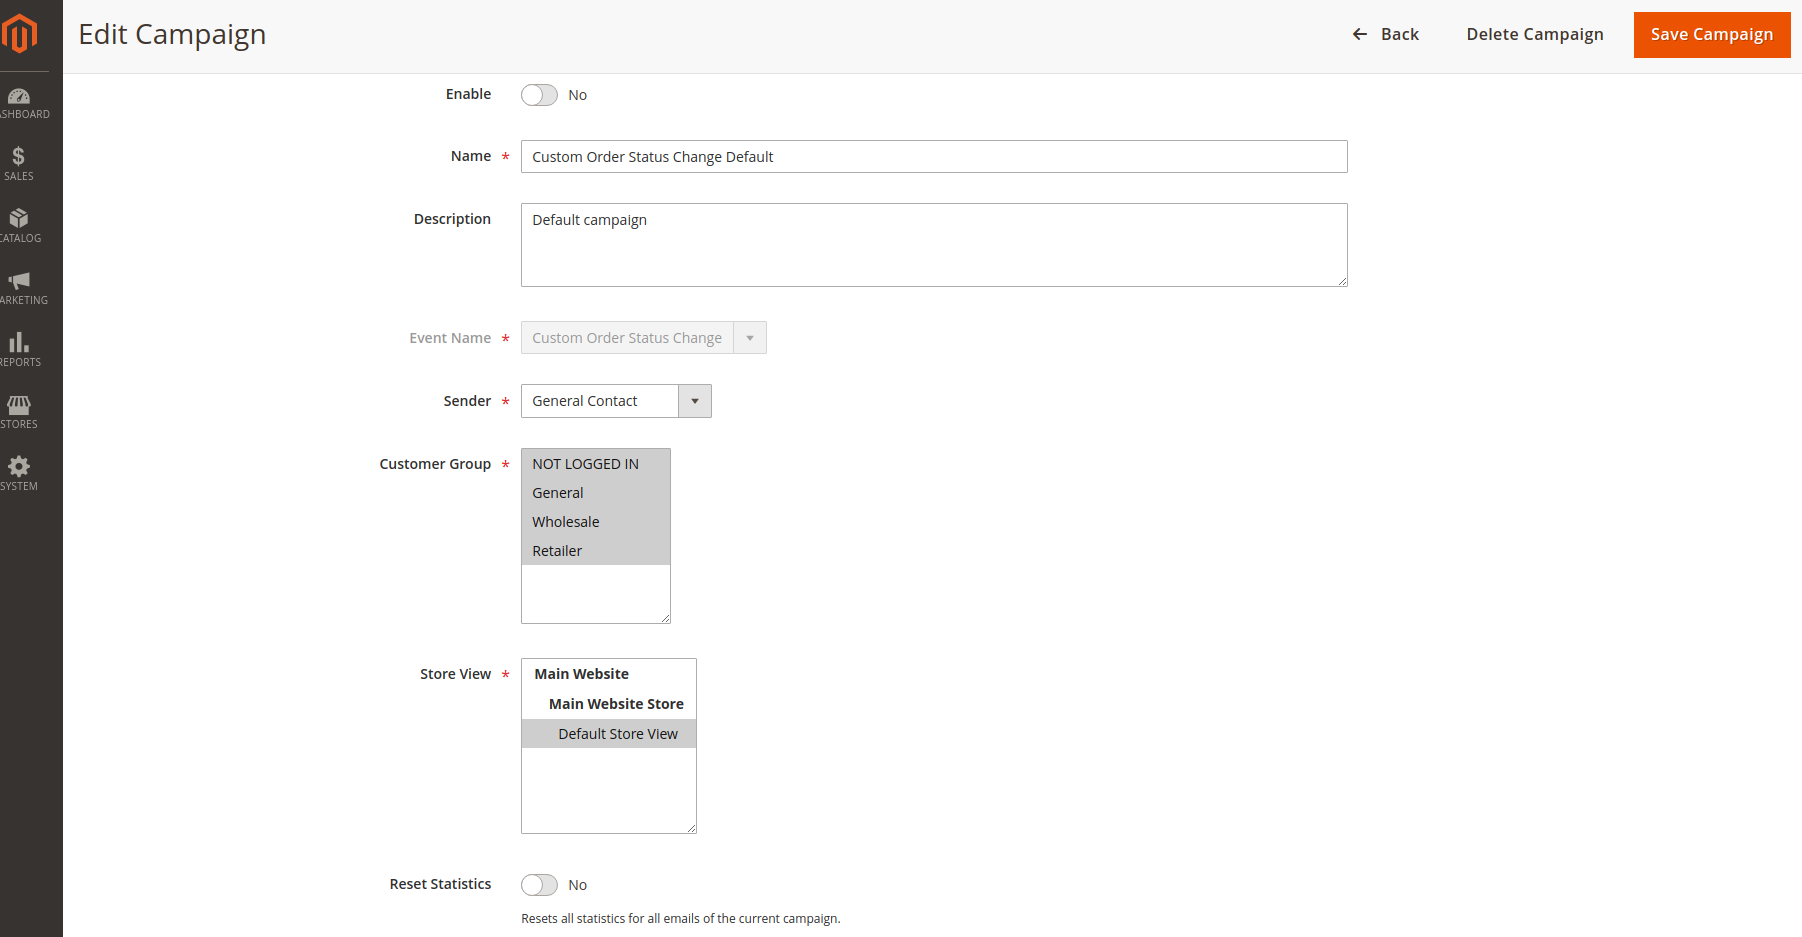
On the Campaign detail page, click on 'Edit Campaign' and enable it. Remember to 'Save Campaign,' and it will be Active. From the campaign edit page, you can configure the campaign so the emails will be sent to specific customer groups and selected website/store views. It also allows you to reset the entire campaign statistics.
Follow Up Email Queue
Under Admin > Aitoc > Follow Up Email > Email queue, you will see the entire list of emails generated along with their status.
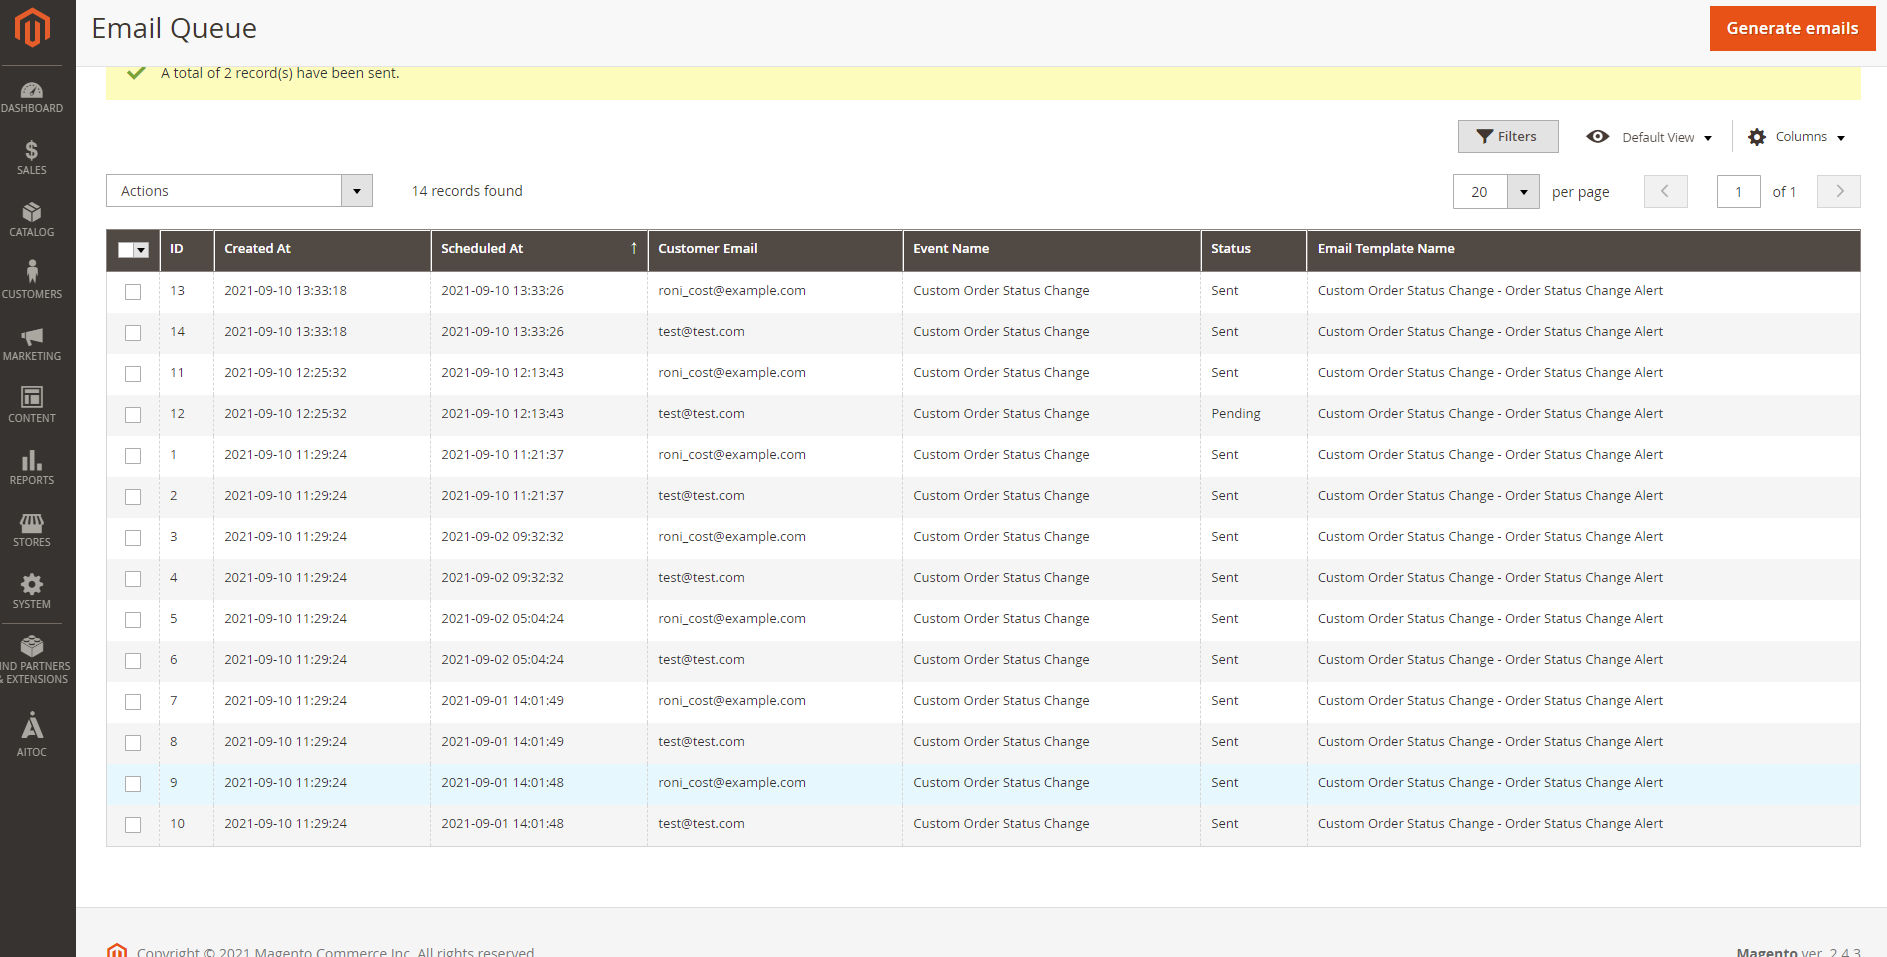
Using "Generate Emails" button, you can manually generate emails as well.
Example of email receive by user
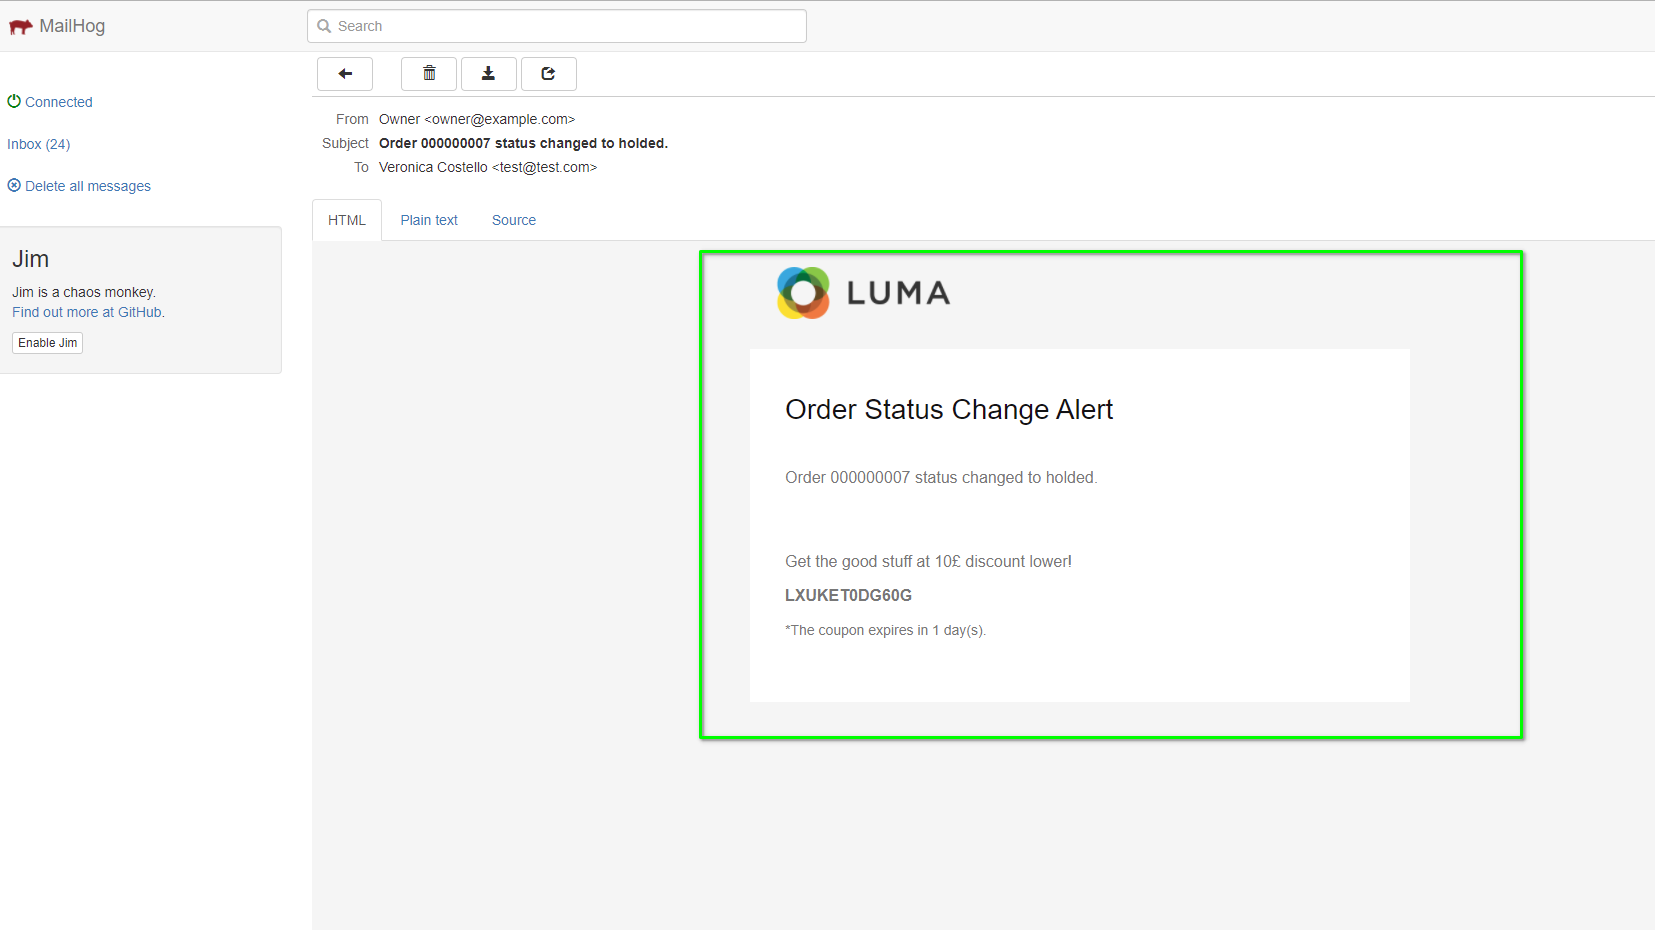
Here is an example of an email template customers receive when their order status change to "Complete." The example has a default email template that comes with the module. You can also see how the discount code appears in the email template.
THANK YOU FOR CHOOSING AITOC EXTENSIONS!