
On this page
Testimonials
Description
The Testimonials module allows you to add and display the customer's testimonials on your website. The testimonials help in gaining the trust of other customers. With the help of the module, the Admin can create testimonials, and a customer can also submit testimonials from the frontend.
Compatibility
Testimonial module is compatible with the following Magento platforms:
| Community Edition (Open Source) | Enterprise Edition (Commerce) | Cloud Edition |
|---|---|---|
| 2.4.* | 2.4.* | 2.4.* |
Installation
Installing module using zip file
- Unzip and paste the extension file into your root Magento folder.
- Connect to your server by SSH.
- Go to your Magento root folder.
- To install the extension, perform this command:
php bin/magento setup:upgrade
php bin/magento setup:di:compile
php bin/magento setup:static-content:deploy
Composer installation
If you haven't installed any Aitoc module before, in that case first you will need to add your Aitoc composer repository. Please go through the document to see how you can add a composer repository.
To install the module, you will need to run the following commands:
composer require aitoc/module-testimonials
php bin/magento setup:upgrade
php bin/magento setup:di:compile
php bin/magento setup:static-content:deploy -f- To switch the extension on/off, perform these commands:
php bin/magento module:enable Aitoc_Testimonials
php bin/magento module:disable Aitoc_Testimonials- To update the module, use below command:
composer update aitoc/module-testimonialsModule Configuration
To access the configuration of the module, go to STORES → Configuration → AITOC EXTENSIONS → Testimonials from within the admin panel:
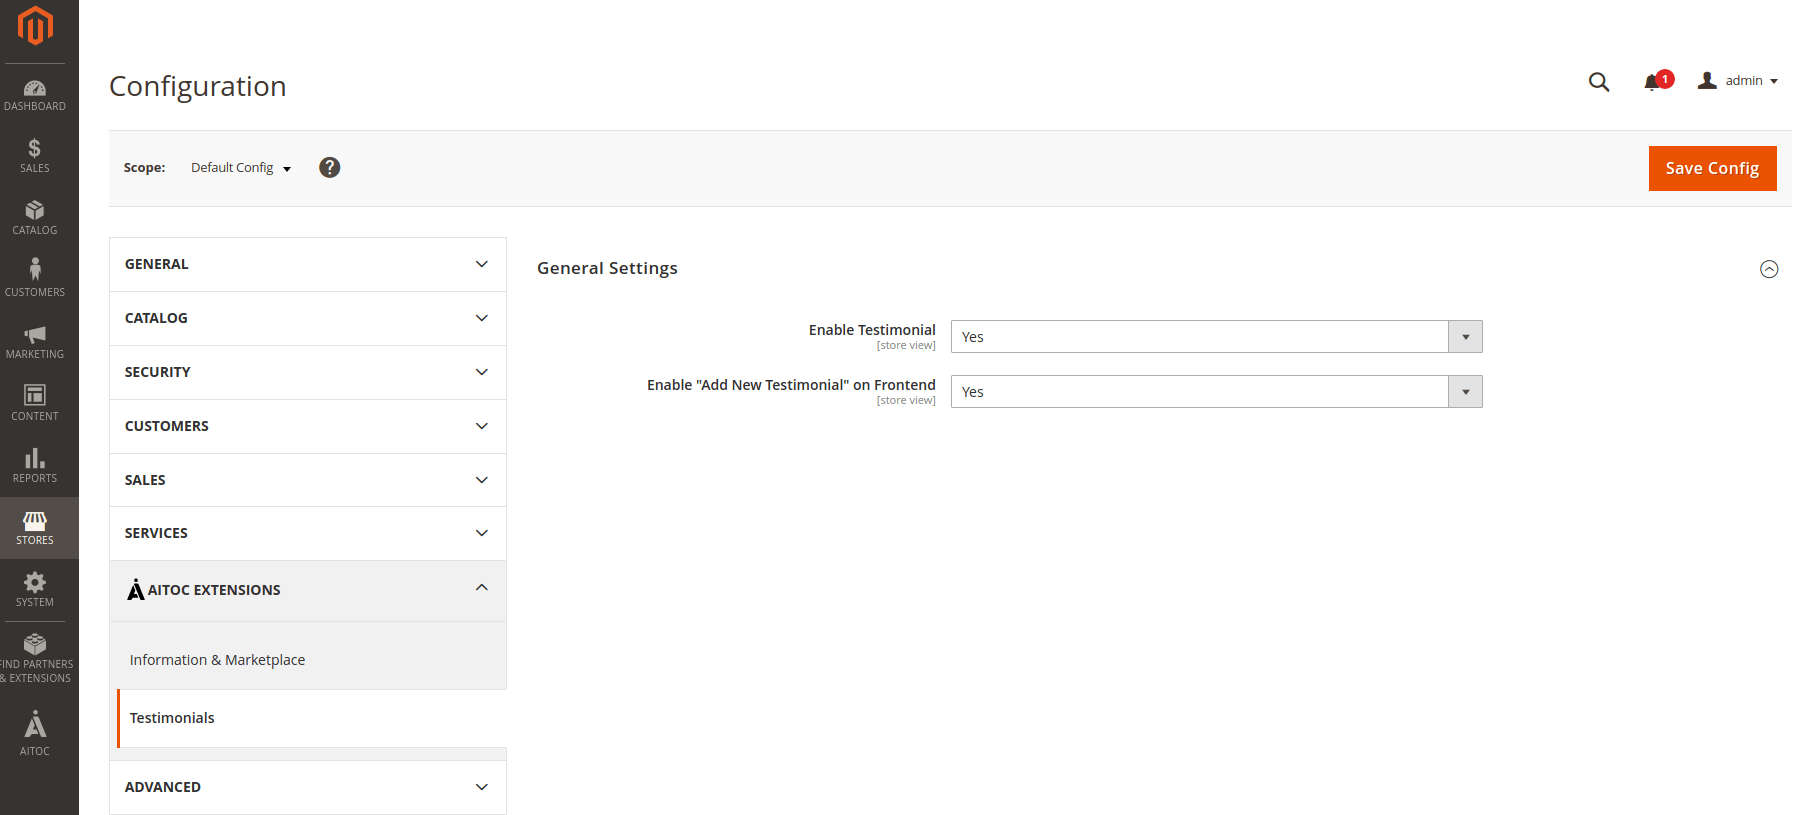
Enable Testimonial = Select Yes to enable the module functionality and display testimonials on the front-end.
Enable "Add New Testimonial" on Frontend = Select Yes to allow customers to submit testimonials from your website.
Frontend Experience
Testimonials Widget
The module allows you to display testimonials on any page using the Widget functionality.
Go to CONTENT → Elements → Widgets and click the Add Widget button:
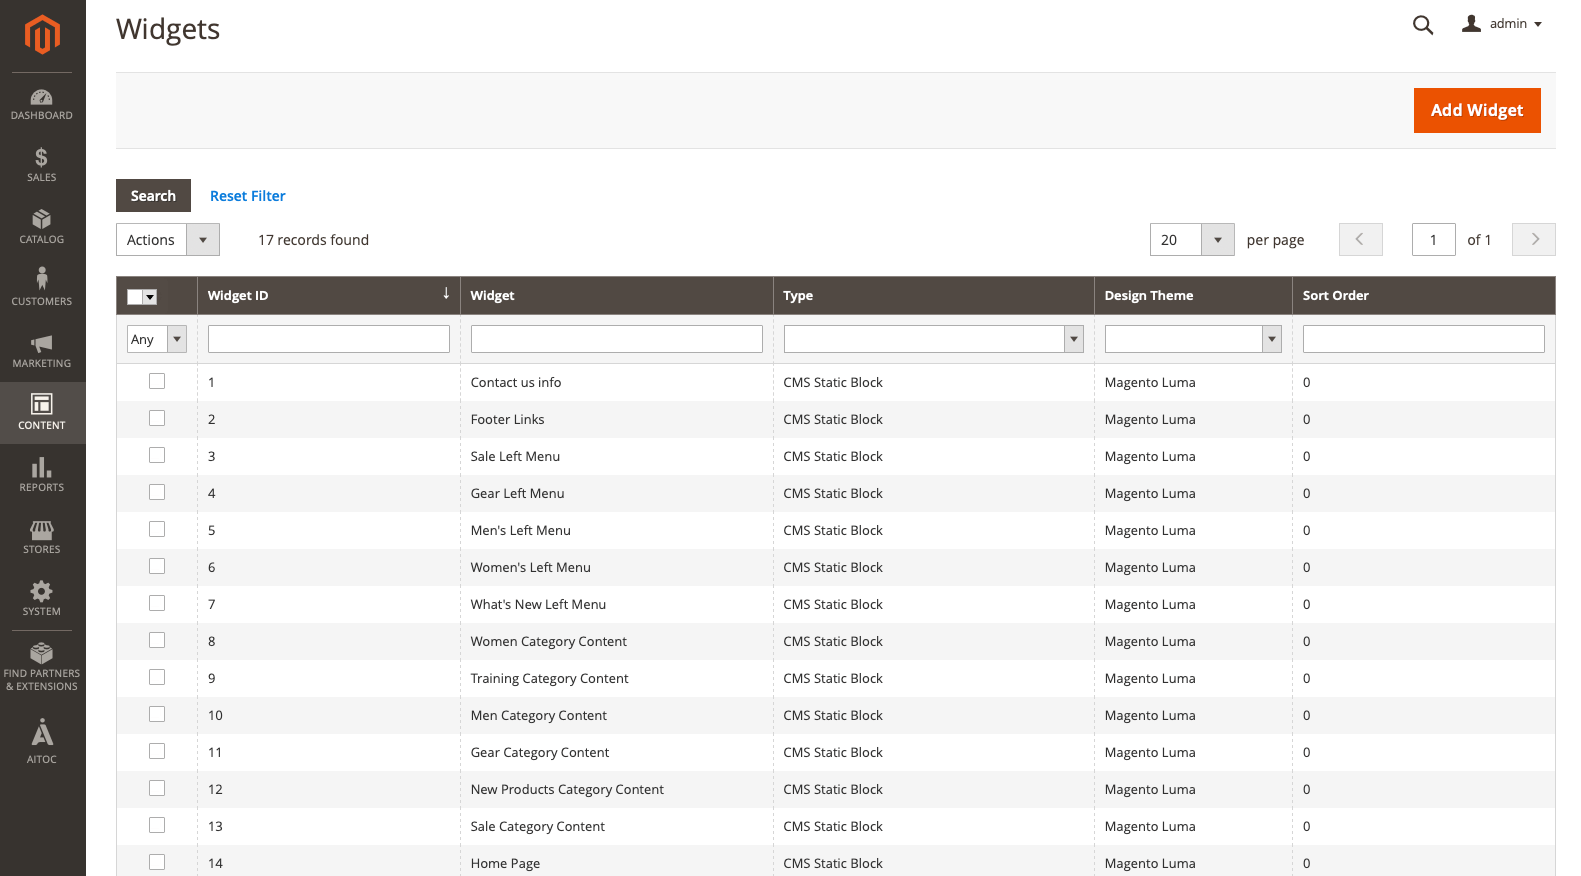
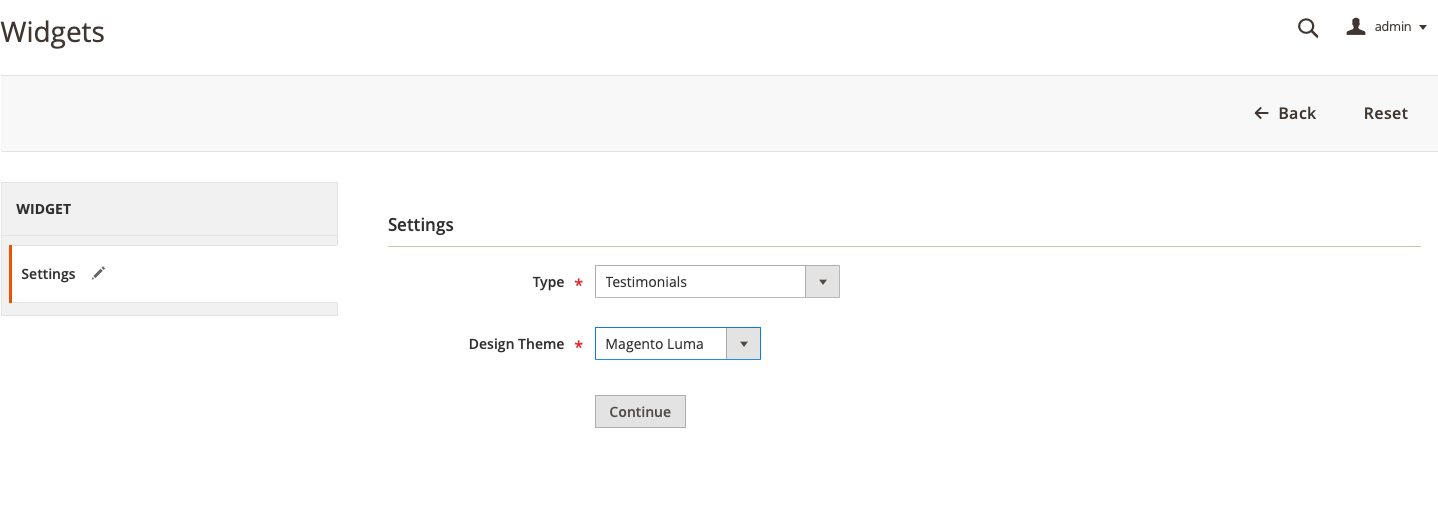
On this page, you need to select Testimonials as the Type, choose the theme you are currently using and click Continue:
Please specify the Widget Title and assign it to the store views where you wish to display the block with testimonials:
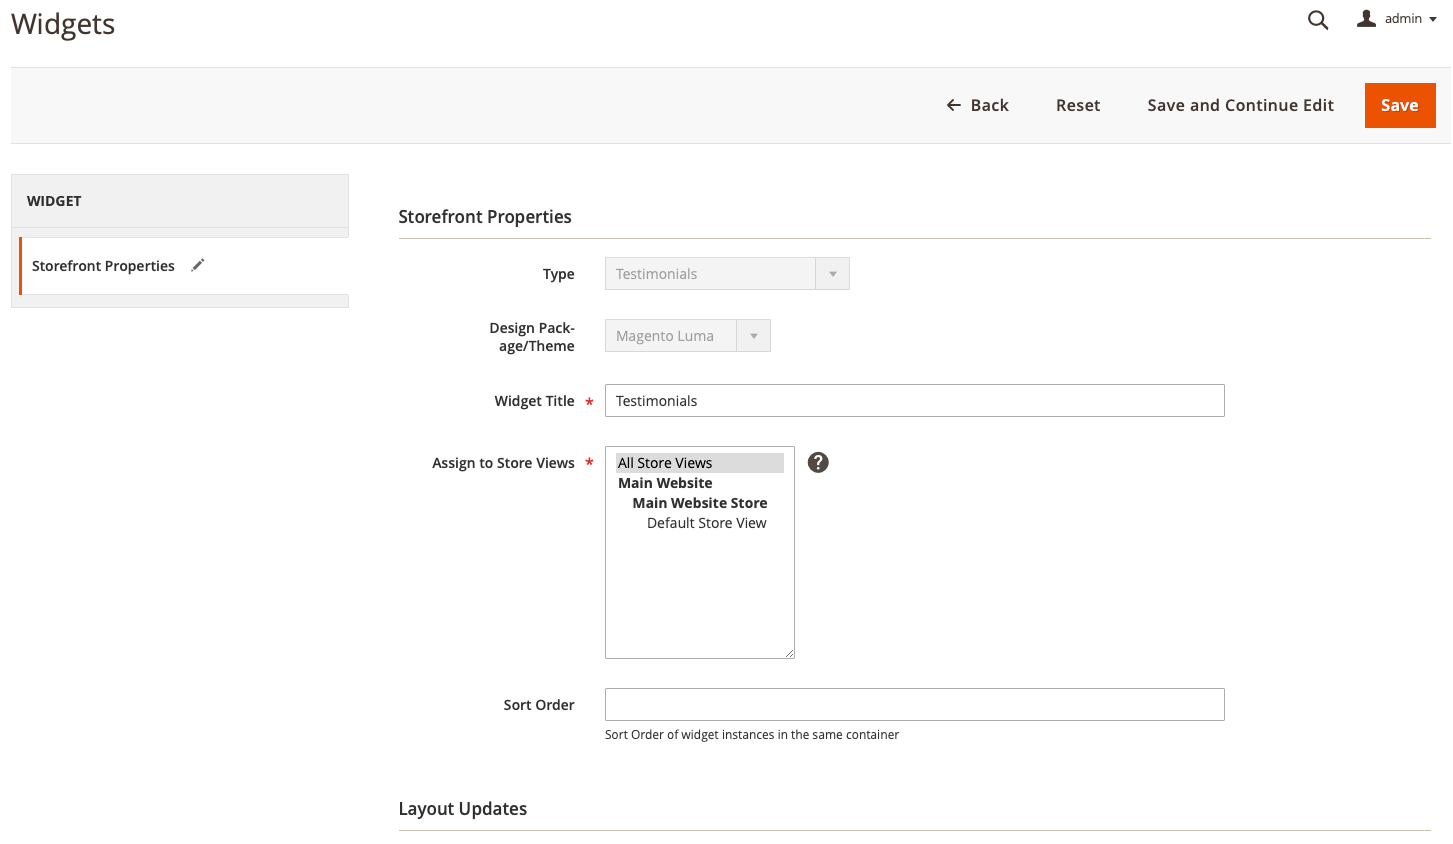
Once you've finished these steps, click the Save button.
Now you need to open the block or Page where you wish to add the Testimonial block. In the text block, you need to click the "constructor brick":
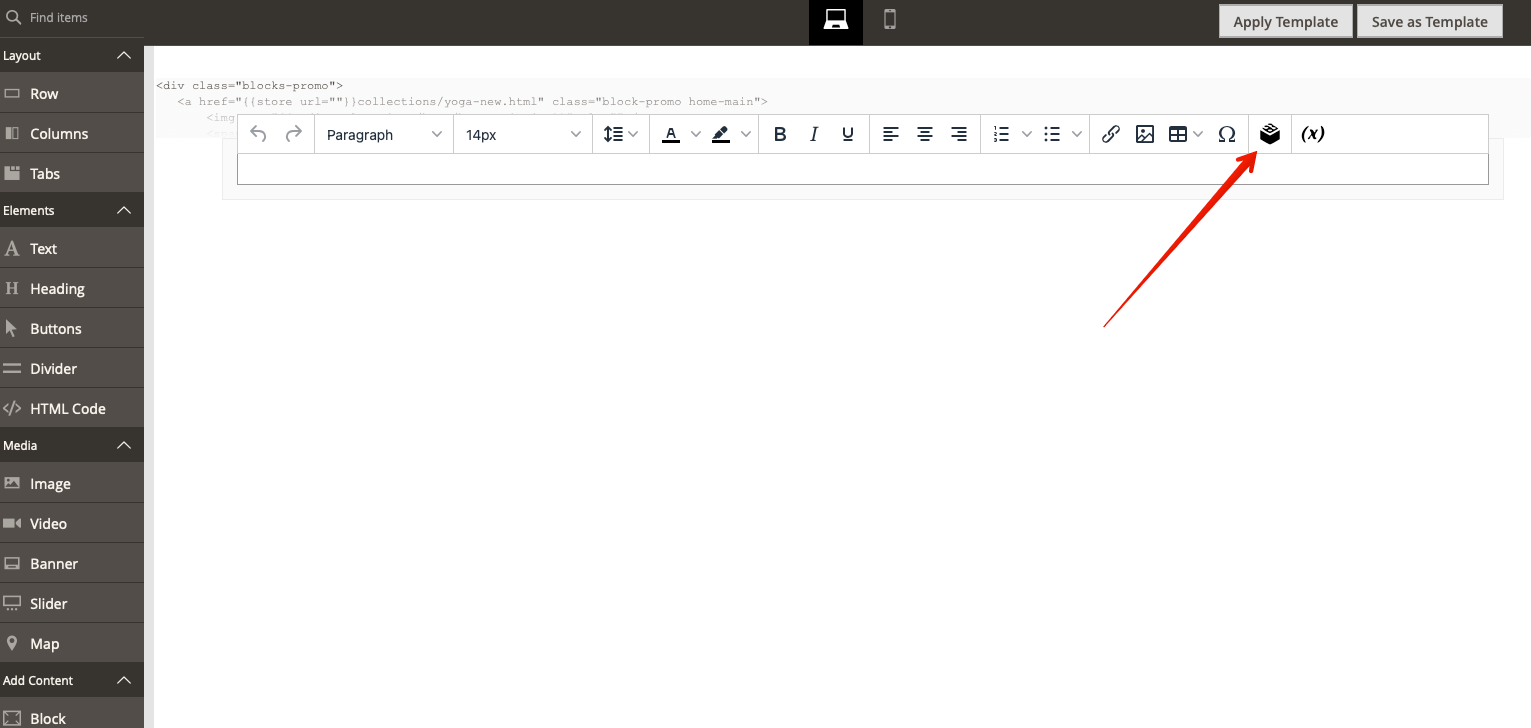
and choose Testimonials from the dropdown:
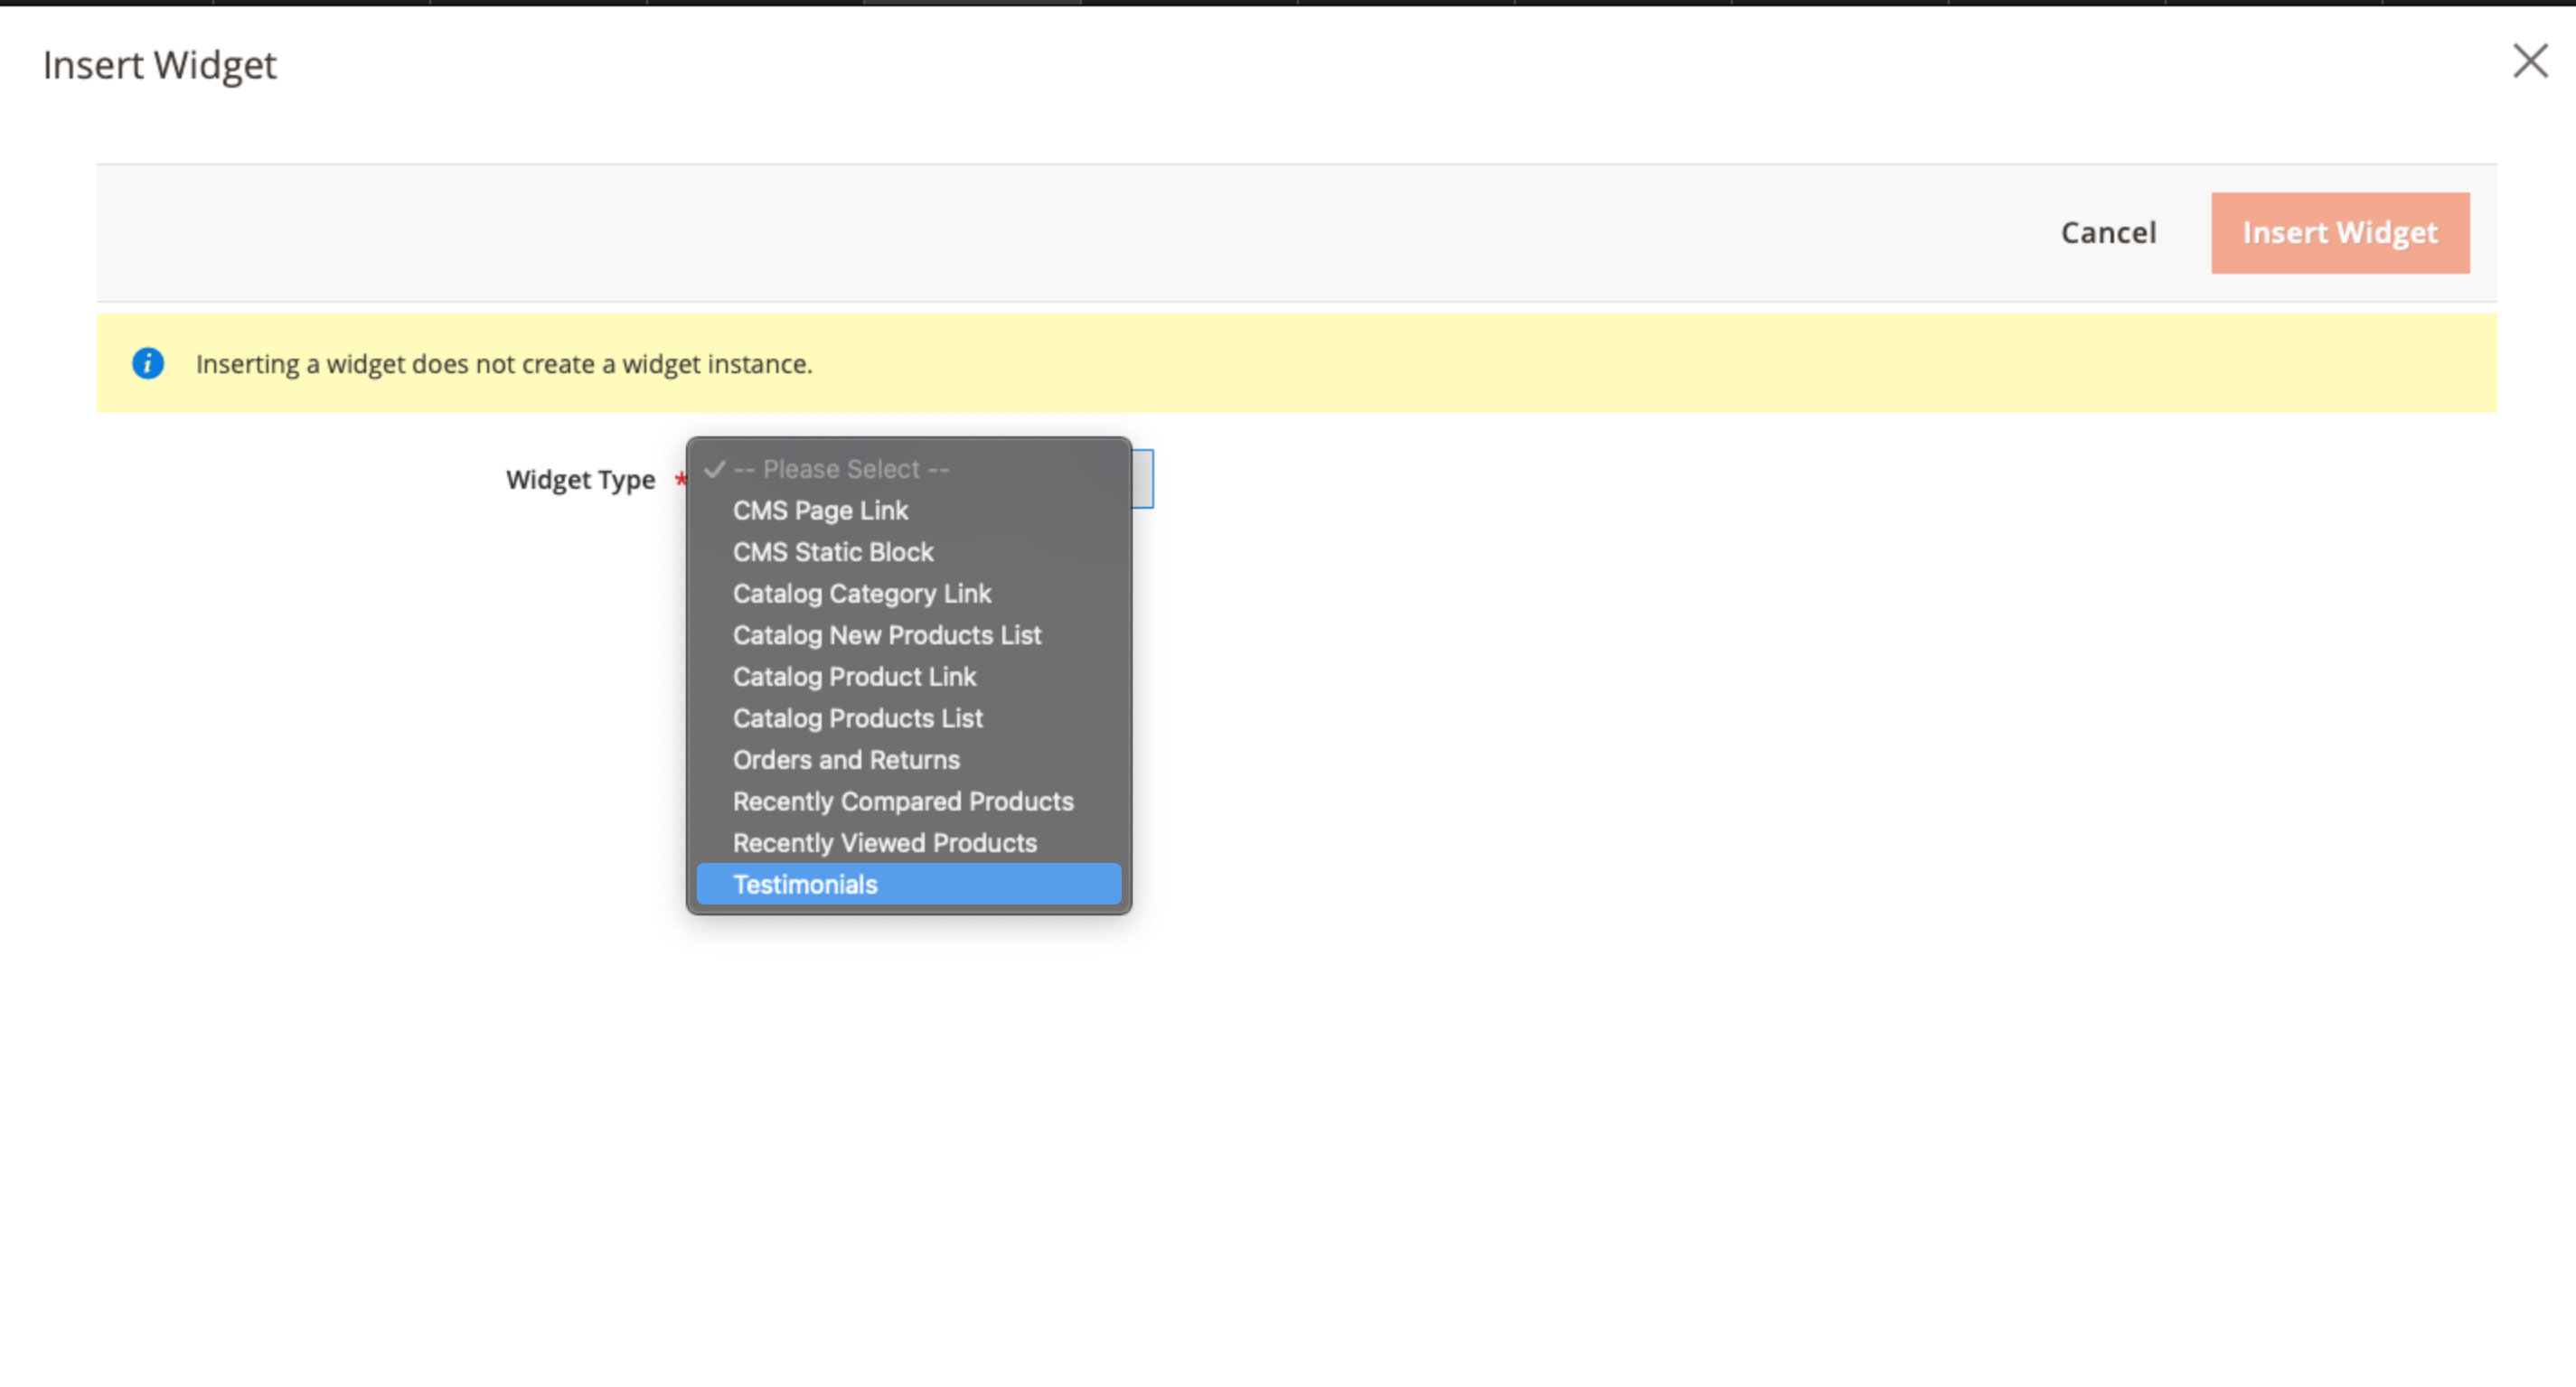
Once you save the block or page and clear Magento caches, the Testimonials block should appear:
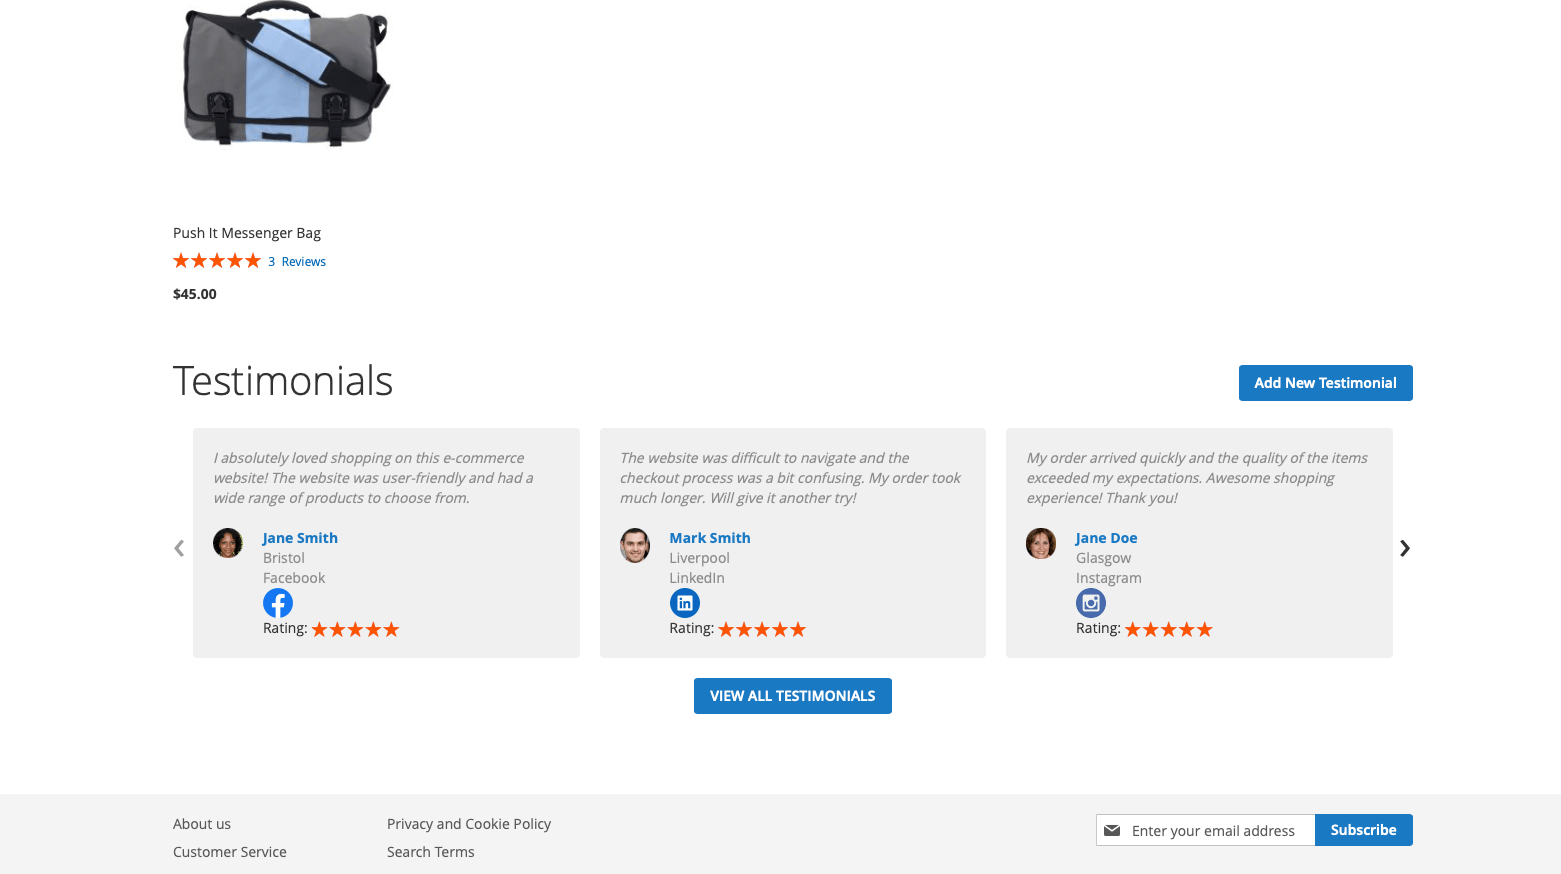
The button Add New Testimonial will be shown only if it is allowed to do in the extension's configuration. Clicking the View All Testimonials button will lead to the special Testimonials page.
Testimonials Page
Once the module is installed and enabled, it will display all the testimonials on the special Testimonial page. Its URL is https://www.site.com/testimonials.
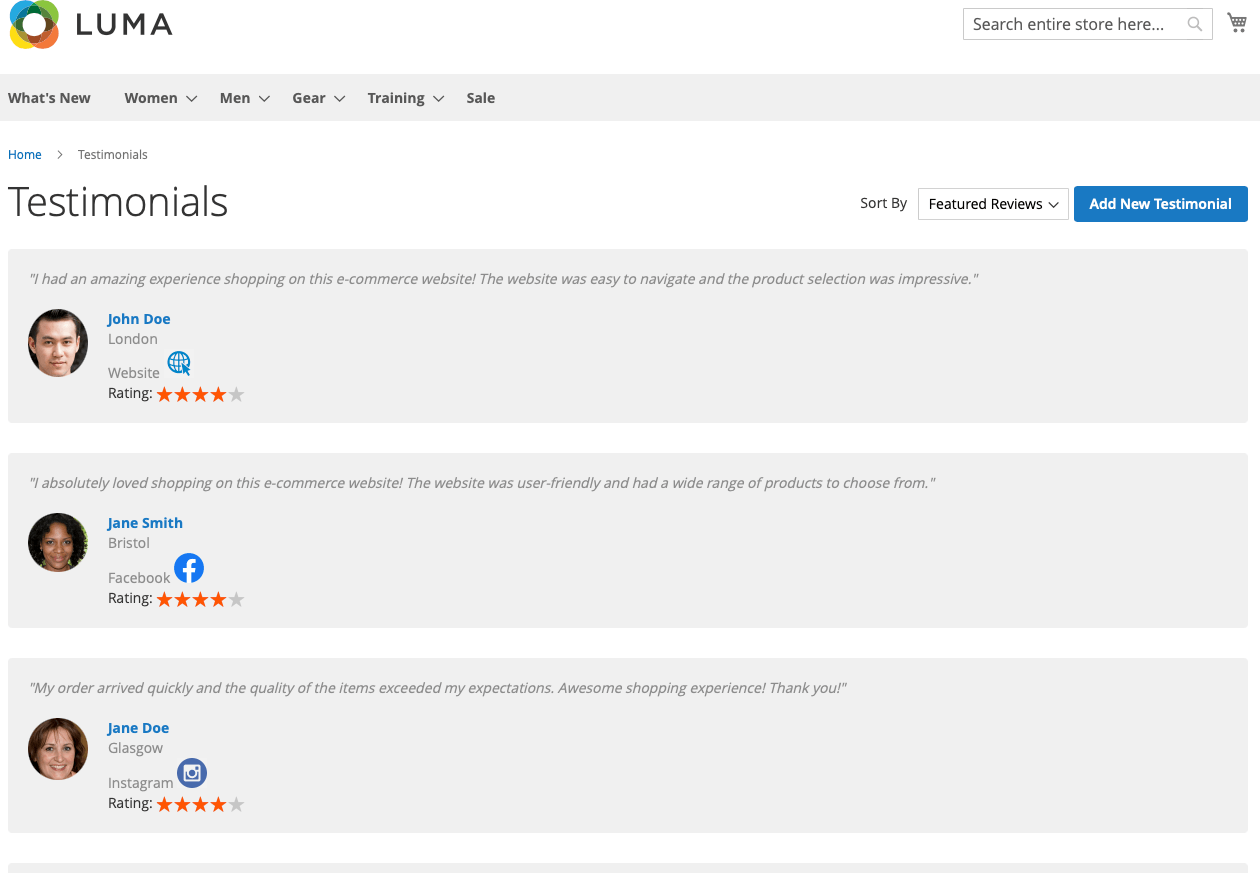
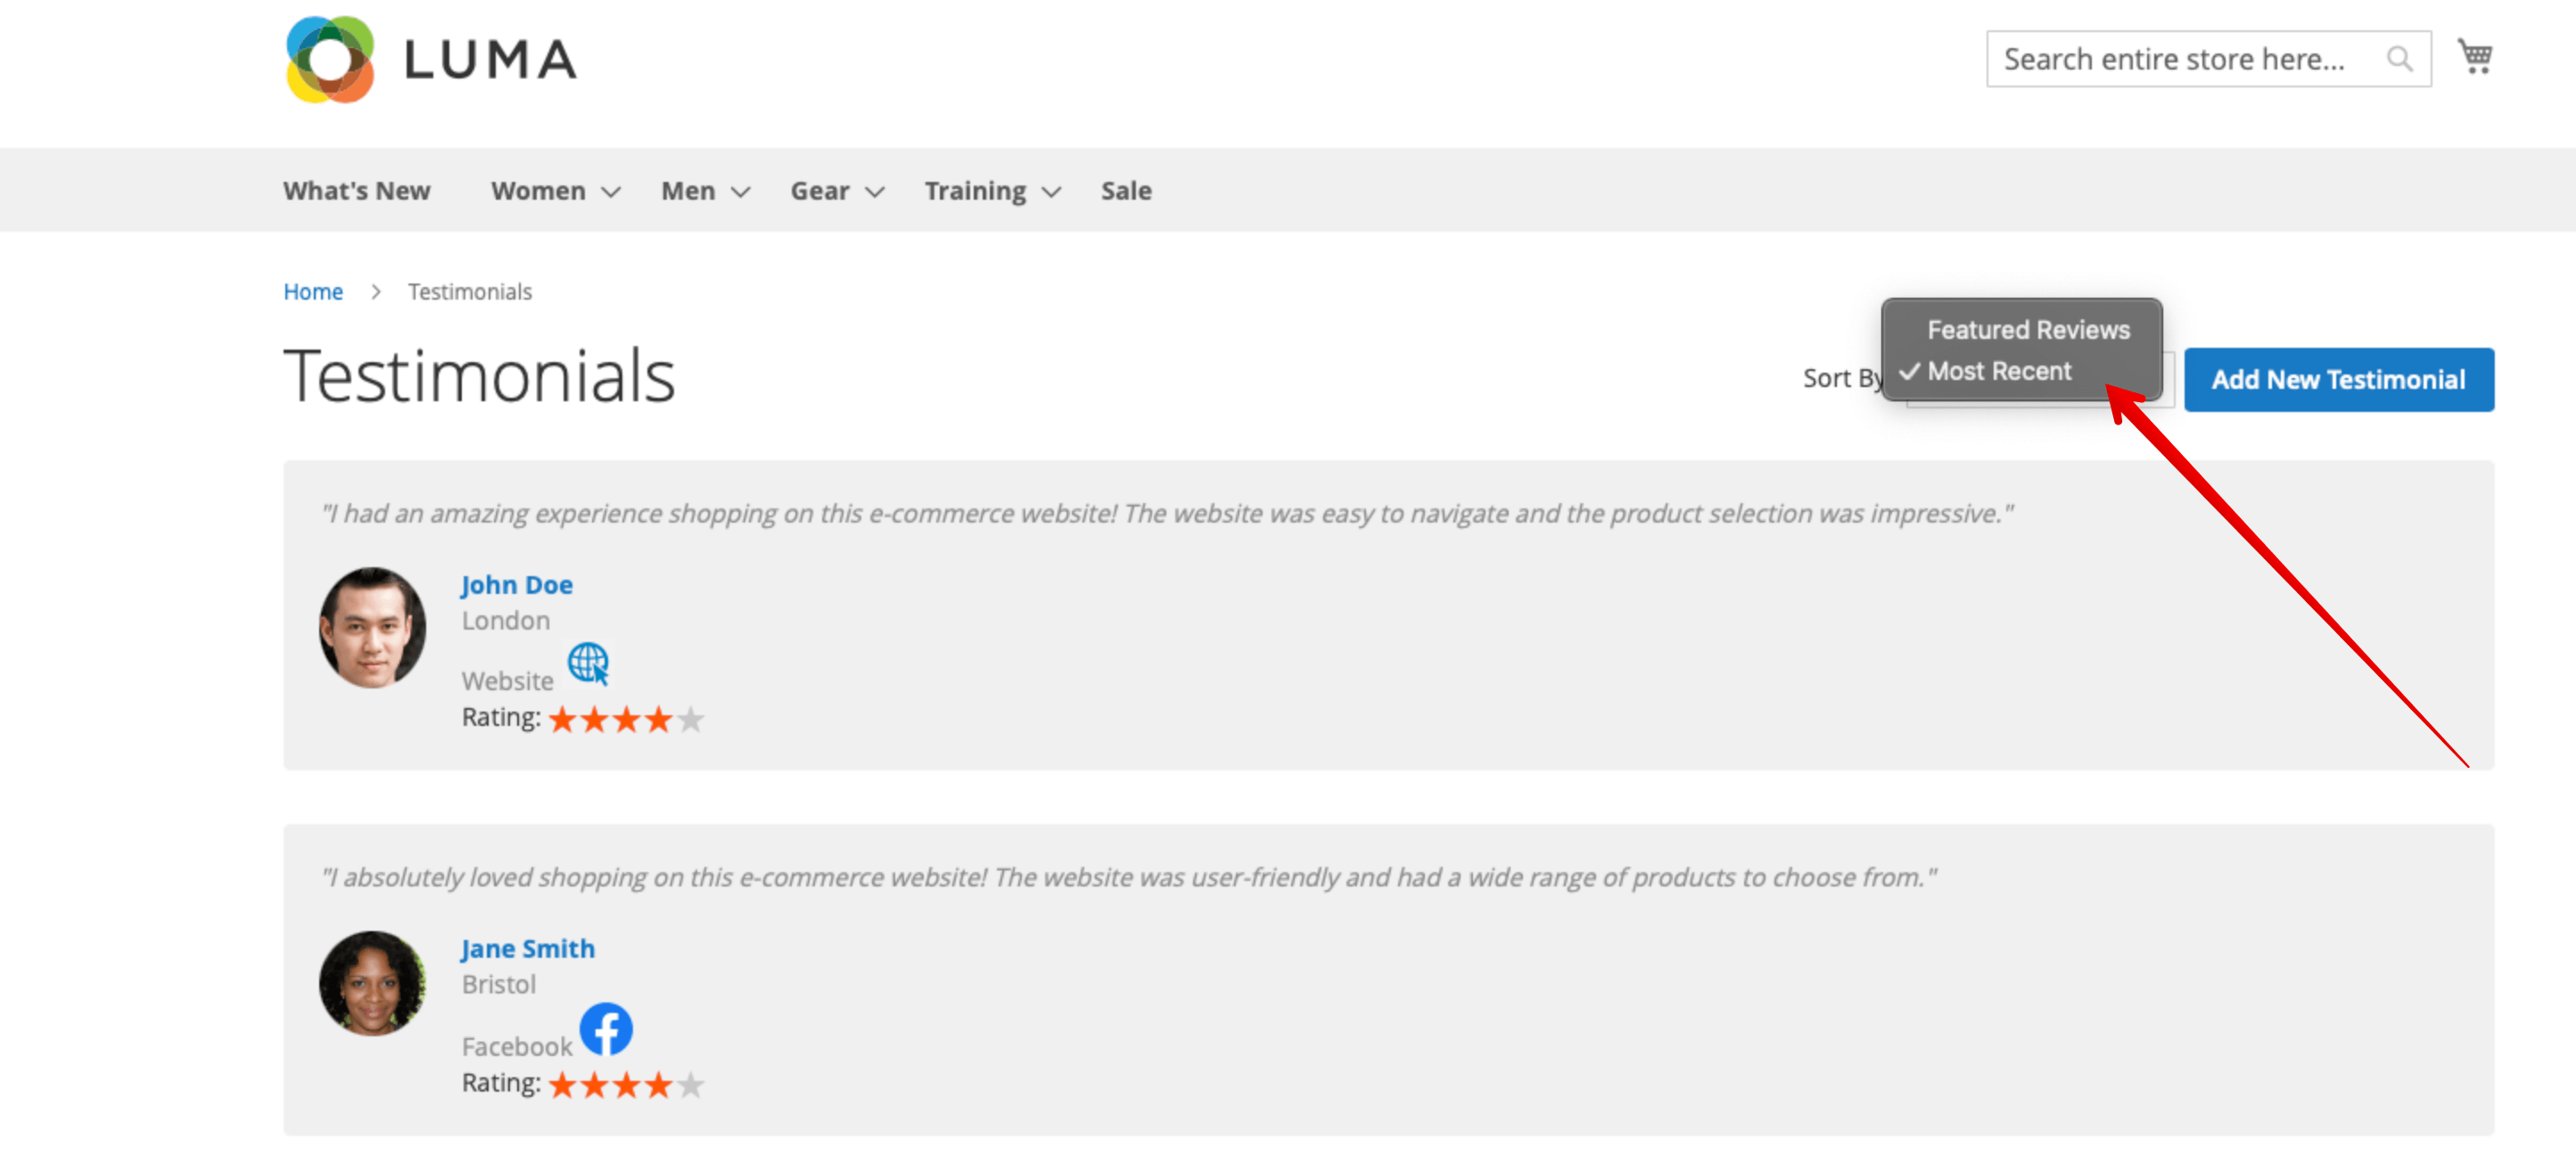
The page has the possibility to sort the testimonials. The sorting mechanism will be explained later in the document.
The button Add New Testimonial will be shown only if it is allowed to do in the extension's configuration.
Add New Testimonial (Frontend)
From the widget or from the special page the customer may add the new testimonial (if it is allowed to do so in the extension's configuration.)
When the customer clicks the Add New Testimonial button, they will see this screen:
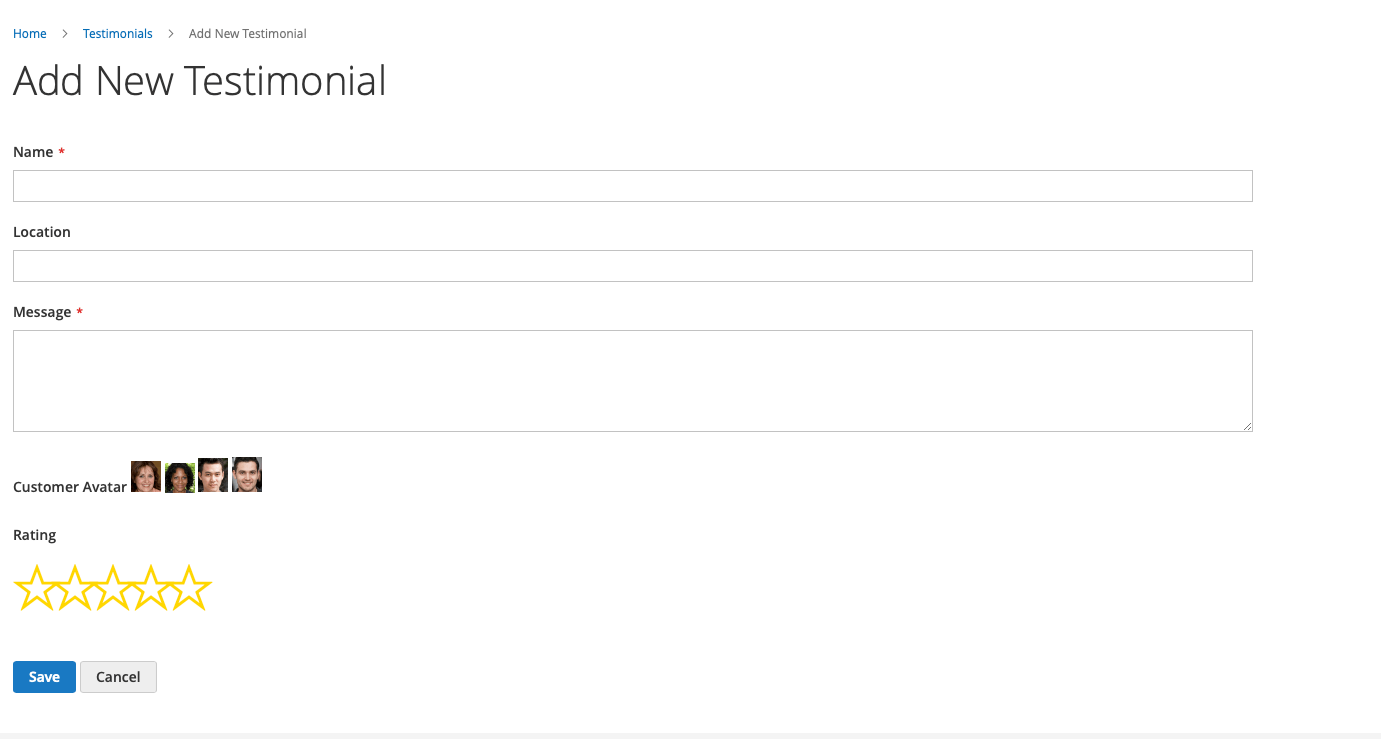
The customer can specify their location (like city, state) and choose one of the approved avatars.
When the customer submits the testimonial from the frontend, it will have Unpublished status so it won't appear on the front end. The admin must change the testimonial status manually in the backend to display it on the website.
Manage Testimonials
Once you have installed the module, Go to AITOC → Testimonials → Manage Testimonials.
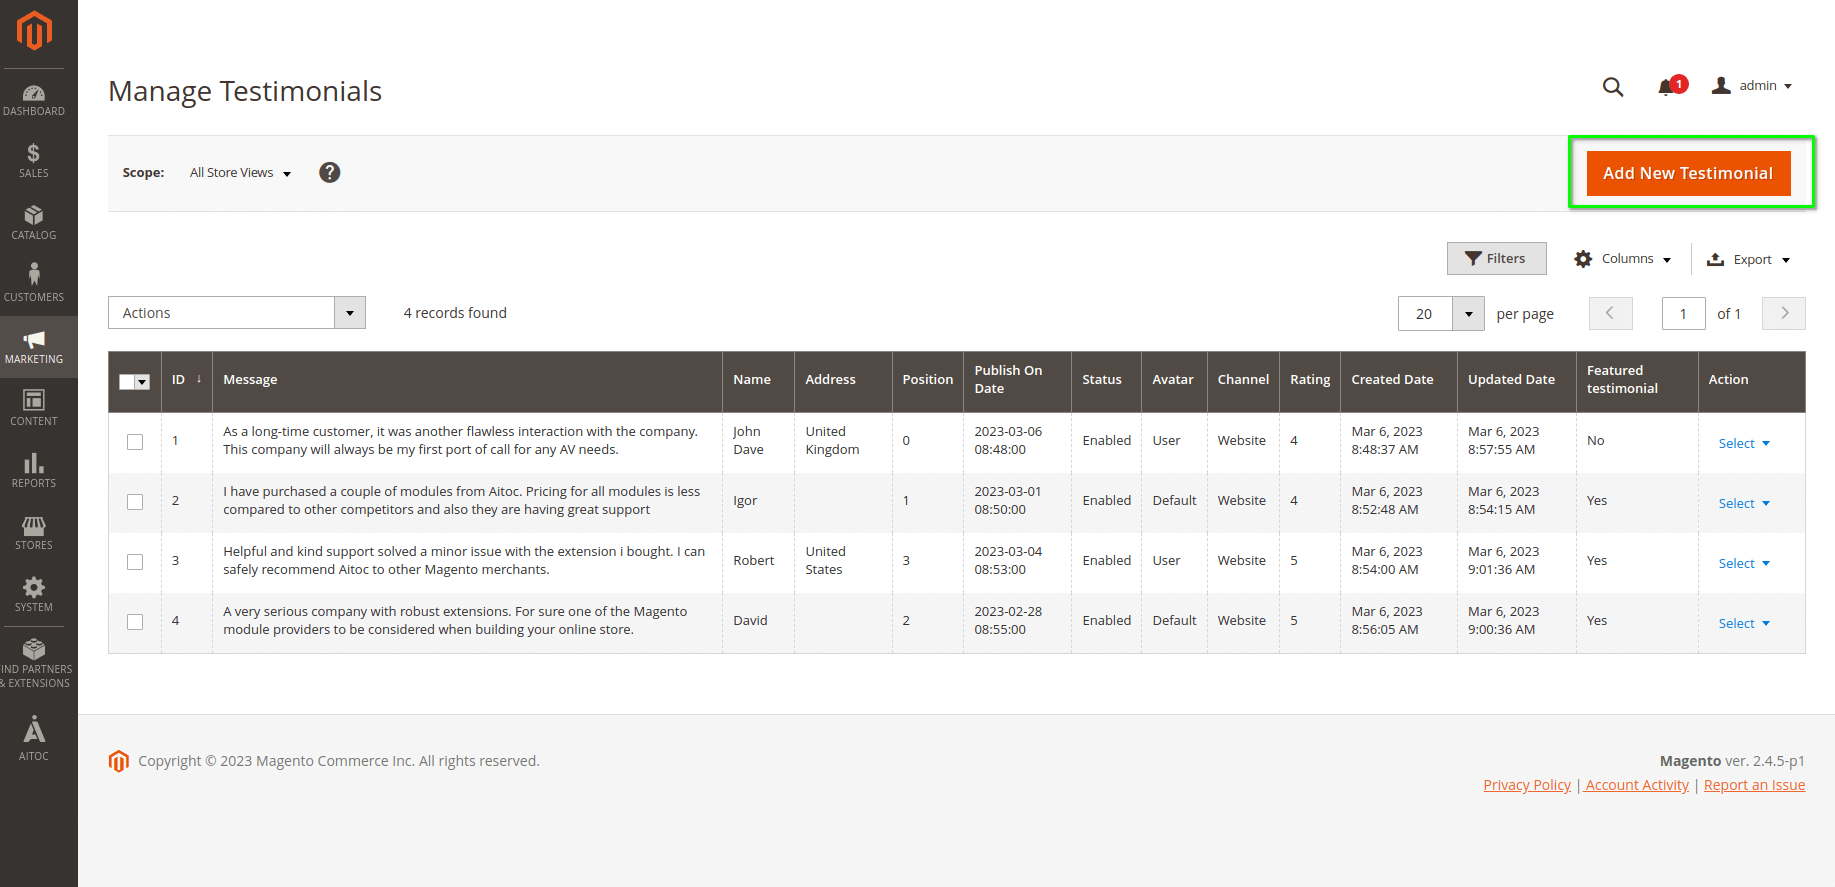
All the existing testimonials will appear here. It shows the ones created by Admin and by customers from the frontend page. Note that the customer's testimonials won't appear on the frontend until the admin approves that from here.
Add New Testimonial
To create the new one, click the Add New Testimonial button:
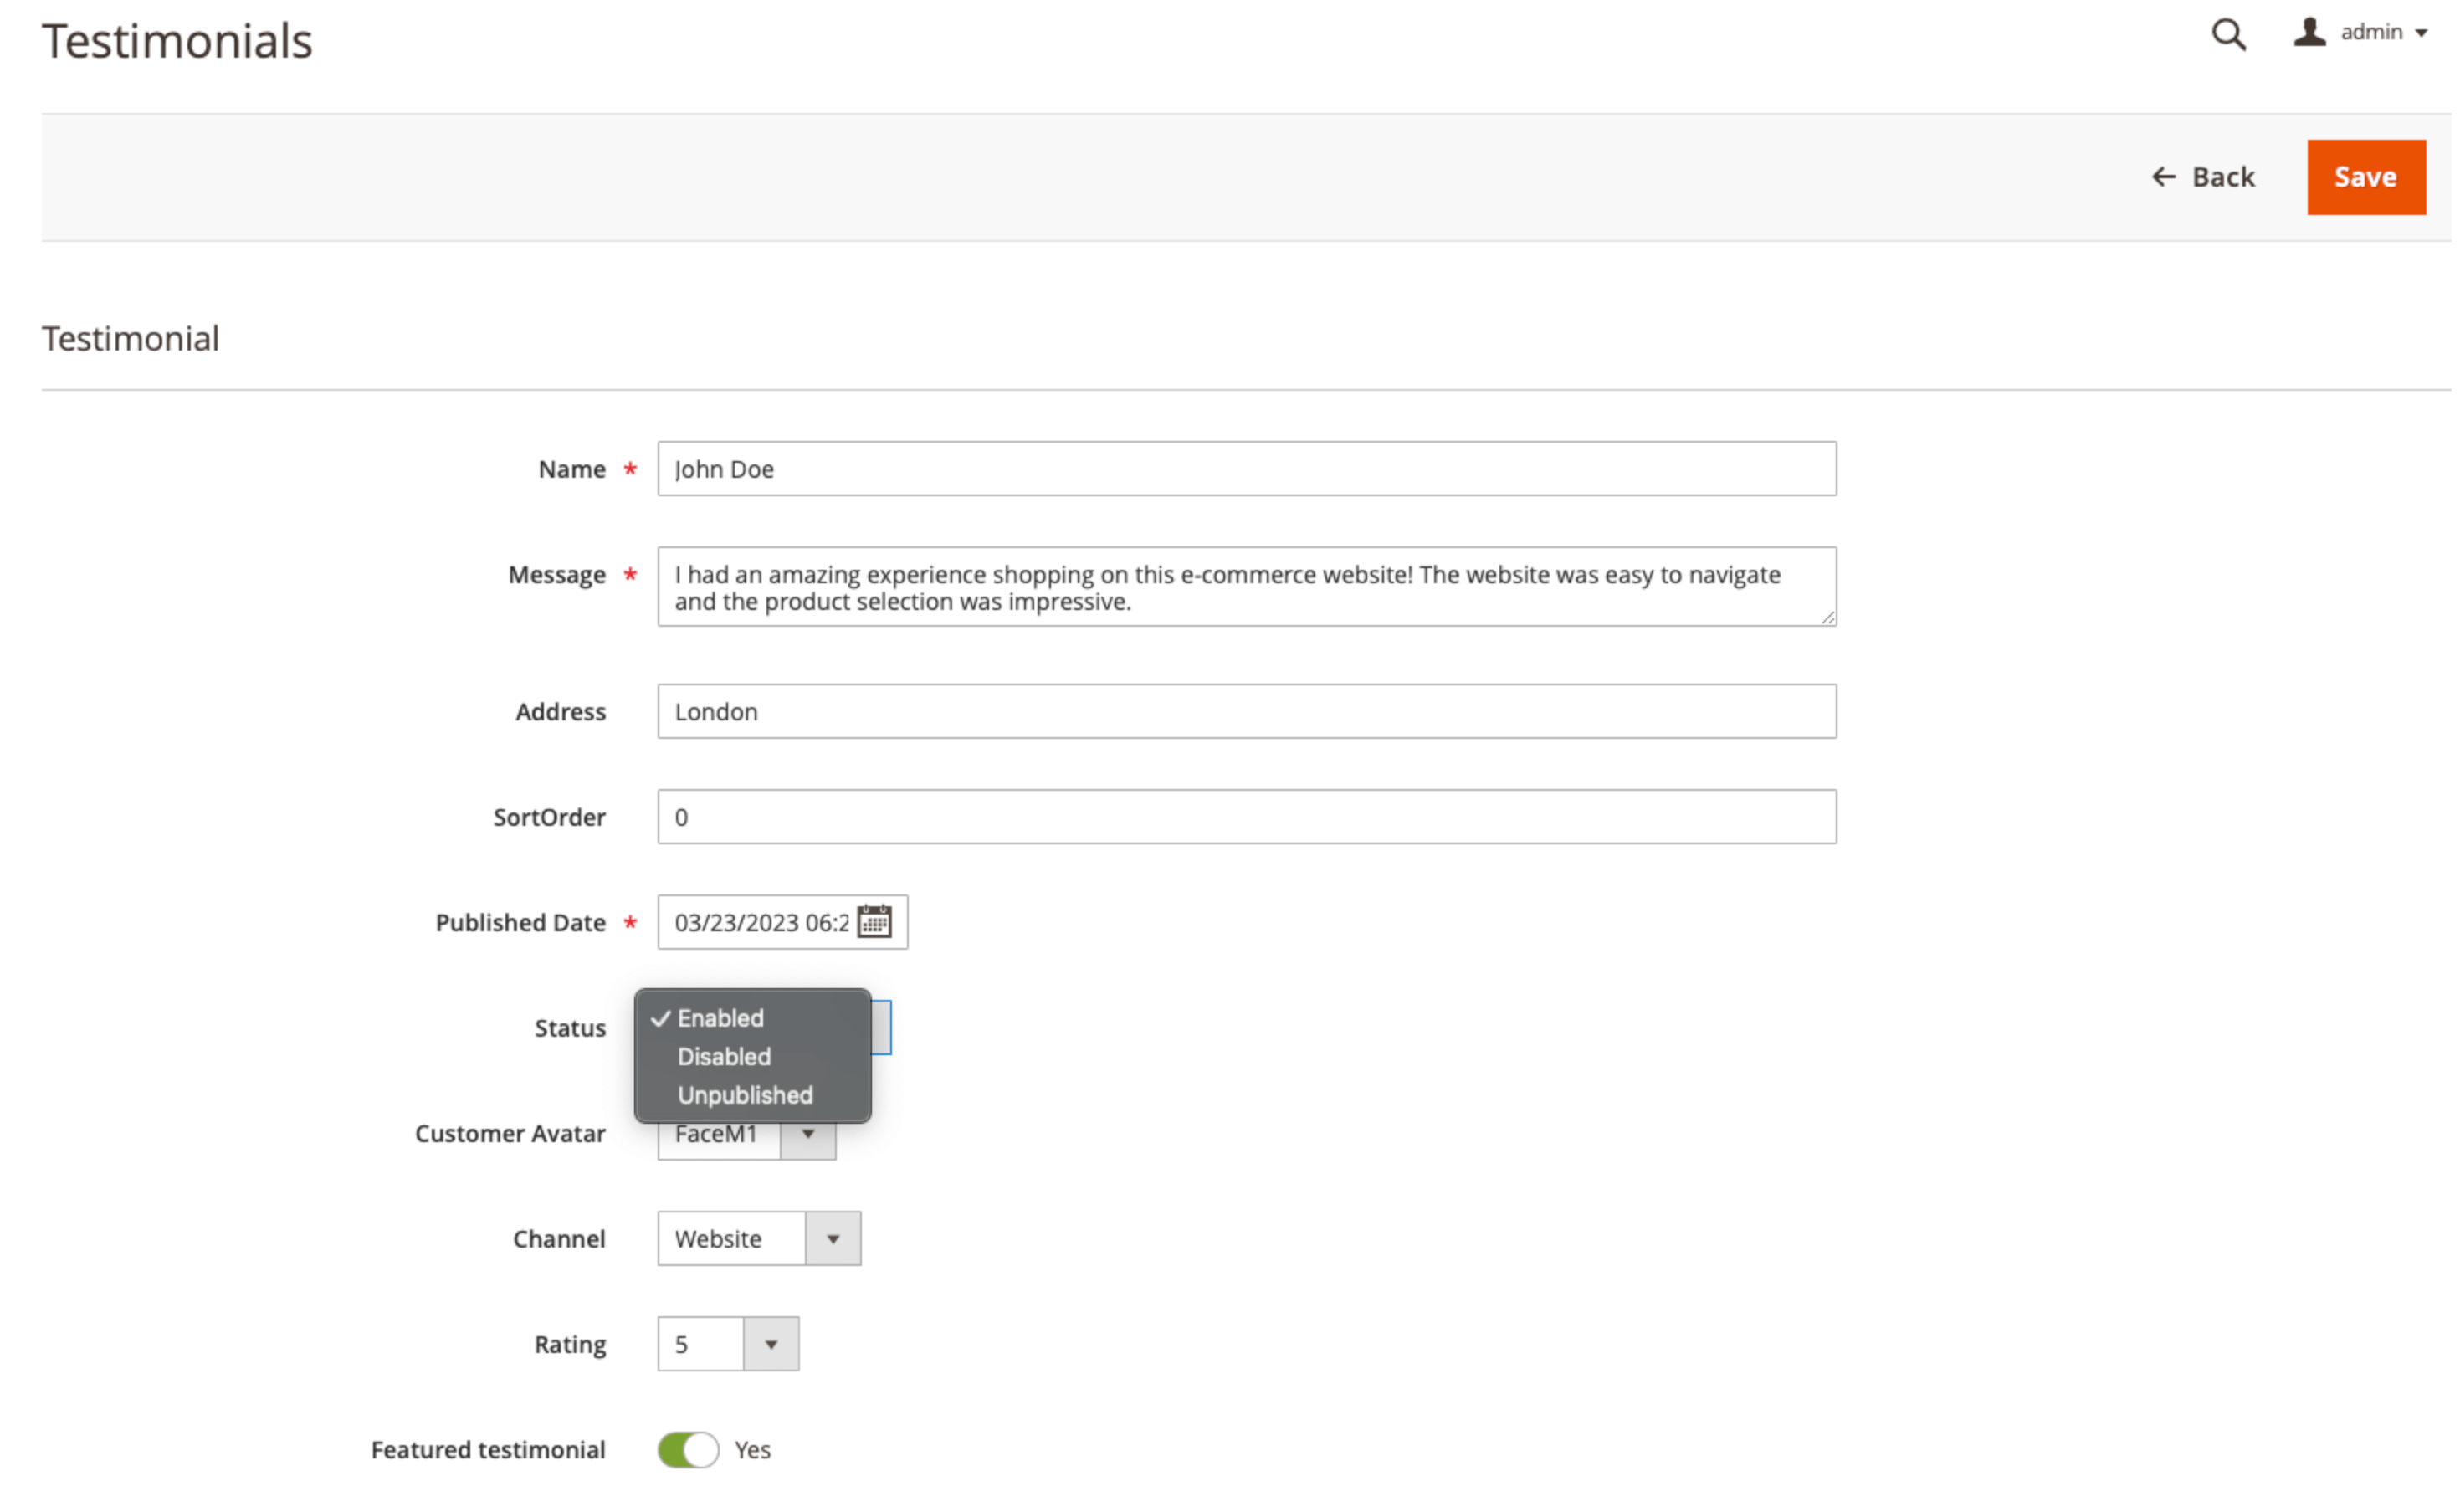
The Name will be displayed as the customer's name while the Message is the actual content of the testimonial. These are the most important fields to add
Location is an address or location (like city, state) of the customer.
SortOrder = From here, Admin can define the sort order of the Testimonial. By default, the value will be 0, and Testimonial will be displayed in descending order. This field is important only for the sort order in the widget block.
Published Date = Published date and time of Testimonial. By default, it adds the current server time. This field shows the sorting order of the testimonials on the testimonial's page if the sort order is set by the Most Recent option:
Note
The Published Date is not used in the widget, only on the testimonial's page. In the widget, if the SortOrder of 2 different testimonials is the same, they are being ranked by the time you update and save the testimonial.
Status. By default, when the customer creates the testimonial, it has the Unpublished status. The Admin decides whether to show this text (by selecting the Enabled option) or not (Disabled status).
Customer Avatar. From here, the admin can choose the customer's avatar which will appear on the frontend. Avatar management is explained further in the documentation.
Channel. Channel is the medium that customers use to submit testimonials (like Instagram, Facebook, etc.) From here, the admin can choose the channel which will appear on the frontend. Channel management is explained further in the documentation
Rating can be chosen from 1 to 5.
Featured Testimonial. The testimonial will be shown in the widget ONLY if it is set as Featured. On the testimonial page if the sort order is set by the Featured option, it will show only featured ones. The sort order of the featured testimonials in the widget depends on the SortOrder value and then (if it's the same) on the updated_time value. The sort order of the featured testimonials on the testimonial's page depends on the Published Date value.
Sorting Logic
| Testimonials Place | Sorting Logic |
|---|---|
| Widget | Only Featured testimonials. The sort order depends on the SortOrder value. If several testimonials share the same SortOrder value, then they are sorted based on updated_time value. If you wish to show some specific testimonial as the first one, just save it from the backend once again |
| Testimonials Page (Featured) | Only Featured testimonials. The sort order depends on the Published Date value |
| Testimonials Page (Most Recent) | All Enabled testimonials will be shown (regardless of their Featured status). The sort order depends on the Published Date value |
Add Custom Avatar
The module allows you to create different customer avatars which can be used in the testimonials. To view and add a new customer Avatar, please go to AITOC → Testimonials → Manage Avatar
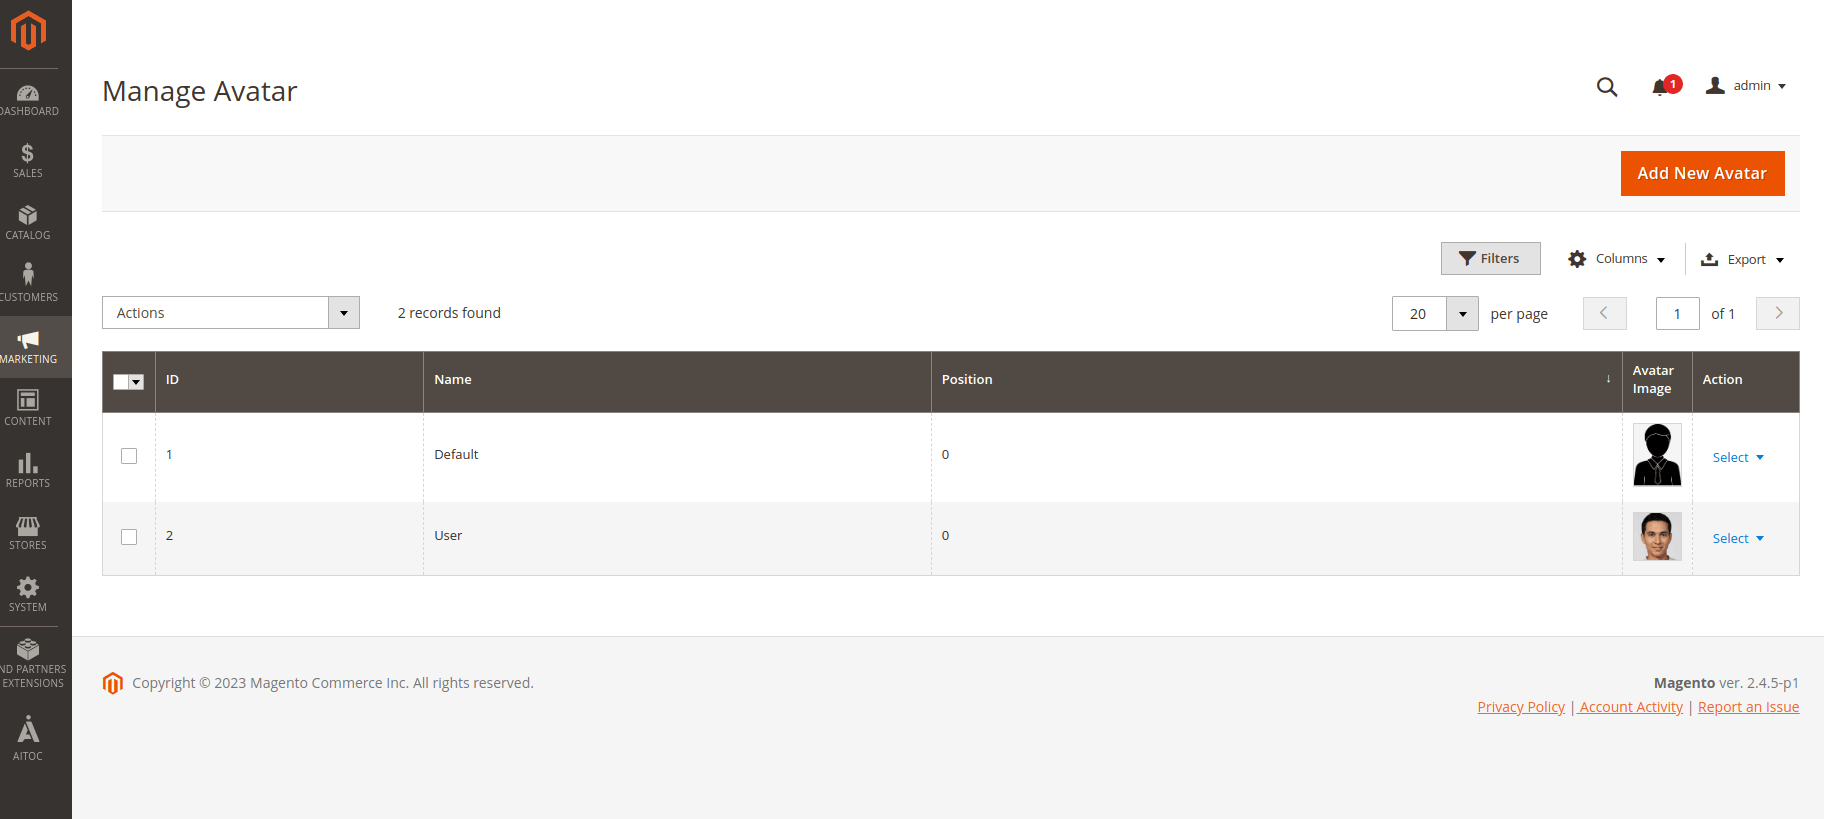
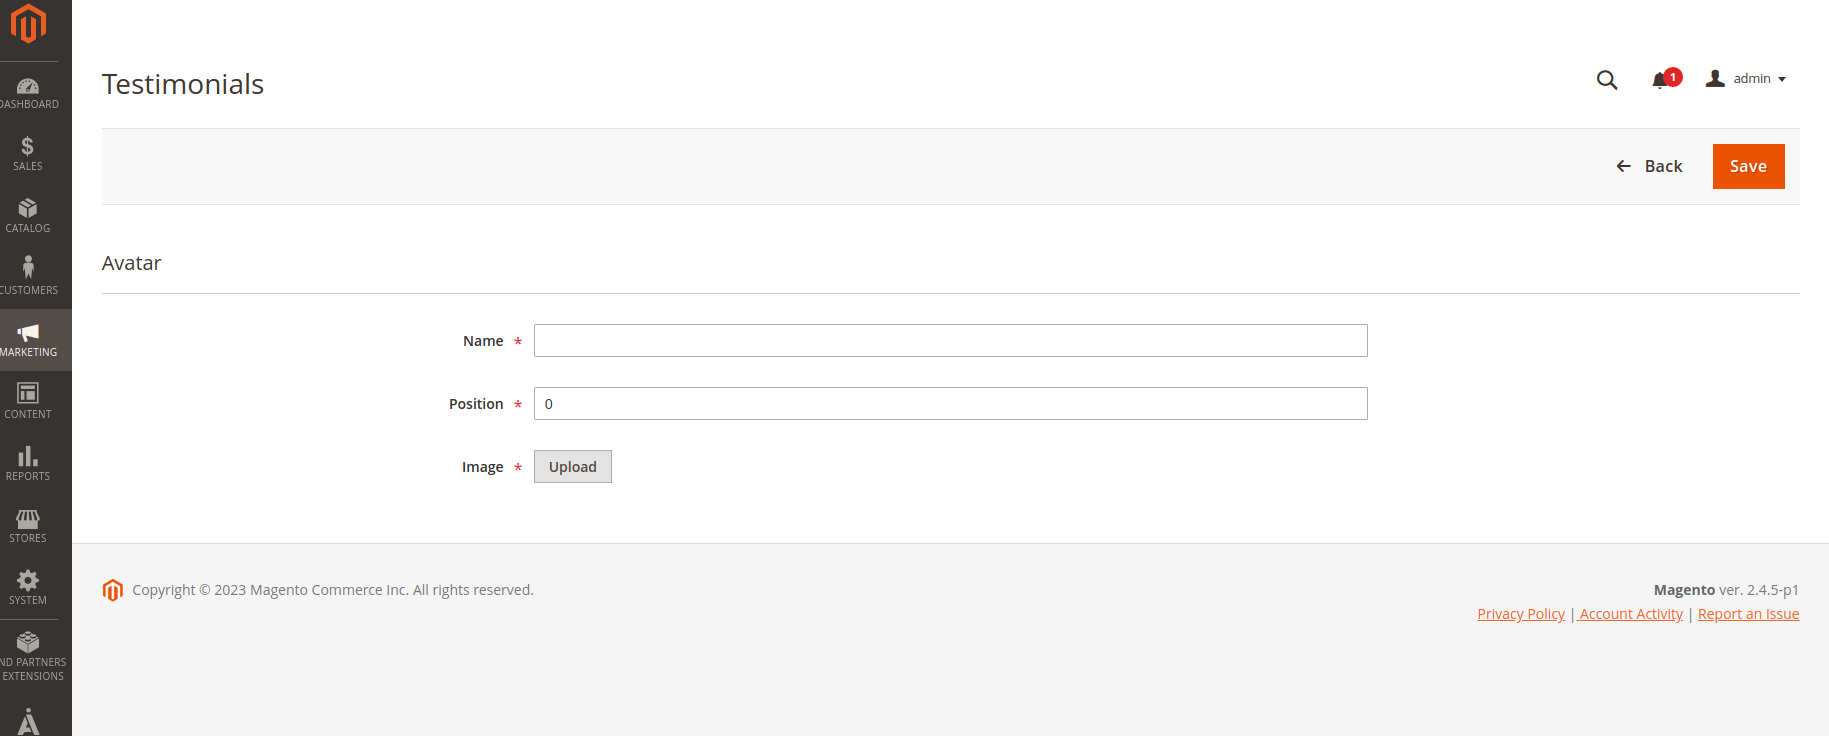
To create a new avatar, you should provide its name and upload an image. For each Testimonial (created by the Admin or by a customer from the frontend), all the added avatars will be available for selection, and the selected Avatar will appear in the Testimonial.
Add New Channel
You can create multiple channels from Admin. Channel is the medium that customers use to submit testimonials. To view and add a new Channel, please go to AITOC → Testimonials → Manage Channels.
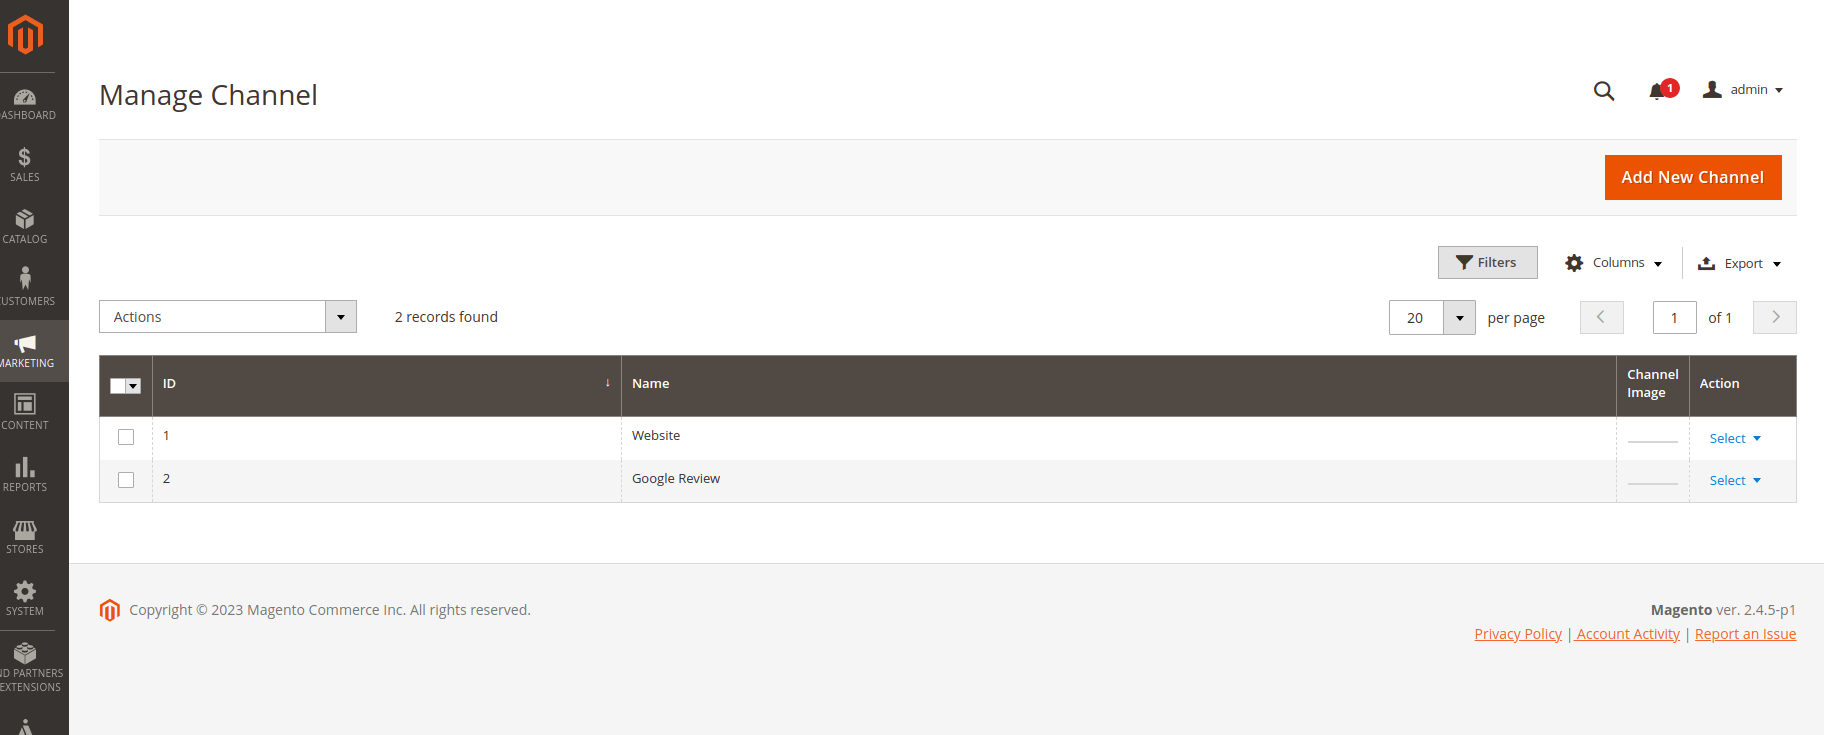
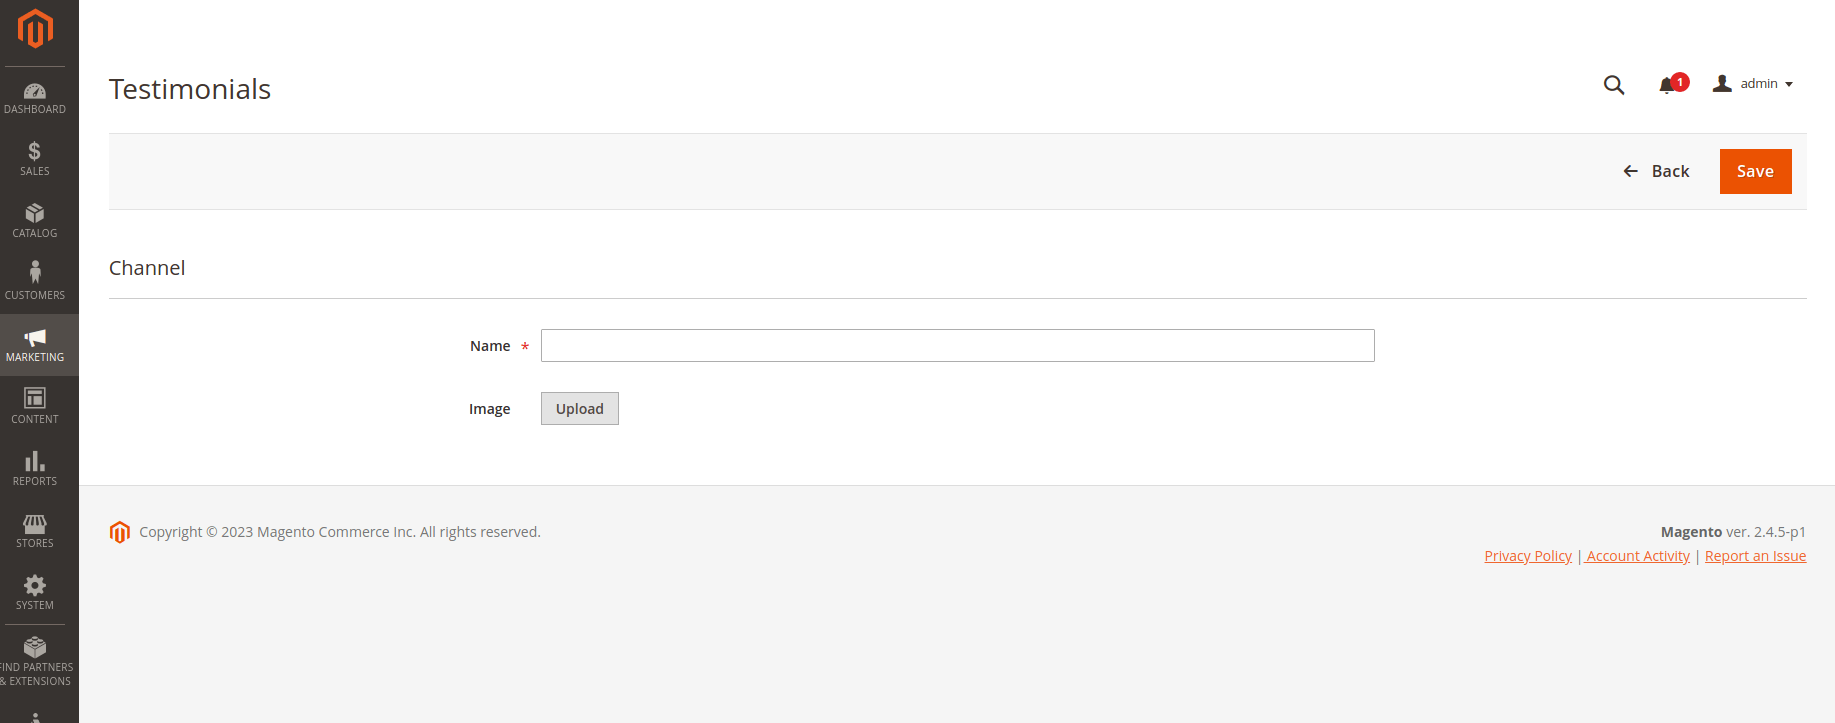
Here you can see all the existing created Channel names and assigned pictures. By clicking the Add New Channel button, you can create a new one. Each channel must have its name and may have the uploaded image.
Frontend Elements
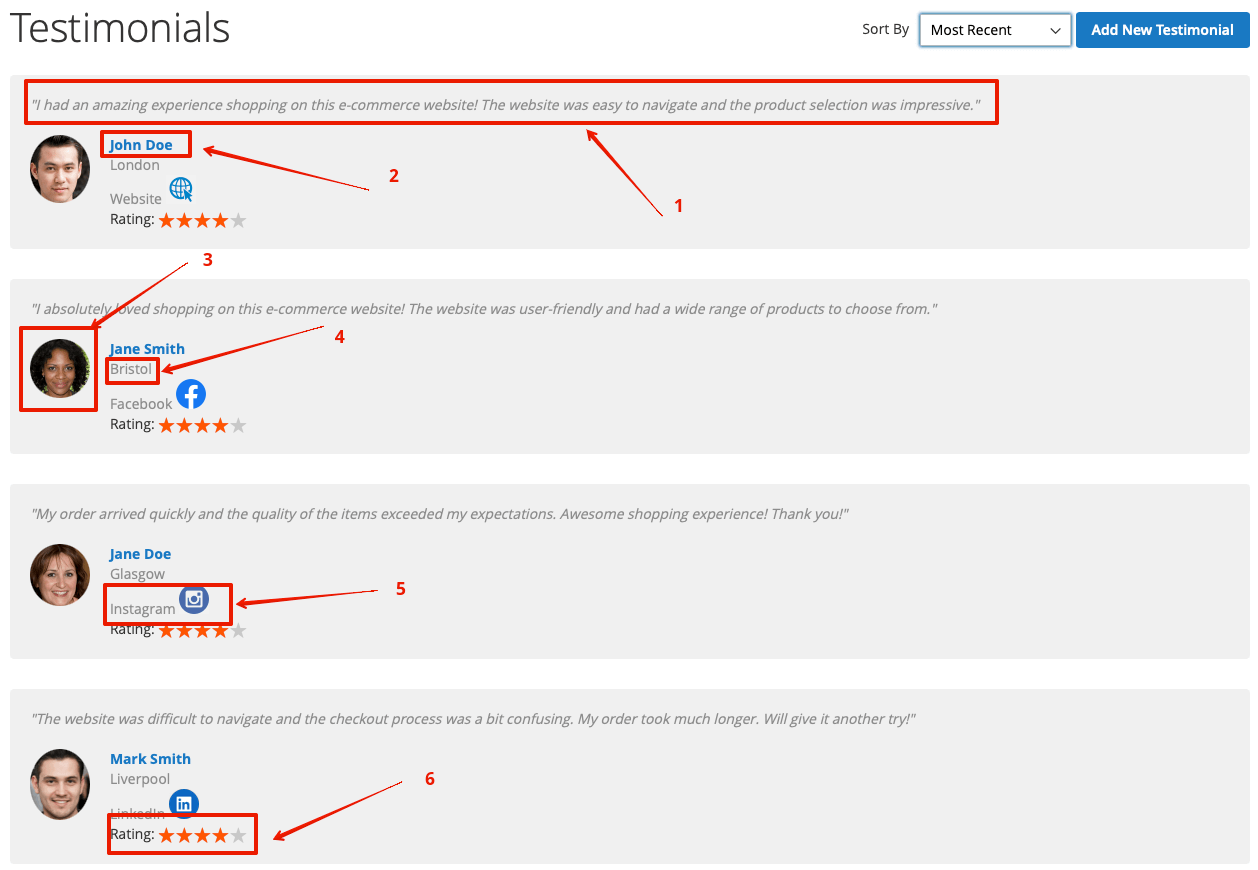
1 and 2 are the Message and the Name from the testimonial's configuration.
3 is the avatar that is chosen by the customer from the Add New Testimonial workspace or chosen by admin in the testimonial's configuration.
4 is the Location specified by the customer or the admin.
5 is the channel chosen in the testimonial's configuration.
6 is the rating value.