Easily move order data between Quickbooks and Magento 2
An accounting software package developed by Intuit, QuickBooks is a preferred choice for multiple small and mid-size businesses. Thanks to the availability of different versions and functionality, the solution able to satisfy almost any accounting needs. Currently, there are 4.3 million users of QuickBooks across the globe.
Owners of Magento-driven stores opt for QuickBooks, too. But concerns over efficient data transfer between QuickBooks and Magento often restrain store owners from installing this accounting solution.
Orders Export and Import, an Aitoc’s extension for Magento 2, can help Magento store owners remove these concerns by importing order data generated by Quickbooks to Magento. Read on this article to find out how to move orders from Quickbooks to Magento 2.
Order Data Export from Quickbooks
You need to export order data from Quickbooks first. This accounting software arms users with an extensive set of tools, and Reports is one of its most powerful features. Leverage this functionality to create and generate a custom report with all the required fields. Make sure to save it to use the report later on.
Quickbooks allows users to export reports. So open the newly created report and click the ‘Export’ button, and choose the appropriate file format for export. The format must be supported by the extension. It works with XML, CSV / Tab Separated and even Advanced CSV / Tab Separated formats.
Importing File to Magento 2
Edit the exported file to prepare it for importing to Magento. If you’ve already used this extension, you can open a previously exported file. If it’s your first time with Orders Export and Import, you need to export orders to see which column titles you need to use in the file instead of the existing ones.
Go to System > Extensions > Aitoc Export Orders. On the new page, hit the ‘Add New Profile’ button. You need to create a profile to make the first data export. Add a custom profile title and select a data format and the appropriate file export option (e.g., you may place the file on the local server).
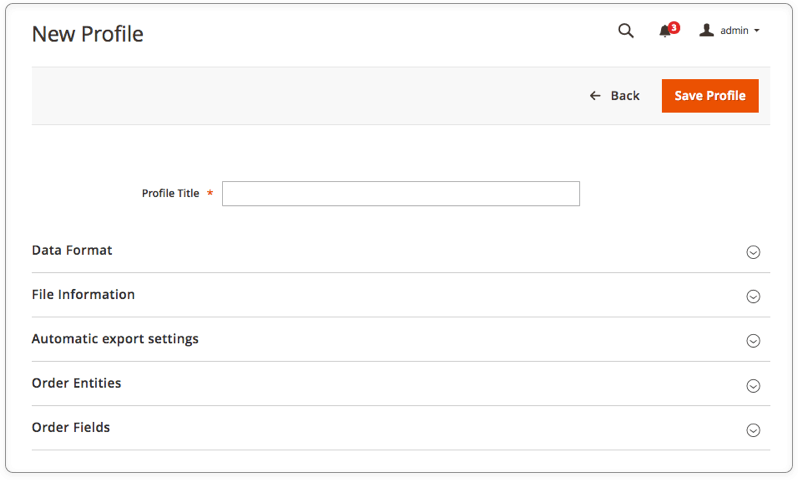
In the ‘Automatic Export Settings’ section, set ‘Export order’ to ‘Manual export from order grid’. You don’t need to automate data export in our case.
In the remaining ‘Order Entities’ and ‘Order Fields’ sections choose the necessary fields. Now you can save the profile.
Navigate to Sales > Orders to start the export. Find the newly created profile under the ‘Export All Orders’ dropdown. As soon as the file is generated, you can open it to check columns’ titles. One more tip: to eliminate any errors during file import, double check that all the columns with the orders come first in the file.
To import the edited file to Magento, navigate to System > Extensions > Aitoc Import Orders. Click the ‘Import New File’ button to configure the upcoming import. Set ‘ Try to import orders to corresponding store views’ to ‘No’, as there are no Store Views in your file.
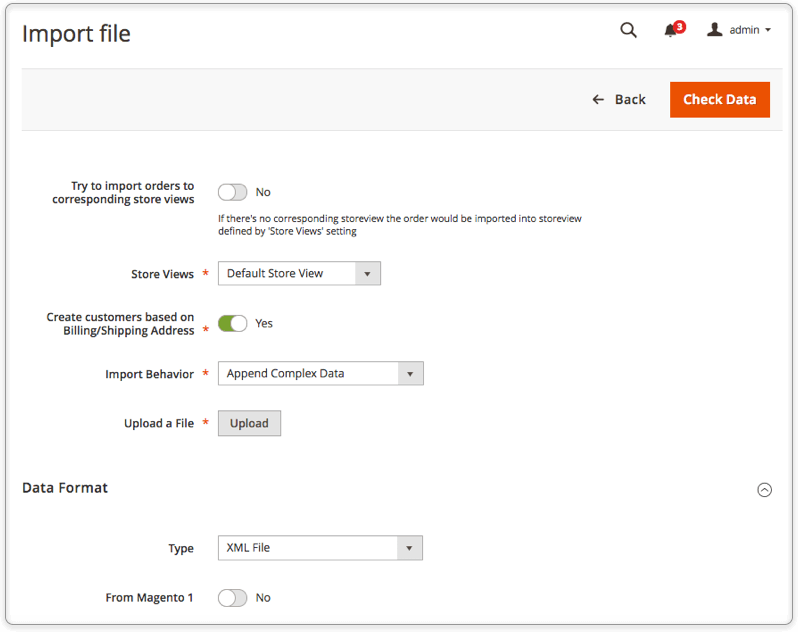
Choose the required Stove View in the next field. You can also allow the extension to create customers based on their billing/shipping address available in your file.
The next step is to specify the necessary import behavior: we recommend using the ‘Append Complex Data’ option unless you would like to replace existing orders with orders with the same IDs from the imported file or delete all orders which IDs match the ones in the file.
Select the file format and set ‘From Magento 1’ to ‘No’ and upload your file. Now you may hit the ‘Check File’ button at the top of the page. Once the file is checked, you may click to the ‘Start Import’ button to import your file to Magento 2. Here is how the order data transfer between Quickbooks and Magento 2 works.
Conclusion
Quickbooks is a great solution enabling both offline and online merchants to efficiently manage their accounting activities. We hope that our tutorial has shown you that all these issues can be solved with Orders Export and Import.
