Orders Export & Import
Description
The Orders Export & Import module allows orders to be exported as well as imported on your Magento 2 store. Orders from other eCommerce platforms can also be imported on Magento 2 website using this module. The module allows the export or import of any number of orders in one click. Also, the module provides functionality to create customer accounts automatically based on billing info available in imported orders.
Compatibility
Orders Export & Import module is compatible with the following Magento platforms:
| Community Edition (Open Source) | Enterprise Edition (Commerce) | Cloud Edition |
|---|---|---|
| 2.3.0 - 2.4.* | 2.3.0 - 2.4.* | 2.3.0 - 2.4.* |
Installation
Installing module using zip file
- Unzip and paste the extension file into your root Magento folder.
- Connect to your server by SSH.
- Go to your Magento root folder.
- To install the extension, perform this command:
php bin/magento setup:upgrade
php bin/magento setup:di:compile
php bin/magento setup:static-content:deploy
Composer installation
If you haven't installed any Aitoc module before, in that case first you will need to add your Aitoc composer repository. Please go through the document to see how you can add a composer repository.
To install the module, you will need to run the following commands:
composer require aitoc/orders-export-import
php bin/magento setup:upgrade
php bin/magento setup:di:compile
php bin/magento setup:static-content:deploy -f
- To switch the extension on/off, perform these commands:
php bin/magento module:enable Aitoc_OrdersExportImport
php bin/magento module:disable Aitoc_OrdersExportImport
- To update the module, use below command:
composer update aitoc/orders-export-import
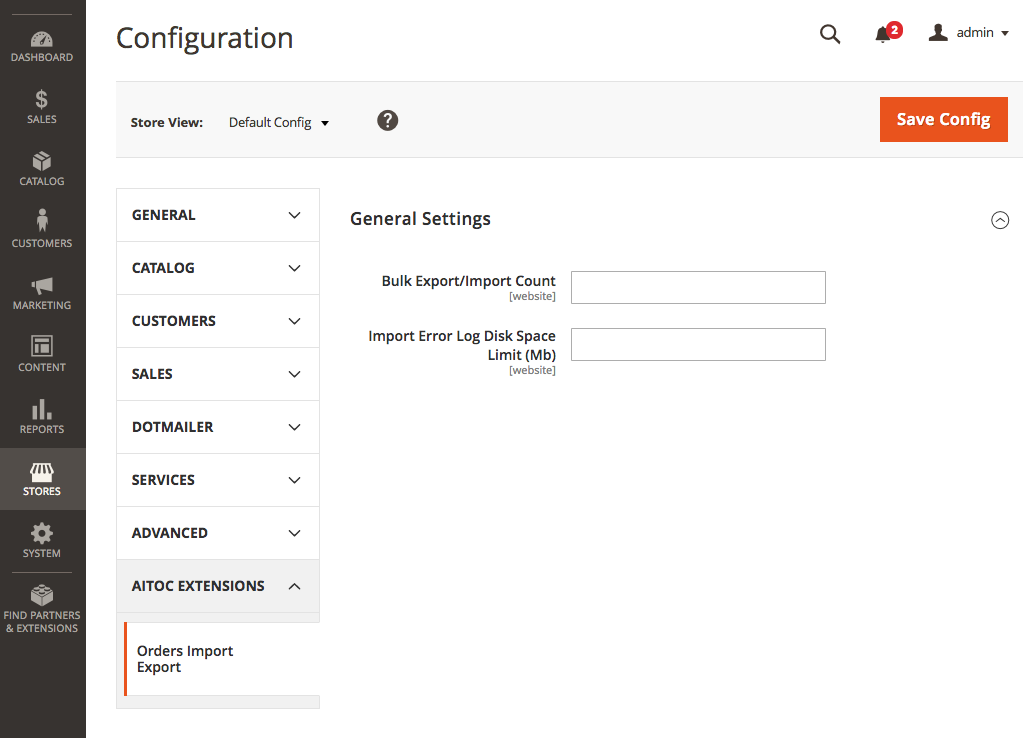
Config settings
STORES > CONFIGURATION > AITOC EXTENSIONS > Order Export & Import
Note
Here you can limit the number of orders processed during a single cron job. If left blank, the module will take the default value of 50.
You can set this value lower if your server is overloaded during export/import operation.
Note
If you limit the disk space for the log, the system will warn the admin each time during the import operation that this limit is reached.
This helps prevent the log files from taking a lot of server disk space.
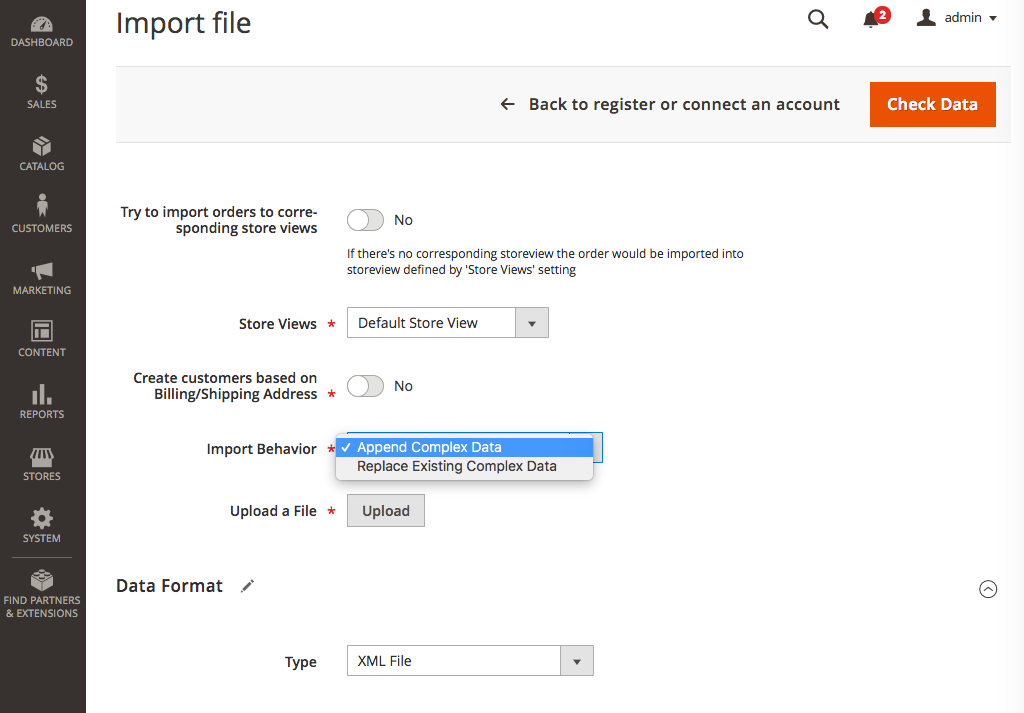
Configuring import
SYSTEM > Order Export & Import > Import Profile
Note
Once the uploaded import file is checked to have the correct format and structure, you’ll be able to start the import operation.
Note
- “Append Complex Data” mode can be used if orderID is not present in your current Magento.
- “Replace Existing Complex Data” mode can be used to replace orders info if you import orders with OrderIDs that already exist in the system.
Note
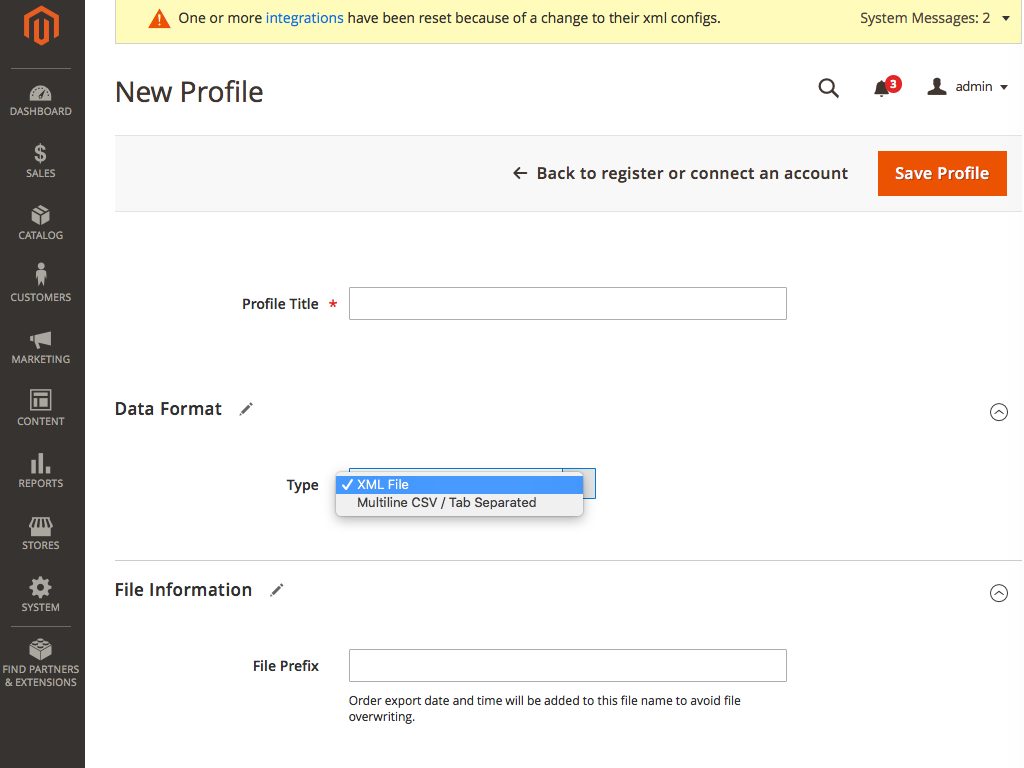
Type format should be relevant to an uploaded file.
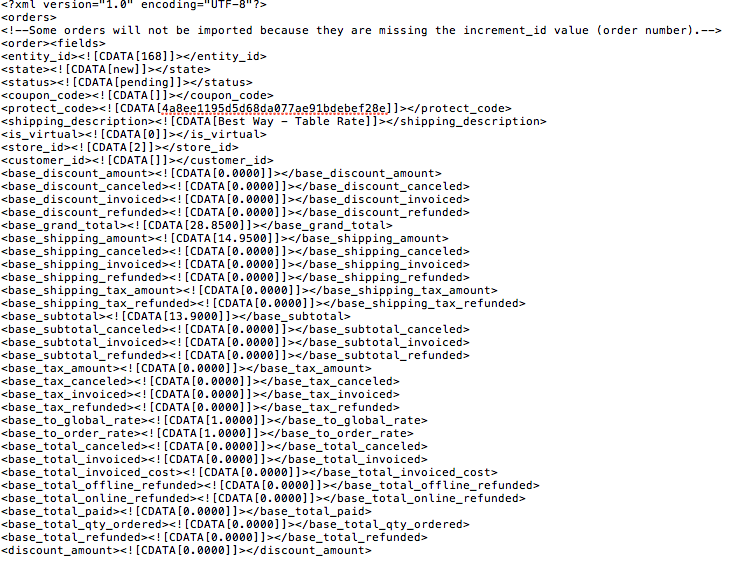
Sample Import File:
You need to make sure that the import file you are using is having the same structure as per the above sample files. You can use the above sample file as a reference and prepare the import file.
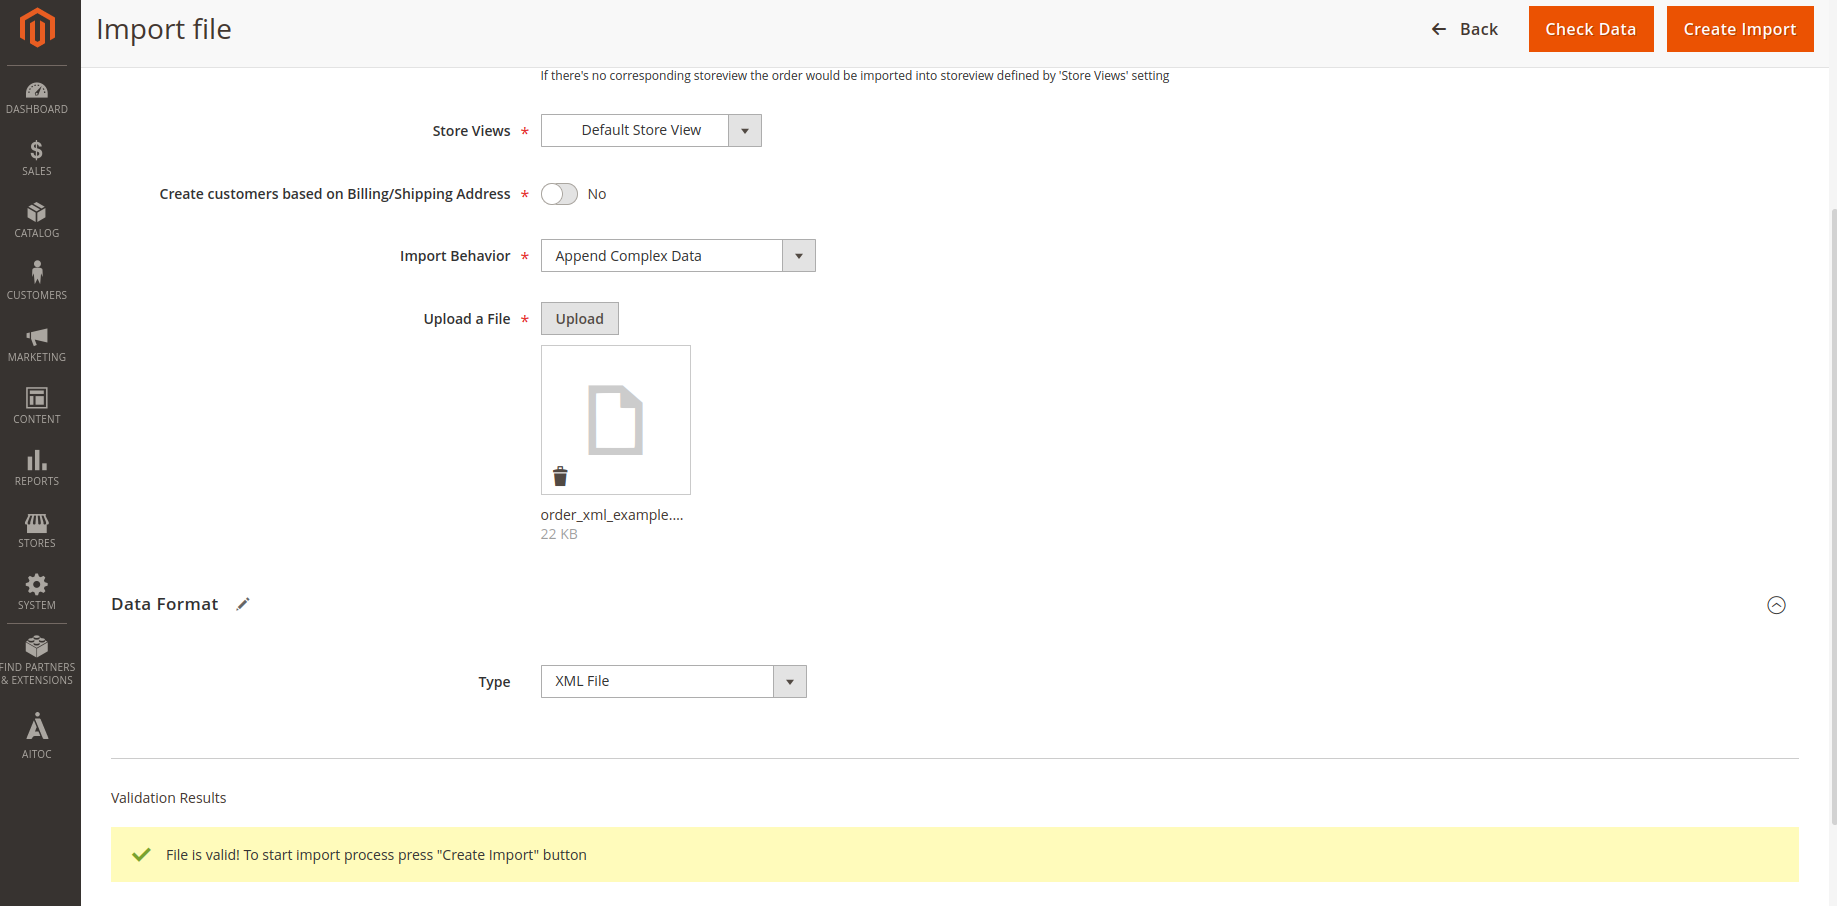
How to import orders
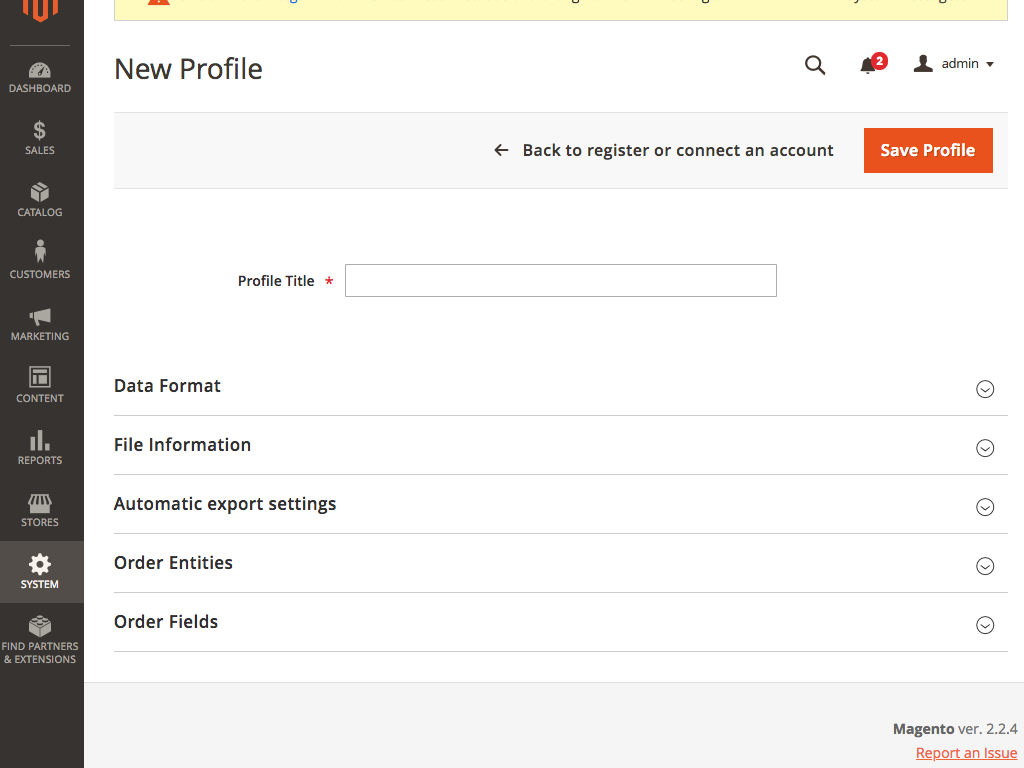
- Goto System > Order Export & Import > Import Profiles.
- Create new profile
- Select all fields value as required.
- Upload the order import file and select the type of file that has been uploaded
- After uploading the file, click on the "Check Data" button. After clicking on the button module will cross-check the uploaded import file and the file is correct, it will show the "Create Import" button. Clicking on this button will start the order import process.
- On System > Order Export & Import > Import Profiles, the profile will get saved. To import the order data, click on the Force Run button, and order data will be imported.
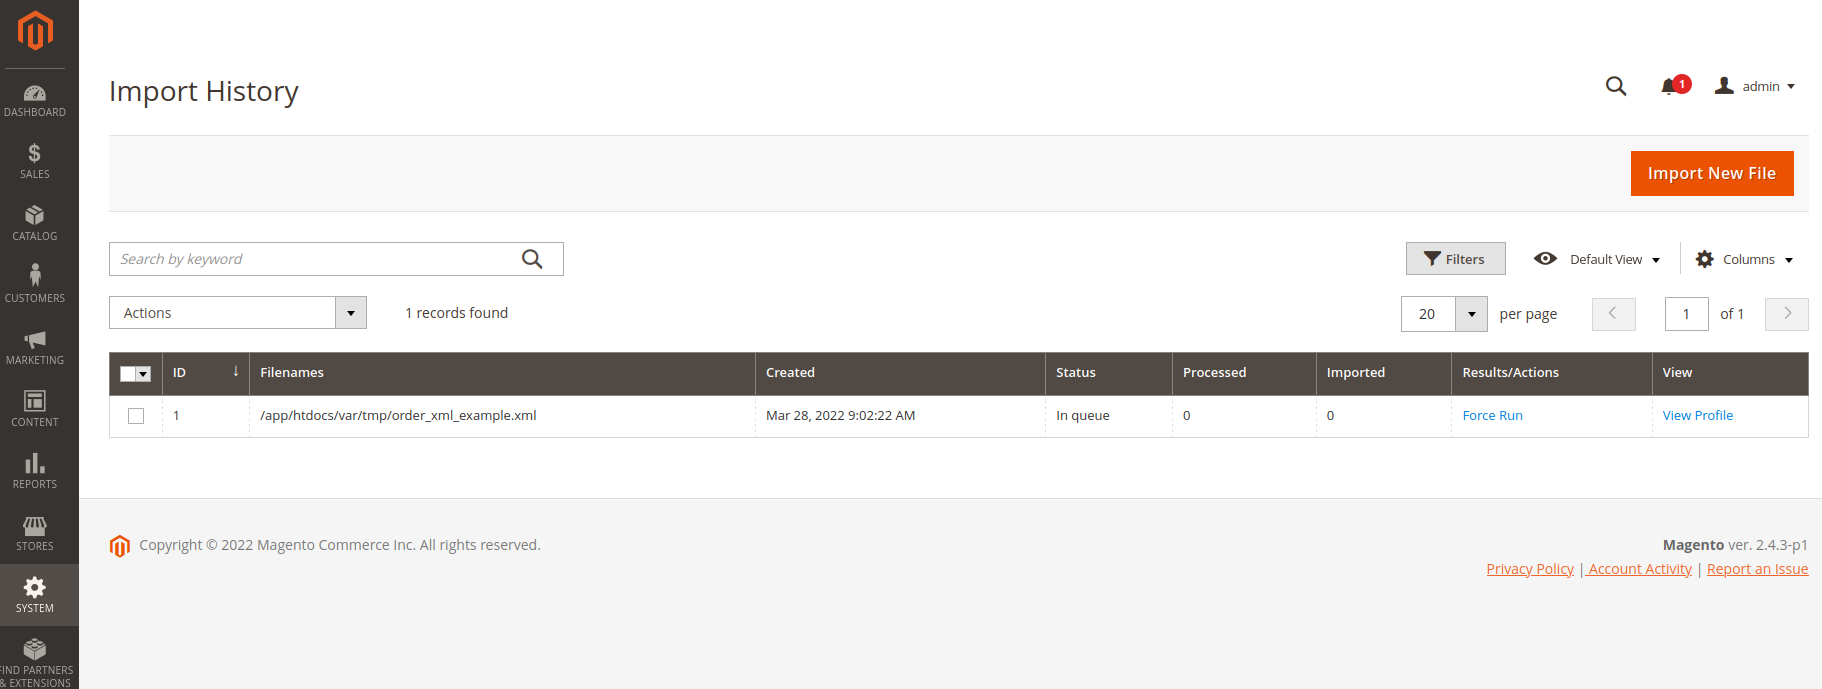
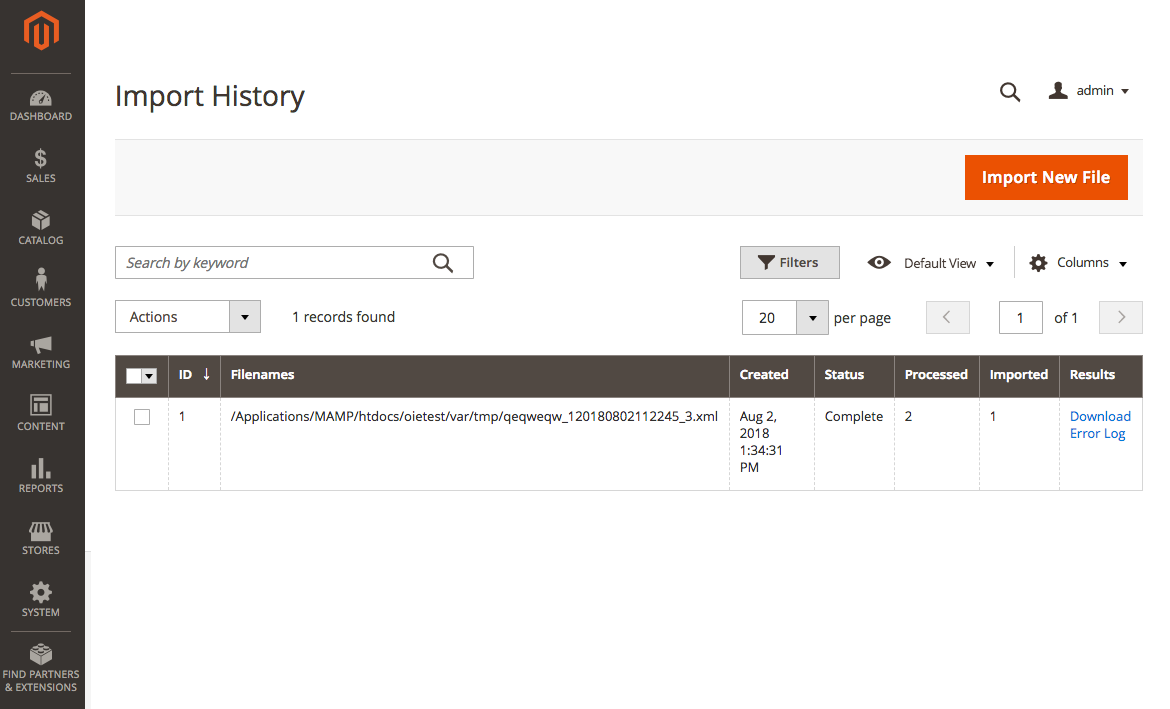
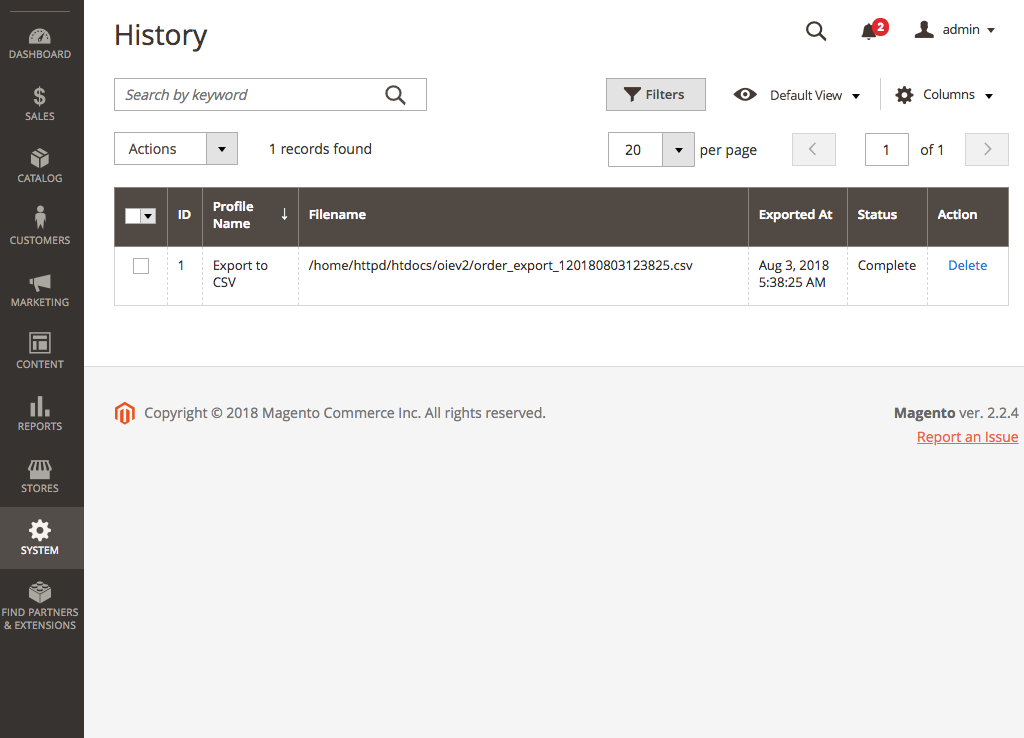
Order Import History and the Processor tab
SYSTEM > Order Export & Import > Import Profile
Note
If some of your orders did not import during the operation, you’ll be able to download the error log and find the reason.
Managing Order Export profiles
SYSTEM > Order Export & Import > Export Profile
Note
Create a new export profile to start exporting your orders.
The list of all your export profiles will be here.
You can edit or delete your existing export profiles.

Configuring Export output
SYSTEM > Order Export & Import > Export Profile > Add new Profile
- Set the format of the export file. You have .xml .csv and .csv (multiline) to choose from.
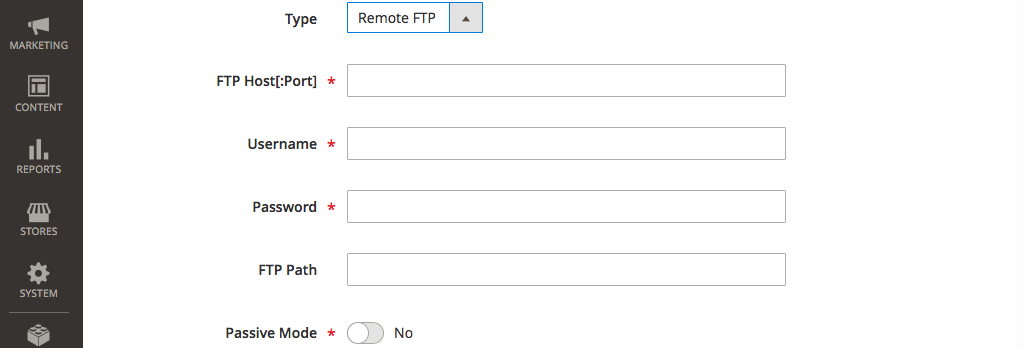
- Choose where your export file will be stored. You have three options: Local Server, Remote FTP and Email.
- Choose between manual or automatic export operation setup.
- Select which order entities should be included in the export file. You have four categories here: Orders, Invoices, Credit Memos, Shipments.
- Select which order fields should be included in the export file. If you’re going to import this file into a Magento 2 instance, we recommend checking all options here.
Configuring export output / File Information
Note
The extension supports exporting an XML file. It is a preferred data format for order migration between different Magento versions.
Please note that CSV files may have various formats.
For example, you can open a file in Microsoft Excel and then save it in the same CSV format without any changes. As a result, you get a file with a new data structure. The CSV file should be edited in the plain text editor.
Multiline CVS format makes order entries management more convenient.
Note
Order Export file will be placed on remote FTP. Please note that creating an export file may take several minutes.
Configuring export output / Data Format
Note
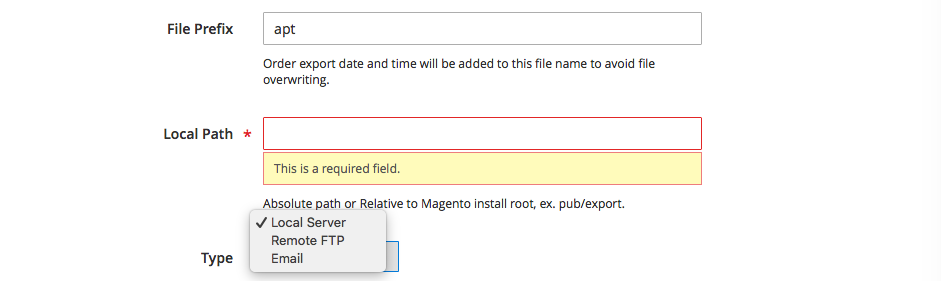
Order Export file will be placed on the local server in “Path folder” with filename “File Prefix“_YYYY-MMDDHHMMSS.ext You can download the file when the export is complete.
Note
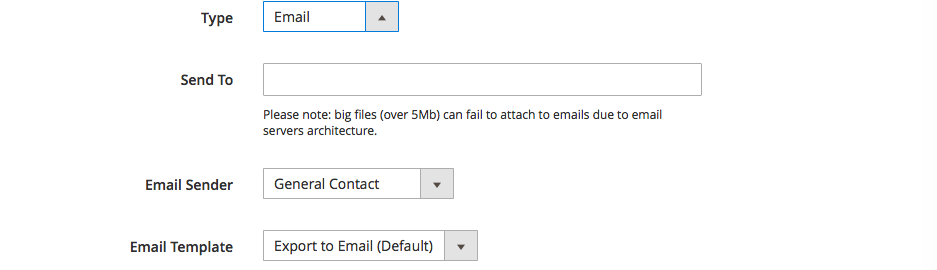
You’ll get an email with the export file attached. You can edit email templates using MARKETING > EMAIL TEMPLATES. Please note that creating an export file may take several minutes.
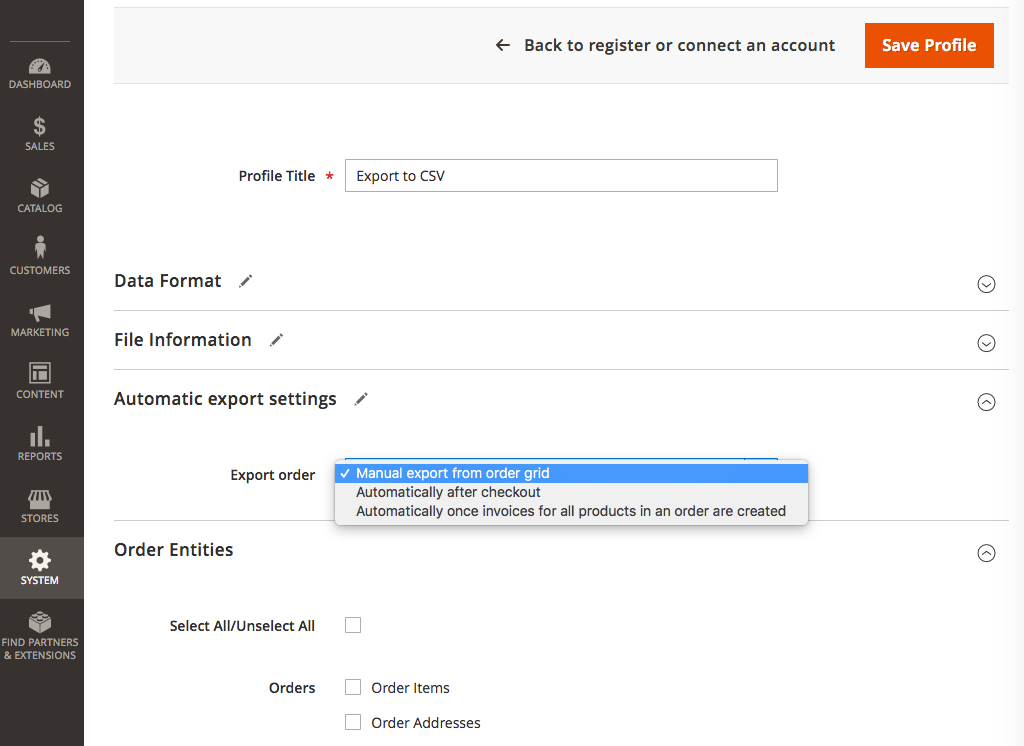
Configuring export output / Automatic export settings
Note
The automatic exporting can be triggered by different types of events. You can select one of them if automatic exporting is needed.
The procedure of manual exporting
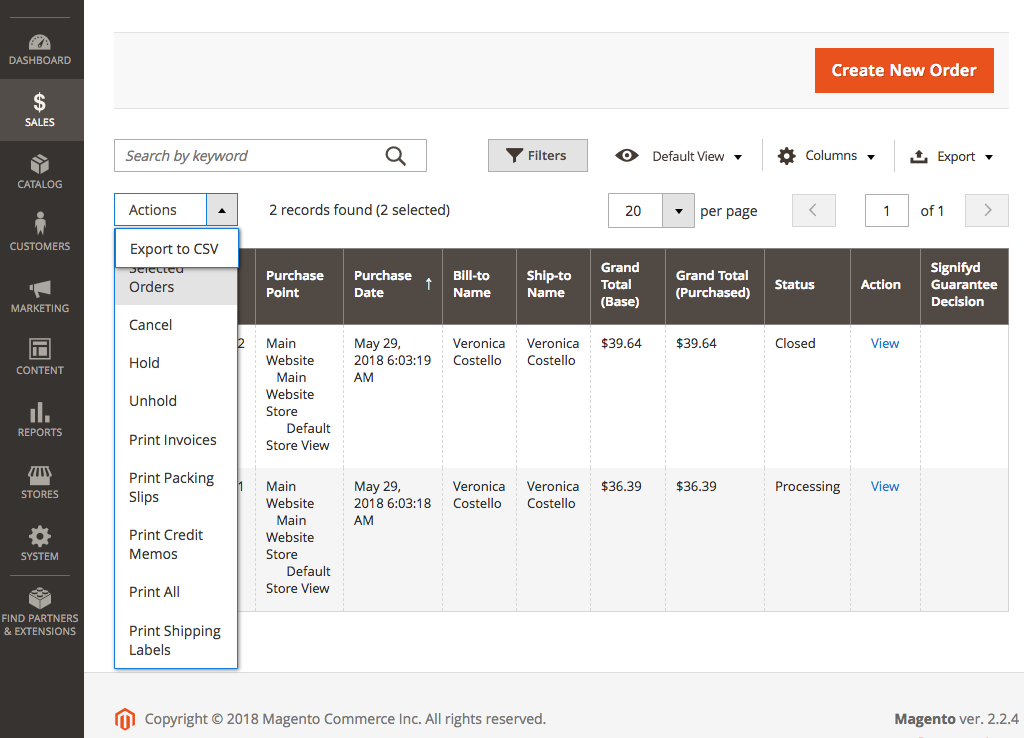
SALES > ORDERS
Note
Apply necessary filters, choose the orders you’d like to import, and select your import profile.
Order Export History and the Processor tab
SYSTEM > Order Export & Import > Export History
Error Log
GDRP compliance
To ensure GDPR compliance to your customers, you need to have an option to state/delete their personal data upon request. The current module allows you to export and import your orders which contain the following data about your customers:
Customer’s name
Customer’s phone
Customer’s billing address
Customer’s shipping address
The website admin sets the path in the Export profile where this data is stored.
THANK YOU FOR CHOOSING AITOC EXTENSIONS!