Checkout Fields Manager
Description
Checkout Fields Manager allows store owners to modify the checkout page and add different types of extra fields. These fields enable store owners to collect customer information and gain valuable insights. Information gathered from custom checkout fields can be further analysed and used as a foundation for new email campaigns, updates of pricing and shipping policies, customer segmentation and product positioning, and many others.
Compatibility
Checkout Fields Manager module is compatible with the following Magento platforms:
| Community Edition (Open Source) | Enterprise Edition (Commerce) | Cloud Edition |
|---|---|---|
| 2.3.0 - 2.4.* | 2.3.0 - 2.4.* | 2.3.0 - 2.4.* |
Installation
Installing module using zip file
- Unzip and paste the extension file into your root Magento folder.
- Connect to your server by SSH.
- Go to your Magento root folder.
- To install the extension, perform this command:
php bin/magento setup:upgrade
php bin/magento setup:di:compile
php bin/magento setup:static-content:deploy
Composer installation
If you haven't installed any Aitoc module before, you will first need to add your Aitoc composer repository. Please review the document to see how you can add the composer repository.
To install the module, you will need to run the following commands:
composer require aitoc/checkout-fields-manager
php bin/magento setup:upgrade
php bin/magento setup:di:compile
php bin/magento setup:static-content:deploy -f
- To switch the extension on/off, perform these commands:
php bin/magento module:enable Aitoc_CheckoutFieldsManager
php bin/magento module:disable Aitoc_CheckoutFieldsManager
- To update the module, use below command:
composer update aitoc/checkout-fields-manager
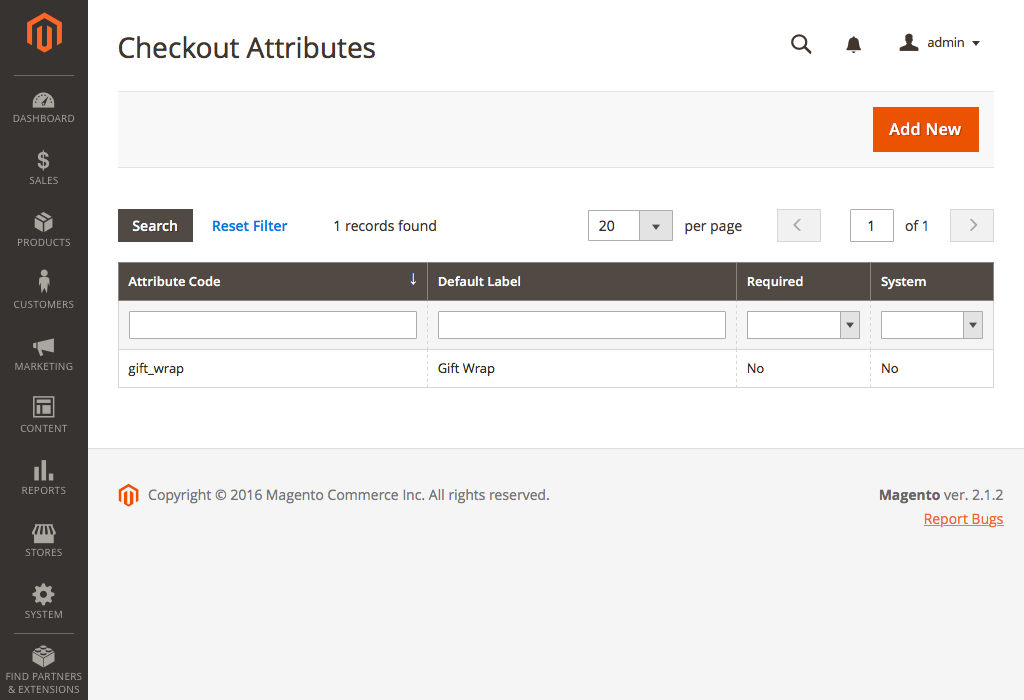
Checkout Attributes
Go to Admin → AITOC → Aitoc → Checkout Fields Manager → Checkout to create a new Attribute or edit an existing one. Alternatively, the page can also be found in STORES → ATTRIBUTES → CHECKOUT.
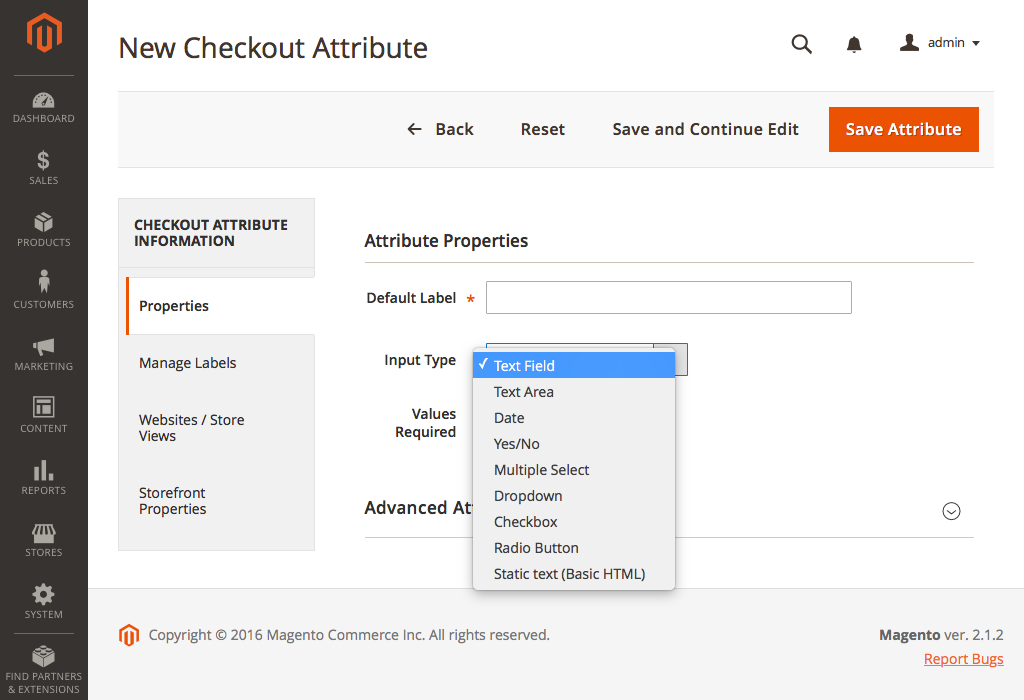
The “Properties” tab
Admin → AITOC → Aitoc → Checkout Fields Manager → Checkout
Note
The extension supports the following attribute input types: Text Field, Text Area, Date, Yes/No, Multiple Select, Dropdown, Checkbox, and Radio Button.
Admin → AITOC → Aitoc → Checkout Fields Manager → Checkout → Edit “Gift Wrap”
Note
Once you fill out all the necessary fields in the Properties tab, go to Manage Label/ Options to add a title and a description for your new field.

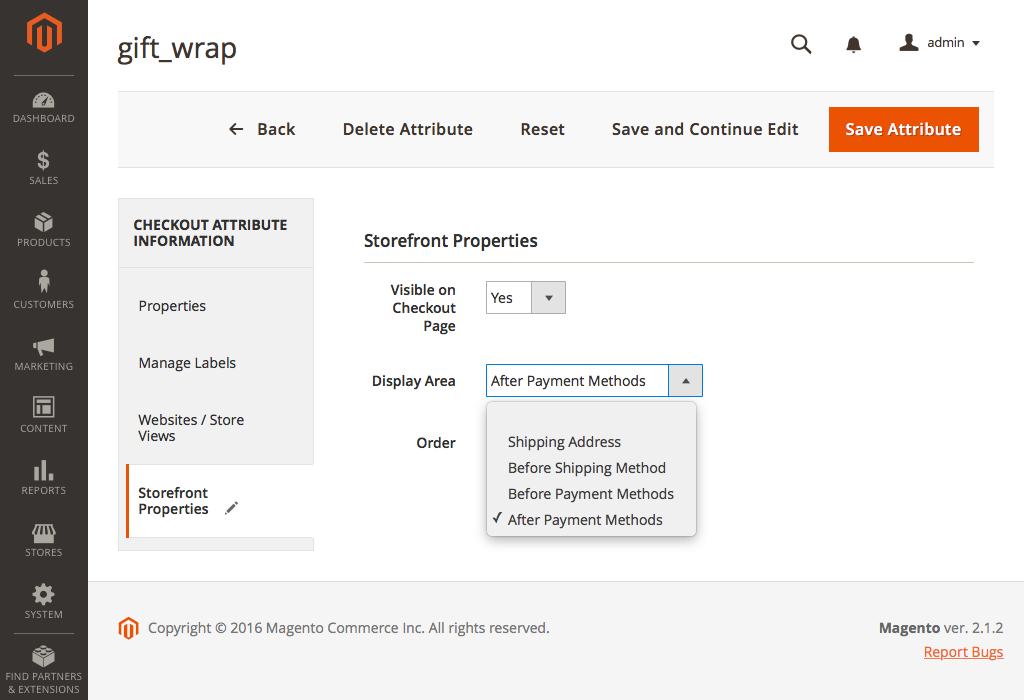
The “Storefront Properties” tab
Admin → AITOC → Aitoc → Checkout Fields Manager → Checkout → Edit “Gift Wrap”
Note
Specify at which checkout step your custom attribute should be displayed.
Note
In the Websites / Store Views tab, you can select what store to display the attribute.
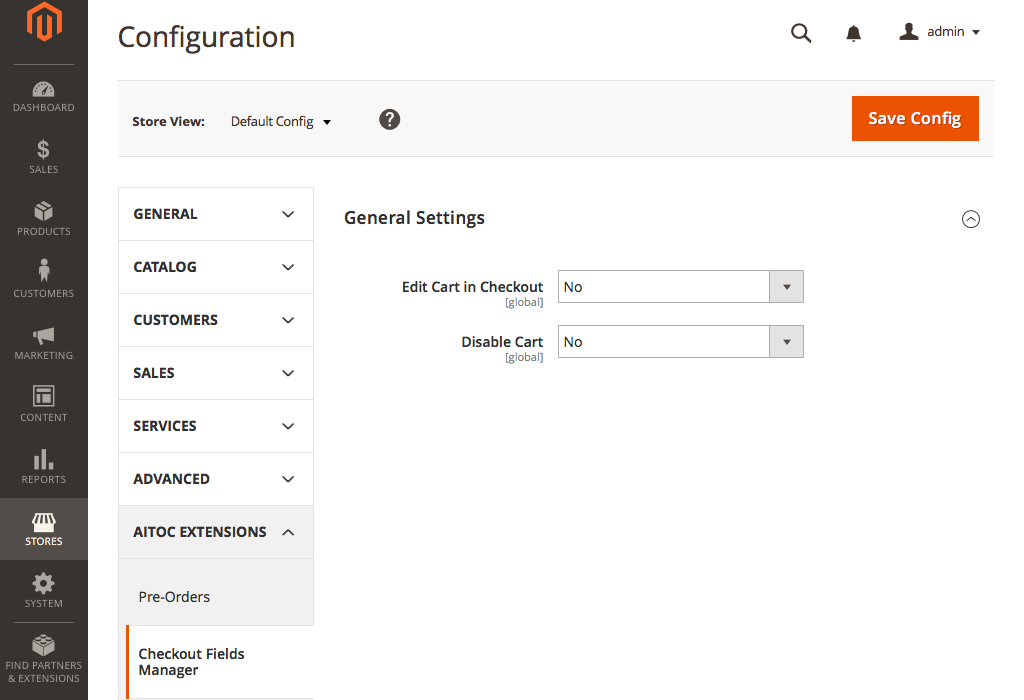
Configuring the extension's General Settings
Admin → AITOC → Aitoc → Checkout Fields Manager → Configuration
Note
The respective settings below enable the Admin to restrict cart editing at checkout within the sidebar and disable cart for customers to proceed to checkout instantly.
Email Template changes
To display the created checkout attributes on the order email template, you must change the email template configuration. Otherwise, the created checkout attributes won't appear in the email template.
Change the existing used Email Template.
The module, by default, provides its email template, which you can use, and the created checkout attributes will appear in the order email.
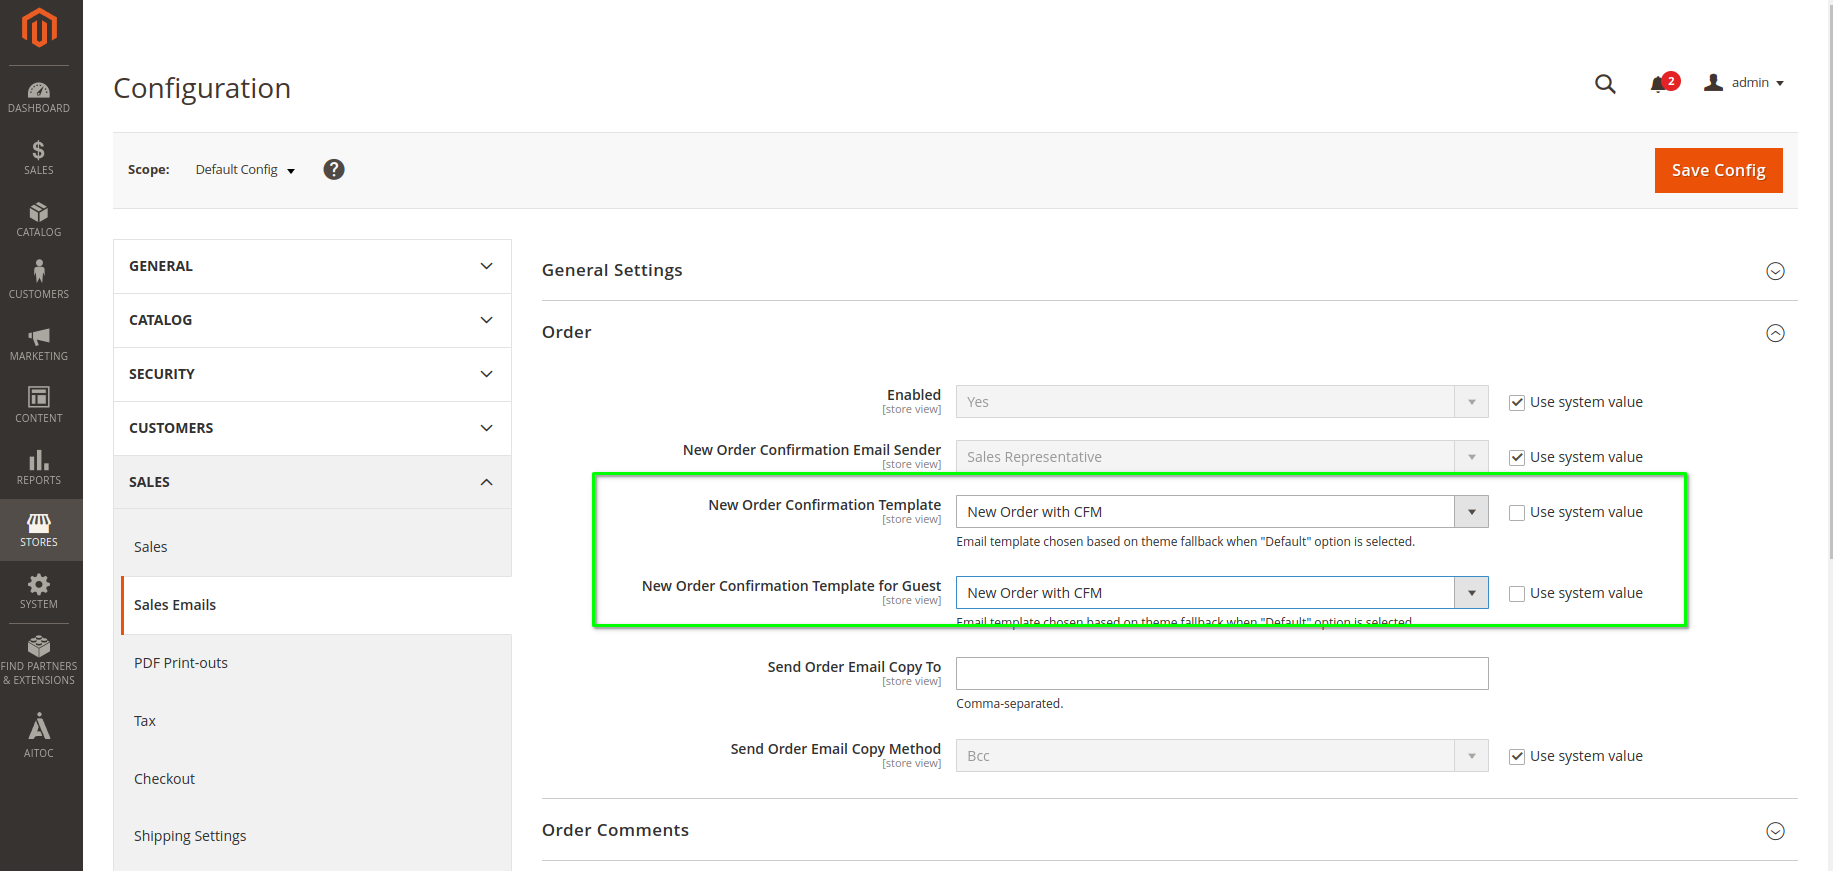
Path: Admin > Stores > Configuration > Sales > Sales Email. For Order emails, you need to change the existing email template and use the "New Order with CFM" template with the module.
Add a variable in your existing email template to display checkout attributes.
Suppose you use a custom email template (not the default) and want to display the created checkout attributes in that email template. In that case, you will need to add the following code to your existing email template.
{{layout handle="cfm_email_order_additional_fields" order_id=$order_id area="frontend"}}
By adding this code, your existing email template will show the checkout attribute and its value.
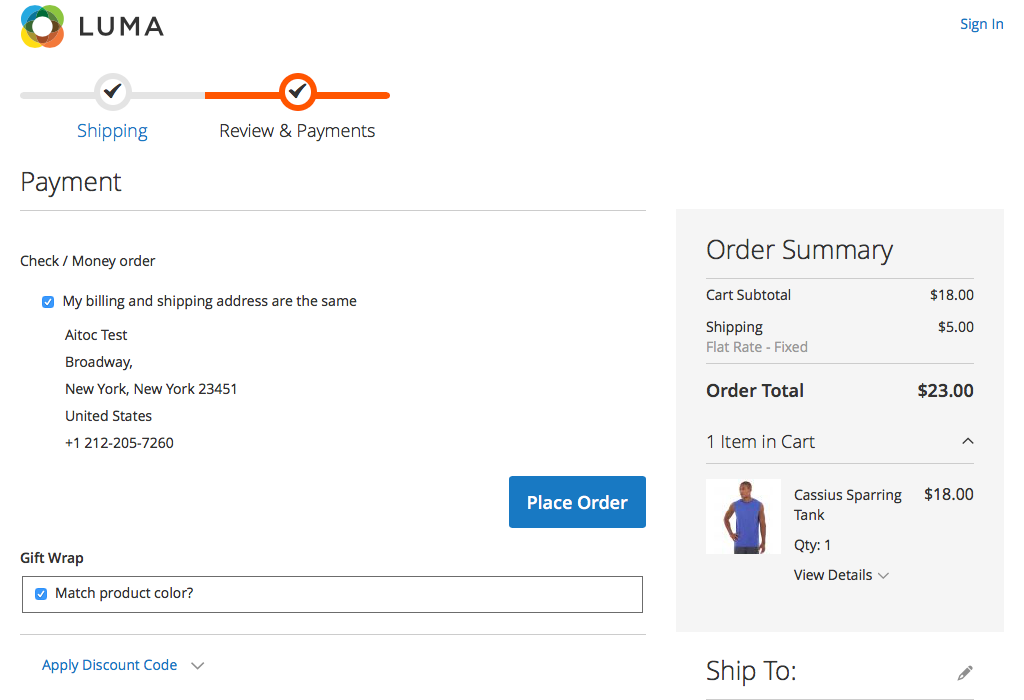
Checkout - Payment Info view
Note
The default Magento feature "Check Out with Multiple Addresses" is not supported by this module.
Note
An example of what a custom attribute looks like on a Payment Info step.
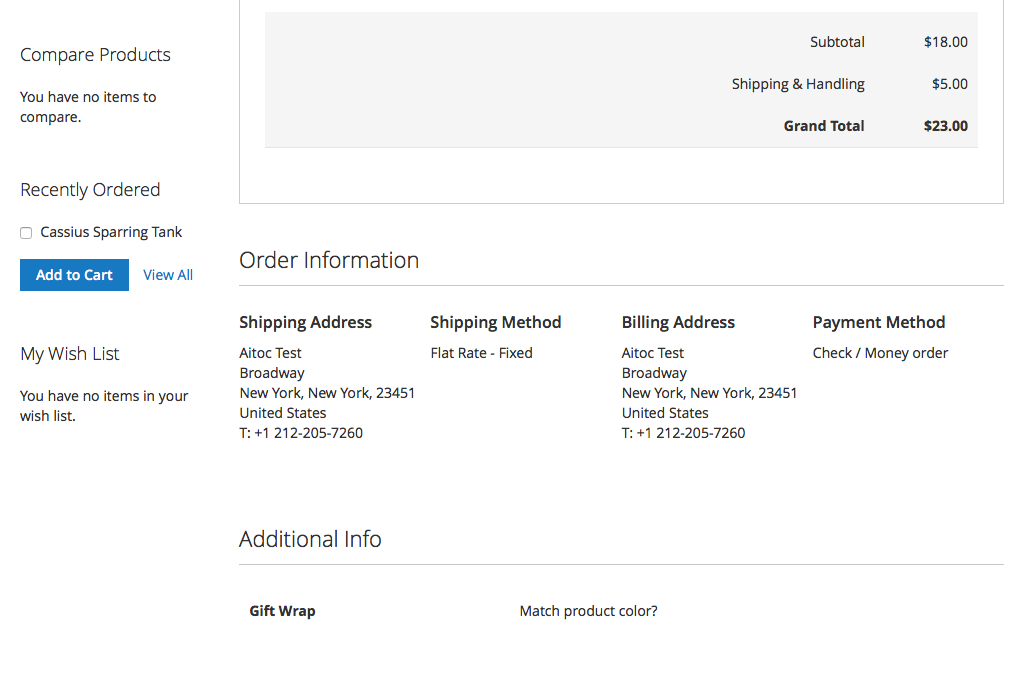
Custom checkout fields in Order of details
Note
Your customers can see the extra fields they filled out in their Magento account (registered users only) and email.
Note
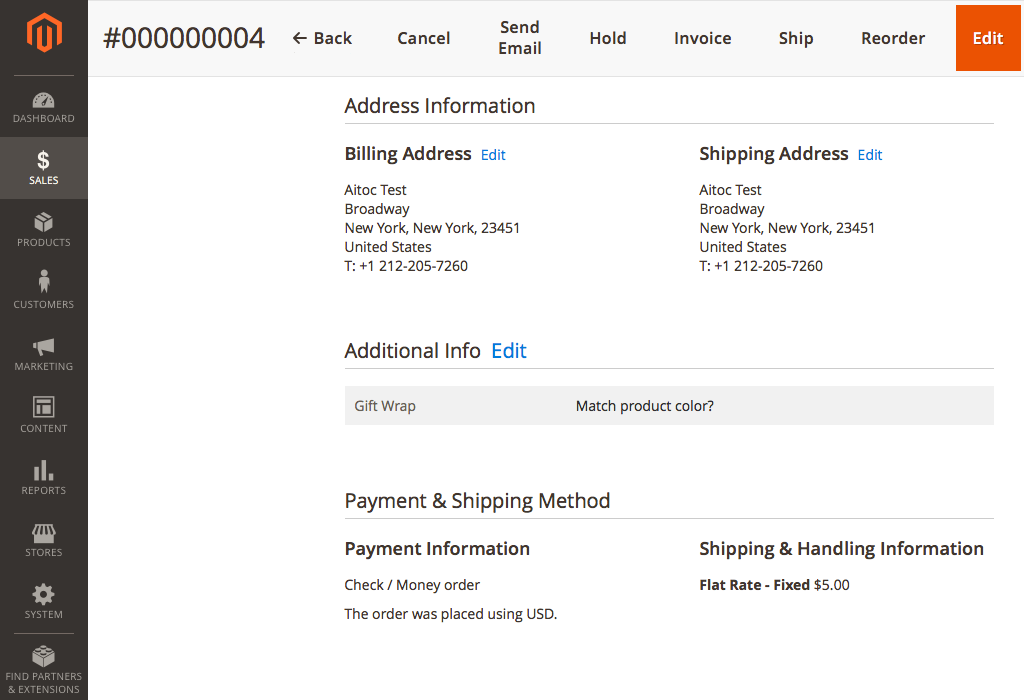
The custom data a client provides is visible to the Admin in the Order/Invoice form. Click “Edit” to edit this data.
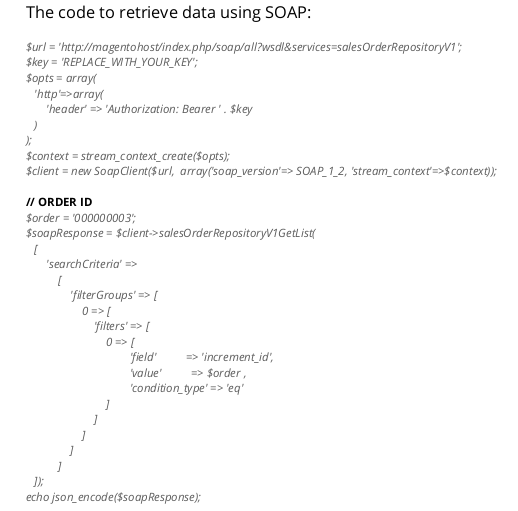
Magento API Support
One can export the data provided by customers using Magento API. Retrieving data by SOAP is done via OAuth. An administrator must generate a key in the console (SSH). Please find below an example of how to get a key:
Command syntax:
curl -X POST "http://magentohost/index.php/rest/V1/integration/admin/token" -H "Content- Type:application/json" -d '{"username":"user", "password":"password"}'
The result of the command above is a set of symbols, which represents the key. One should use it to initialize the variation $key as in the example below.
THANK YOU FOR CHOOSING AITOC EXTENSIONS!