SMTP Email Configuration
Description
Make your Email Marketing impeccable and reliable
Every day you send and receive hundreds of emails and you actually don't know whether they come to your targeted customers or not. There is a high probability that some emails will get in a spam box or will get rejected. Point is that in accordance with Magento default settings, emails are sent through the mail server performing on the Magento installation server. It gives these emails low reputation and they will be rated as untrustworthy. Thus, Magento 2 SMTP Extension is coming out as the solution for this problem. This extension helps the owner of store simply install SMTP (Simple Mail Transfer Protocol) server which transmits the messages into codes or numbers. Through it, messages will be delivered directly and automatically to the chosen customers.
Moreover, SMTP Email Configuration extension for Magento 2 is designed to help you control customization, arranging tests on Magento 2 SMTP server. It increases the chances that your emails will reach their receivers.
With the help of the SMTP email extension for Magento 2 stores:
- Use Emails Log with advanced control
- Run tests before email sending
- Decrease email refusal by cooperation with trusted email providers
- Provide improved ability to deliver rates due to secured connection
- Make emails reach all receivers without the chance to hit the spam box
Note
All Aitoc extensions can be customised to fit particular business needs. If you have questions about any customization, please drop a message at [email protected]
Compatibility
SMTP module is compatible with the following Magento platforms:
| Community Edition (Open Source) | Enterprise Edition (Commerce) | Cloud Edition |
|---|---|---|
| 2.3.0 - 2.4.* | 2.3.0 - 2.4.* | 2.3.0 - 2.4.* |
Installation
Installing module using zip file
- Unzip and paste the extension file into your root Magento folder.
- Connect to your server by SSH.
- Go to your Magento root folder.
- To install the extension, perform this command:
php bin/magento setup:upgrade
php bin/magento setup:di:compile
php bin/magento setup:static-content:deploy
Composer installation
If you haven't installed any Aitoc module before, in that case first you will need to add your Aitoc composer repository. Please go through the document to see how you can add composer repository.
To install the module, you will need to run following commands:
composer require aitoc/smtp
php bin/magento setup:upgrade
php bin/magento setup:di:compile
php bin/magento setup:static-content:deploy -f
- To switch the extension on/off, perform these commands:
php bin/magento module:enable Aitoc_Smtp
php bin/magento module:disable Aitoc_Smtp
- To update the module, use below command:
composer update aitoc/smtp
Extension features
| Feature | Specification |
|---|---|
| Flexible Configurations | It's easy for the store owner to reset the data or the information of any attribute with many options. Depending on your purposes, Mails will be configured simply and much faster. |
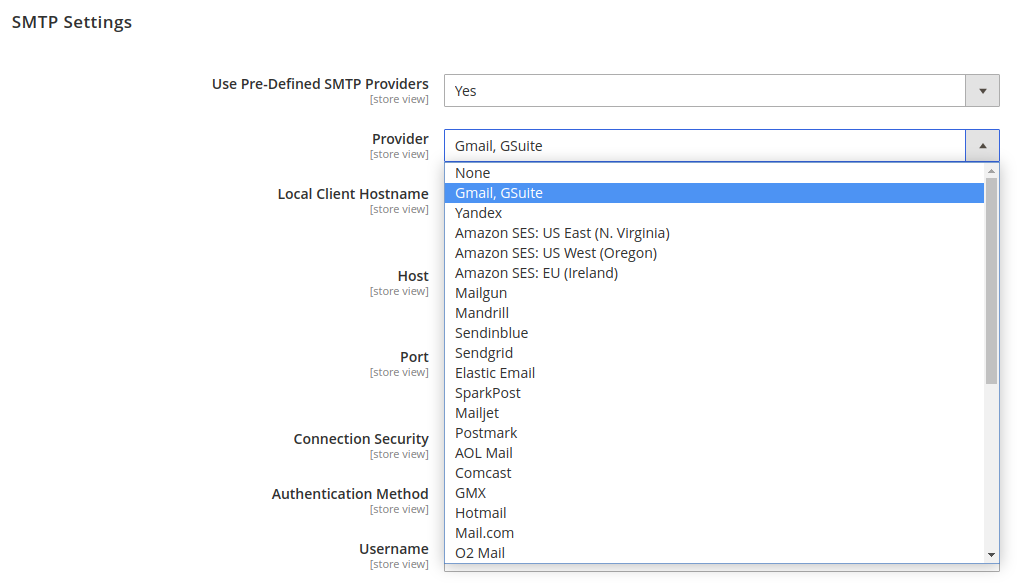
| Reliable SMTP Providers | Set your own SMTP server configuration or use such preset providers as Gmail, Hotmail, Yandex, Office365, Orange, Outlook, Yahoo, GMX and others. |
| Email logging | All the emails sent out from your store will be kept in this log on Magento 2 SMTP extension. The Admin totally can recheck the content of the email and it was sent to whom. Furthermore, you can check the current status (pending, in process or failed) or the exact sending time. Especially, you can clear the log of the mail like the Debug Mode, manually or let it be after a certain time. |
| SMTP Debug Mode | The Debug Mode is helpful to test your emails, check SMTP connection, run self-testing of the module without sending emails. Moreover, by this Debug mode, owners can manage, preview or review the time the email was created. You are also able to delete the logging or it can be done automatically after a period of time. |
| Test email | This feature allows running a test before sending out the email. It means that the extension guarantees that all settings are correct and the email is ready to be sent. |
| Export Email to CSV Files | The extension will also help to export an email to the CSV file. Save your time and export your email into CSV. |
FULL FEATURES OF THE SMTP EXTENSION
- Use Your Own SMTP Server
- Sending the test emails before sending officially
- Ensure all emails will be sent to desired customers
- Email logging with detailed view of every letter
- Delete email log manually
- Debug mode by SMTP email settings to test
- Supports flexible servers
- Check and preview sent emails
Emails Log
This can be accessed by the following REPORTS → SMTP → EMAILS LOG. From here you can look back at all the sent email from the server to customers.
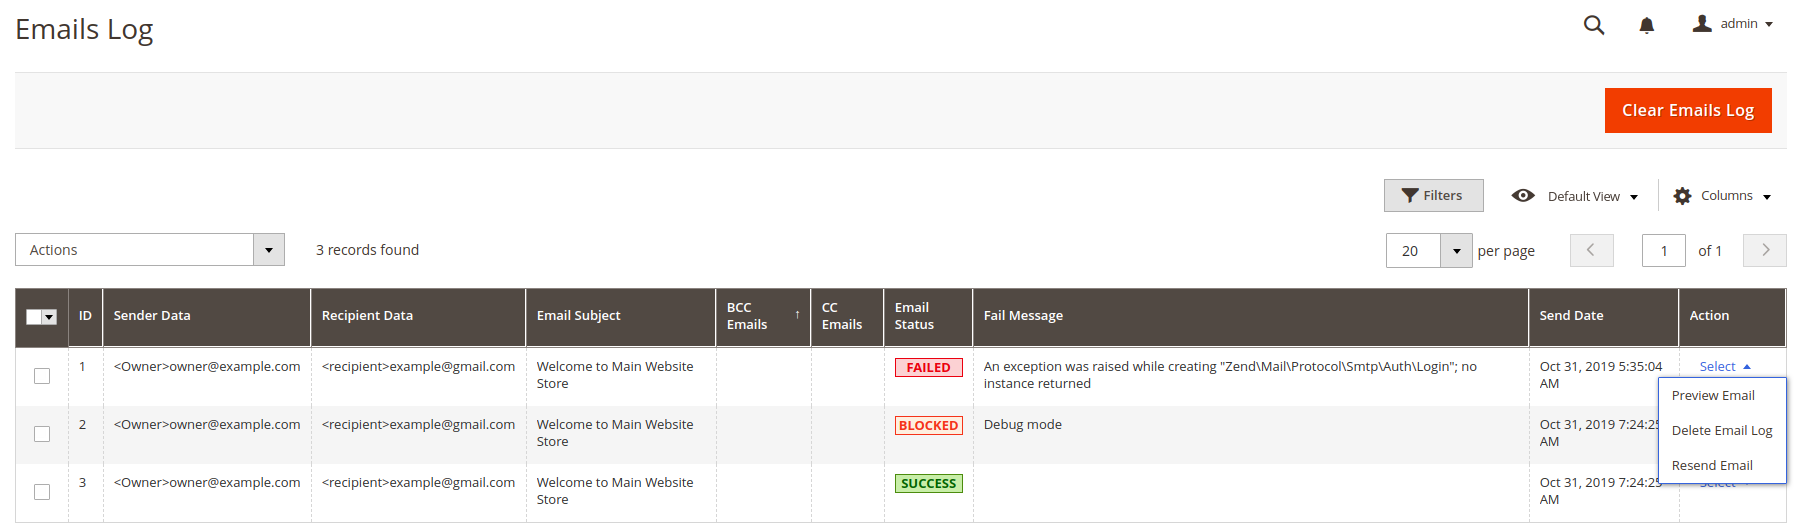
By clicking  in each mail, you can have a general looking at the display which shows how your email will reach the customer's eyes. Hit
 ![]() to clear all the archived emails after checking carefully.
to clear all the archived emails after checking carefully.
Configuration
General Settings
Be sure you’re at Admin Panel, for general settings STORES → CONFIGURATION → AITOC EXTENSIONS → SMTP → GENERAL SETTINGS. Choose 'Yes' to enable Aitoc SMTP on.

SMTP Settings
Still from the same structure with 'General Settings', scroll down to see 'SMTP Settings'.

- 'Use Pre-Defined SMTP Providers'. To see the field 'Provider', select 'Yes' in the field 'Use Pre-Defined SMTP Providers'. Such fields as 'Host', 'Port', 'Connection Security' and 'Authentication Method', which are compatible with the SMTP provider you had chosen, will be filled automatically.

At the moment we support nearly 30 SMTP email service providers.
-
At the 'Host' field, type your Host name or IP address of SMTP Server. You can also custom STMP Provider’s Host name at here. If you had chosen the provider at the above field, you can give this step a free pass.
-
'Port' is a specific gate where emails will be sent through. You can also pass this step if you had chosen the provider from the first place. In general, there will be 3 kinds of Default Port:
- Port 25: Emails sent by other Protocol which different SSL will be sent through this portal
- Port 465: Emails sent by other Protocol SSL will be sent through this portal
- Port 578: Emails sent by other Protocol TLS will be sent through this portal
-
'Authentication Method'. If you hadn’t chosen the provider before, please note those basic methods:
- Login/Password: Authentication by login to the account through Username and Password that will be filled in the next field. Most providers will require this method.
- CRAM-MD5.
-
'Username': where you enter the account name matching format of the SMTP Provider you had selected.
-
'Password': password of the Username. After saving, the password will be encrypted into
 .
. -
'Connection Security': pass this step if you had chosen the provider, or you can select one of the providing protocol below here:
- None: when you select this protocol, you have to accept all the risks that may occur in the process of sending.
- SSL stands for Secure Socket Layer. This protocol ensures that all data exchanged between the web server and the browser is secure and stays safe.
- TLS means Transport Layer Security. This protocol secures data or messages and validates the integrity of messages through message authentication codes.
-
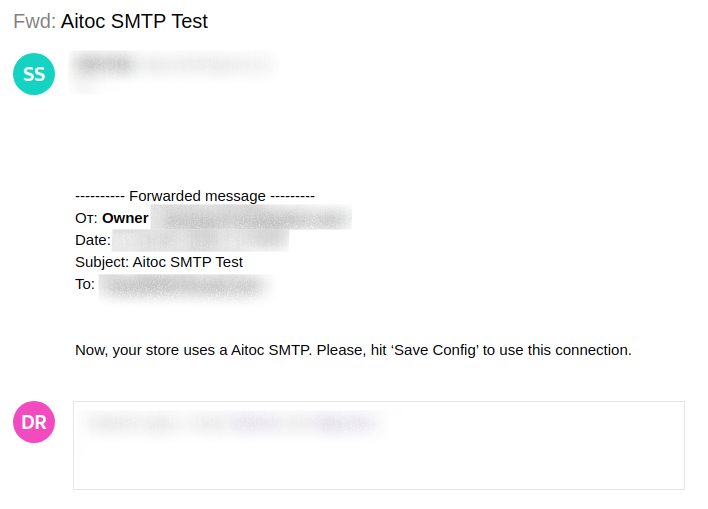
'Send Test To E-mail'. This is the field for you to test the operation of the extension. After filling all fields, click
 . If the information entered is valid, a successful email notification will be sent from Username to Email Test. That email will have the following content:
Log Settings
Still from the same structure with 'SMTP Settings', scroll down to see 'Log Settings'.
To see the field 'Log Clean Every (days)', select 'Yes' in the field 'Enable Log Outgoing Emails'.

The 'Log Clean Every (days)' field limits the storage time for the email you sent. After that limited number of days, Email will automatically delete. If you do not want to delete the emails, set zero in the field blank.
Emails Settings
Still from the same structure with 'Log Settings', scroll down to see 'Emails Settings'.
Magento sends only the HTML part of the message, so some spam filters give such messages a higher spam score. In order to avoid this problem here the Plain Text Part can be added manually for each email template.
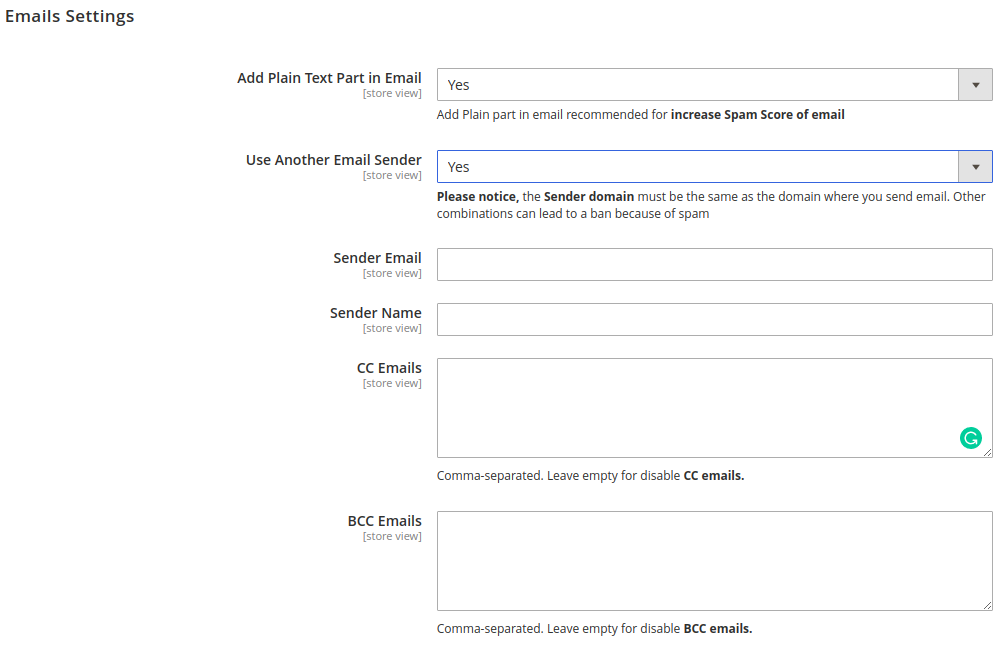
You can also create CC Emails (copies) and BCC Emails (hidden copies).
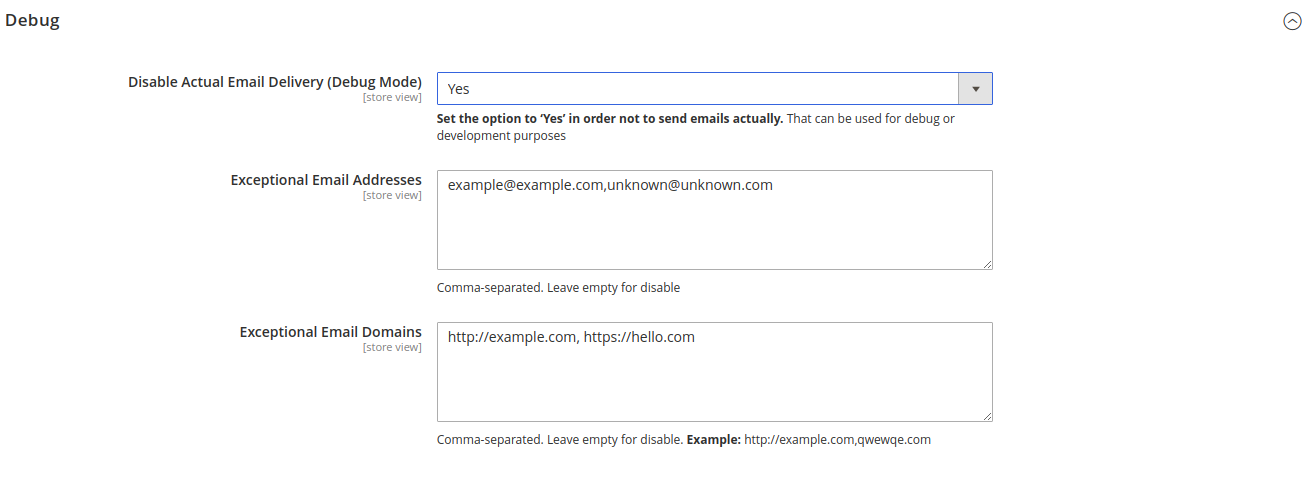
Debug
Still from the same structure with 'Emails Settings', scroll down to see 'Debug'.

The Debug Mode is helpful in testing all Magento 2 SMTP email settings and identifying wrong email settings.
THANK YOU FOR CHOOSING AITOC EXTENSIONS!