
On this page
Invoice Payment
Description
Invoice Payment extension allows the merchant to generate an order in Magento and send a request for payment to their customer, which enables them to pay online via credit/debit card.
Features
- Allows store owners to create ad-hoc orders in the admin panel requesting customer payment, even for products not in the catalog.
- Integrates with Stripe, Braintree, and Paypal (via Braintree) to quickly take payments without the customer needing to pass through the entire checkout.
- Provides a payment link in the order confirmation email and the customer dashboard for orders still requiring payment (in whole or partial).
- Works when the customer has paid only a partial amount of an order's total.
Module Demo
Compatibility
The invoice Payment module is compatible with the following Magento platforms:
| Community Edition (Open Source) | Enterprise Edition (Commerce) | Cloud Edition |
|---|---|---|
| 2.3.0 - 2.4.* | 2.3.0 - 2.4.* | 2.3.0 - 2.4.* |
Installation
Installing module using zip file
- Unzip and paste the extension file into your root Magento folder.
- Connect to your server by SSH.
- Go to your Magento root folder.
- To install the extension, perform this command:
php bin/magento setup:upgrade
php bin/magento setup:di:compile
php bin/magento setup:static-content:deploy- After installing the module, you will need to install the Stripe SDK using the command:
composer require stripe/stripe-phpComposer installation
If you haven't installed any Aitoc module before, in that case, first, you will need to add your Aitoc composer repository. Please go through the document to see how you can add a composer repository.
To install the module, you will need to run the following commands:
composer require aitoc/module-invoice-payment
php bin/magento setup:upgrade
php bin/magento setup:di:compile
php bin/magento setup:static-content:deploy -f- To switch the extension on/off, perform these commands:
php bin/magento module:enable Aitoc_InvoicePayment
php bin/magento module:disable Aitoc_InvoicePayment- To update the module, use below command:
composer update aitoc/module-invoice-paymentVersion Compatibility
Invoice Payment is compatible with the following Magento platforms:
| Community Edition (Open Source) | Enterprise Edition (Commerce) | Cloud Edition |
|---|---|---|
| 2.3.0 - 2.4.* | 2.3.0 - 2.4.* | 2.3.0 - 2.4.* |
Change Log
| Version | Release Date | Changes |
|---|---|---|
| 1.0.0 | 30th October 2018 | Initial Release |
General Usage
Extension Configuration
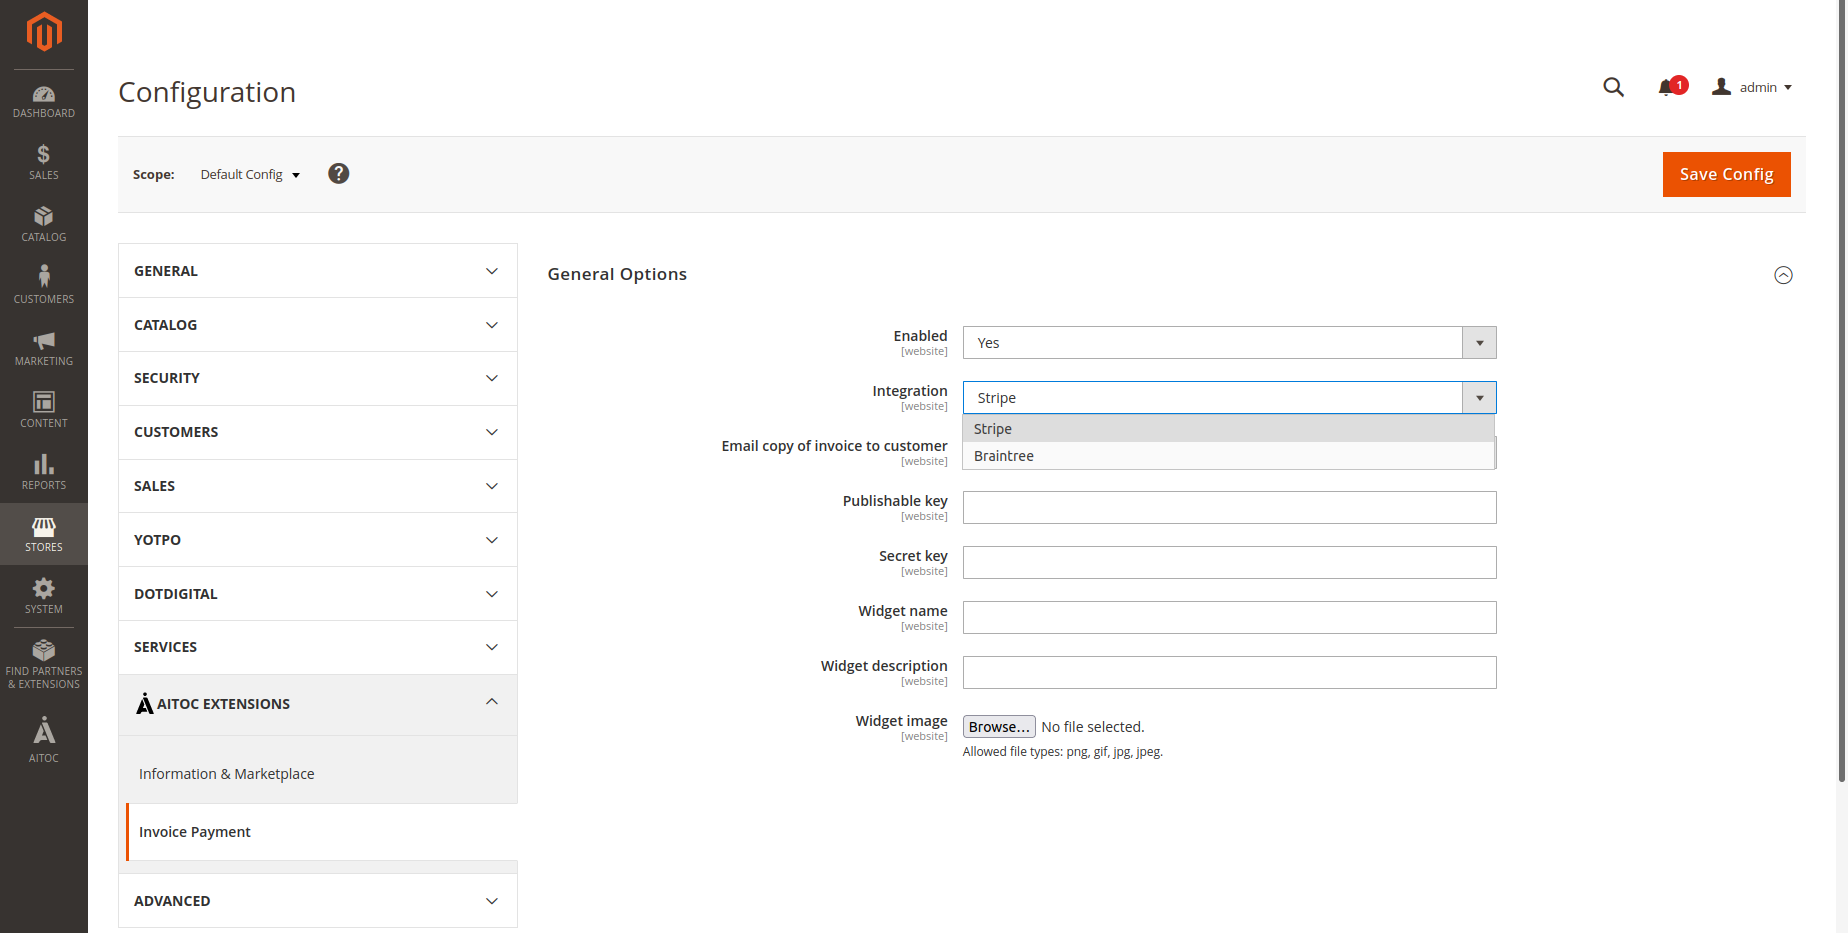
To access the configuration of the module, select Stores → Configuration → AITOC EXTENSIONS → Invoice Payment from within the admin panel:
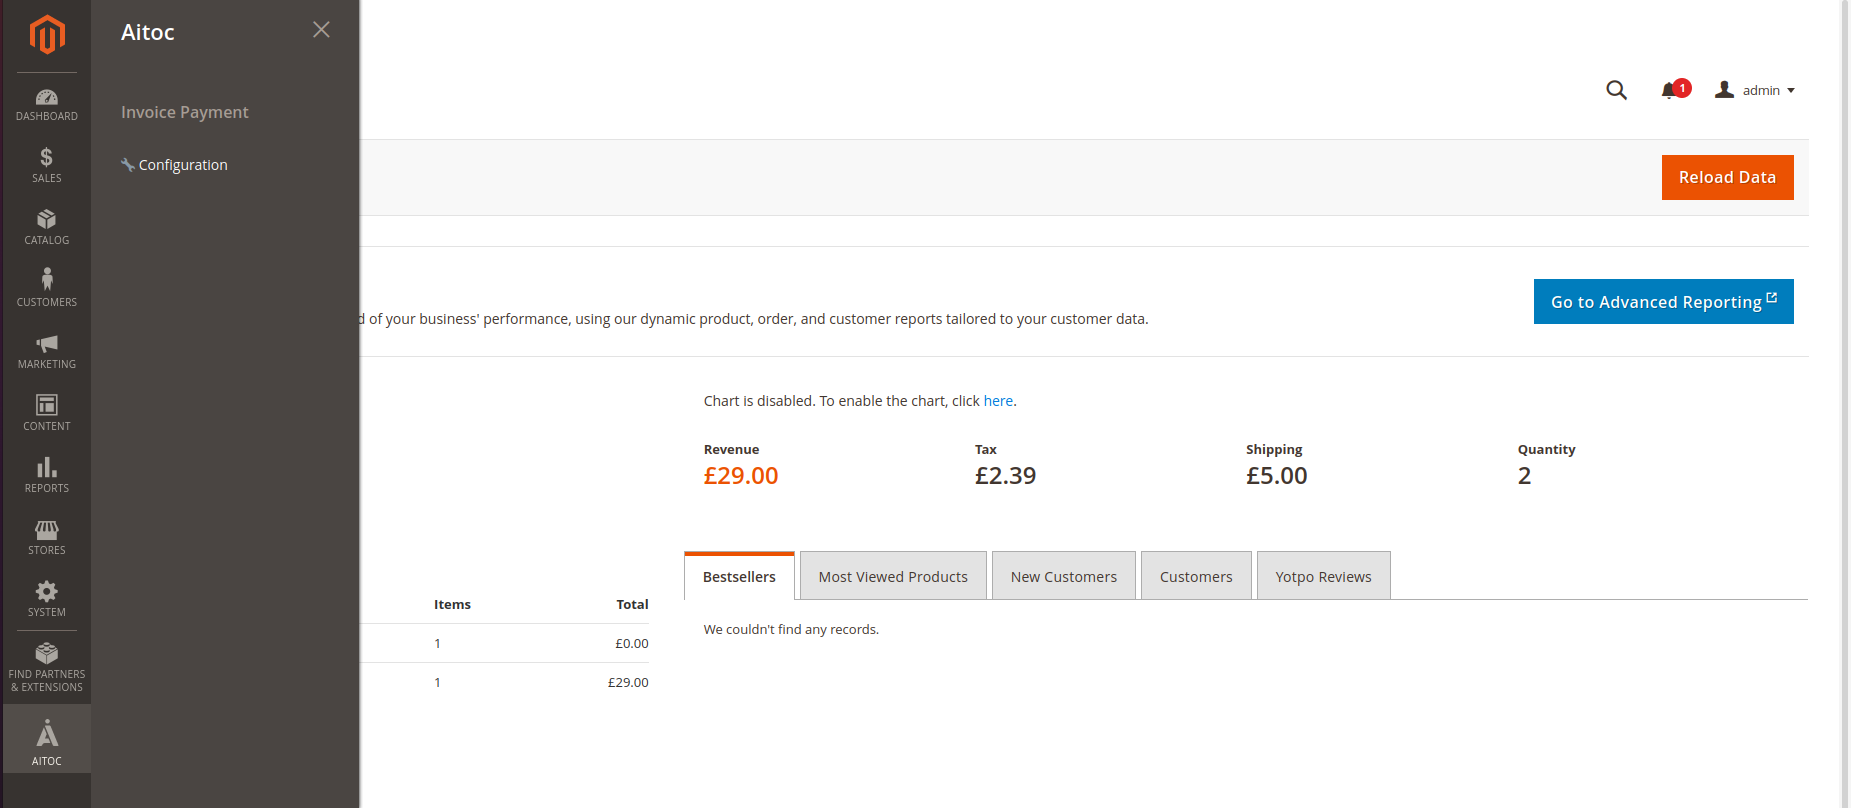
Also, you can go to Admin → AITOC → Invoice Payment → Configuration to access module configuration:
The backend administrator can Enable the extension that allows selecting the Payment Integration Method.
Email copy of the invoice to customer: Set to Yes to send an email of the invoice to the customers once they make the payment.
Payment Integration Method
One can use two different options here:
1) Braintree
If the Braintree option is selected, the Braintree configuration options will appear below. To configure Braintree Payment Method, you can check this link.
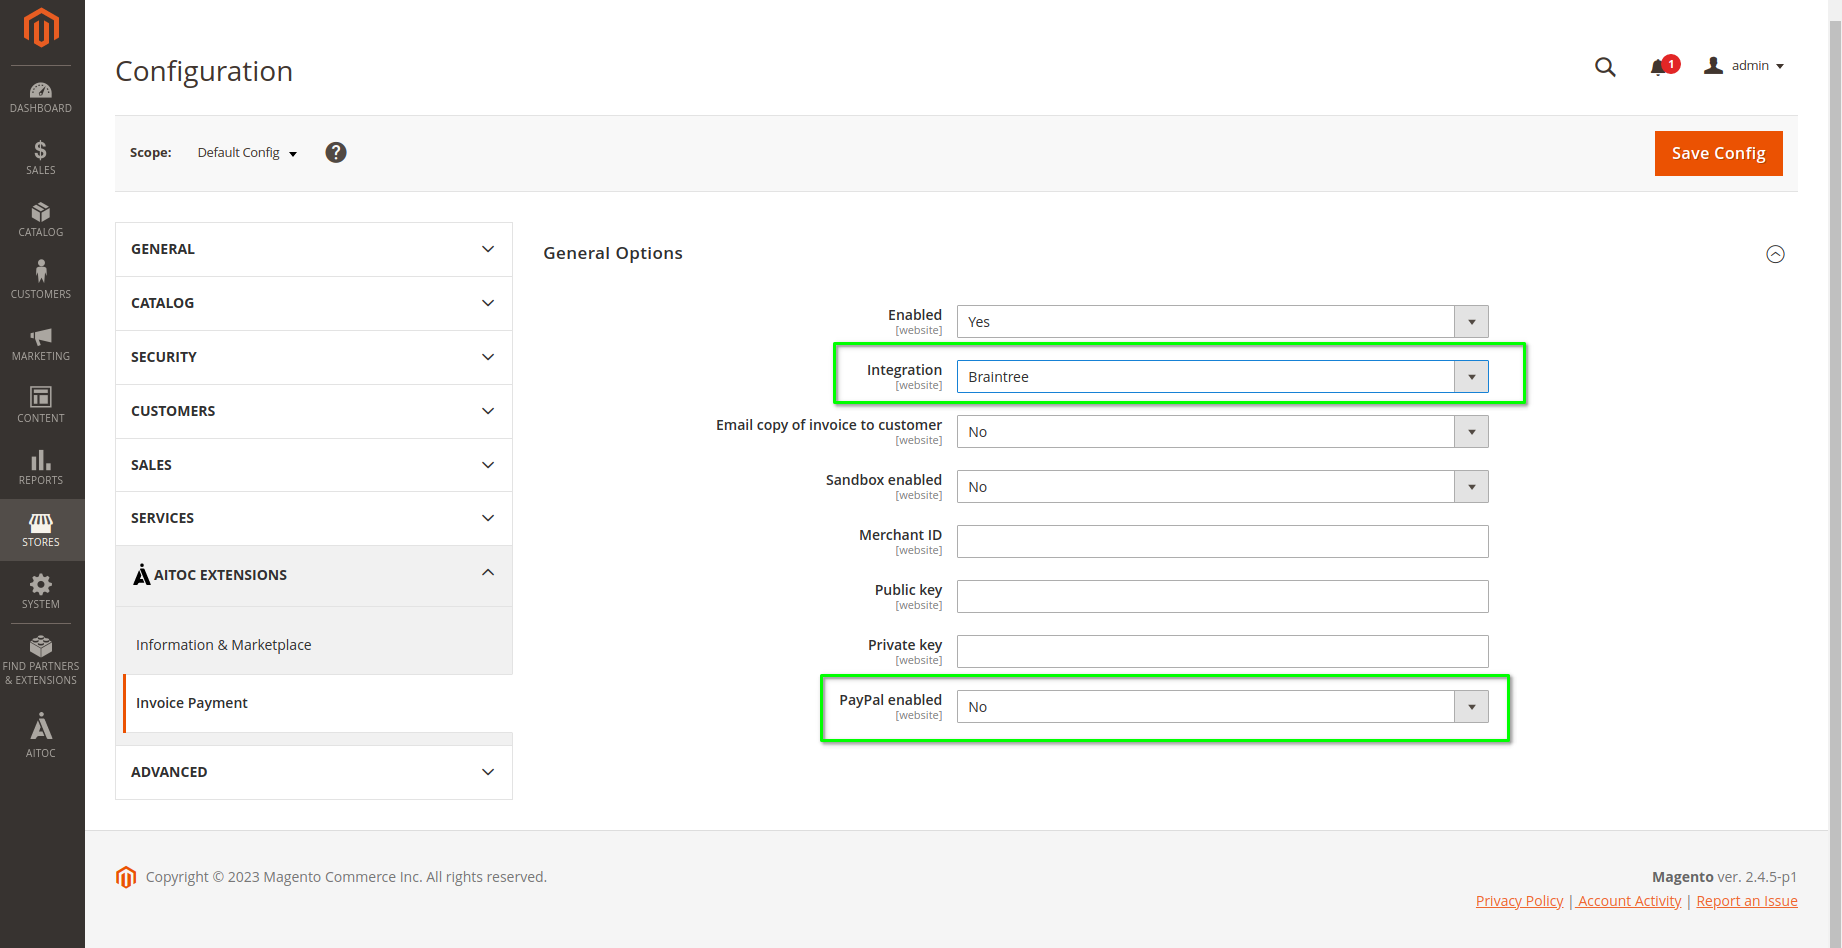
The Paypal via Braintree payment option is also available. Set "Yes" to enable the Paypal payment method option.
Note
Make sure you only enable the Paypal payment method if the Paypal payment method is correctly configured and enabled in your Braintree account. Please refer to the document to enable Paypal in your Braintree account.
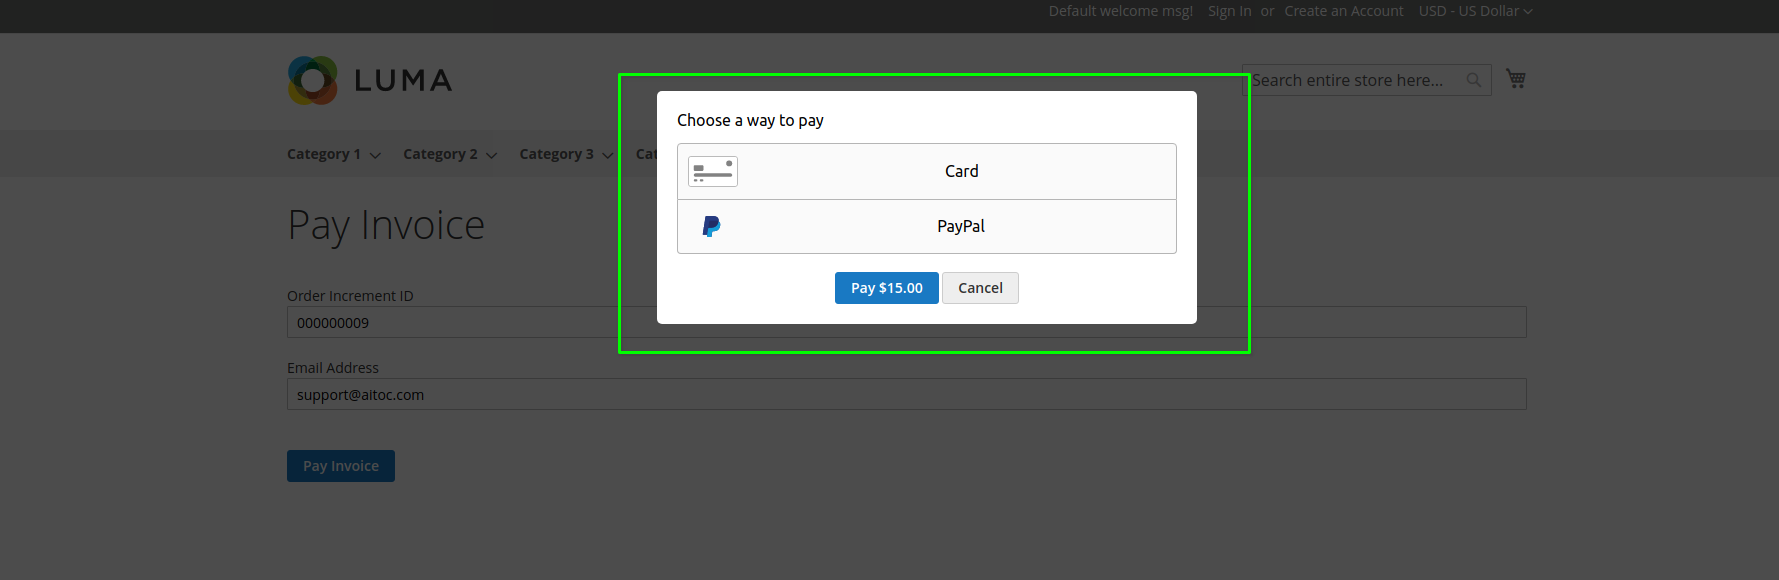
When Braintree and Paypal via Braintree are configured and enabled, the front-end payment option will look like this:
2) Stripe
If selected, the Stripe configuration credentials will appear here:
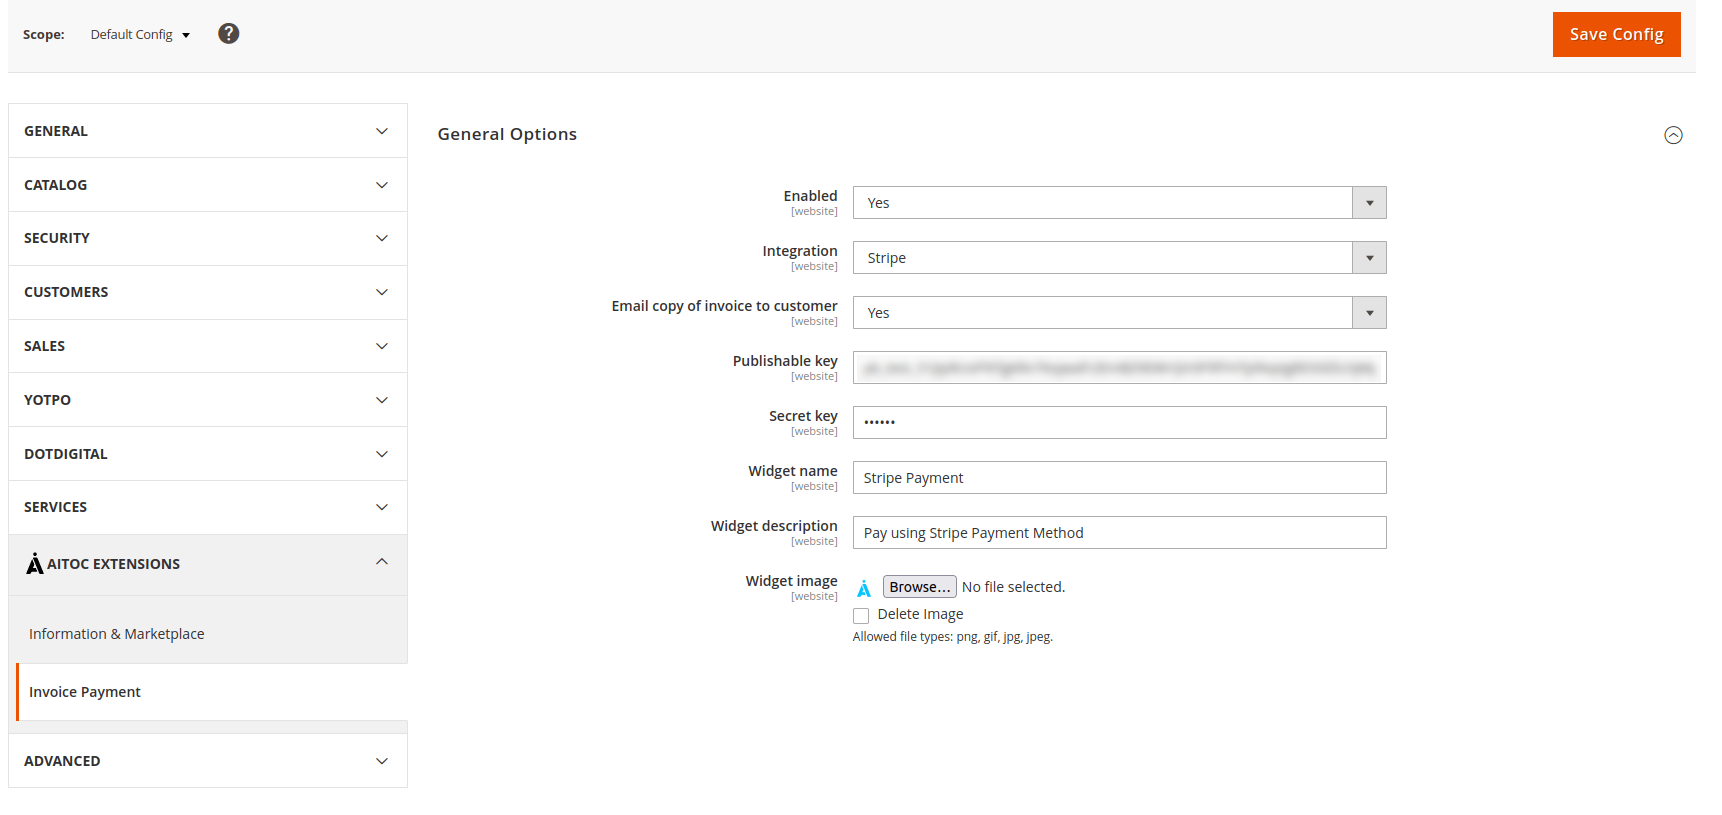
Publishable Key is the field to enter Publishable Key available in your Stripe Account.
Secret Key is the field to enter the Secret Key available in your Stripe Account.
Both keys are required to be set. Please use this link for reference.
Widget Name, Widget Description, & Widget Image will appear in the popup, which will appear on the front when you try to make a payment.
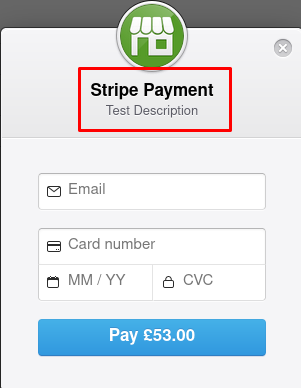
As per the above image:
- Widget Name = Test Name
- Widget Description = Test Description
- Widget Image = The Icon appearing in the top-center of your popup.
Checkout payment method option
You can display "Invoice Payment" as the payment option on the front-end checkout page as well as for admin orders. This will work as an offline payment method. To enable this, you will need to go to:
Path: Admin > Stores > Configuration > Sales > Payment Methods > Pay by Invoice

If you have enabled this option, the name defined under the "Title" field will appear as the Payment method title on the checkout payment method step and the order detail section in the admin and customer dashboard.
Email Template Integration
The Order email template needs to be updated to include the payment link in the order confirmation email.
To update the email template, Go to Marketing → Email Template. Select the email template currently used as a New Order confirmation email.
You can check the current email template, which is in use for the New Order confirmation email template at: Stores → Configuration → Sales → Sales Email → Orders:
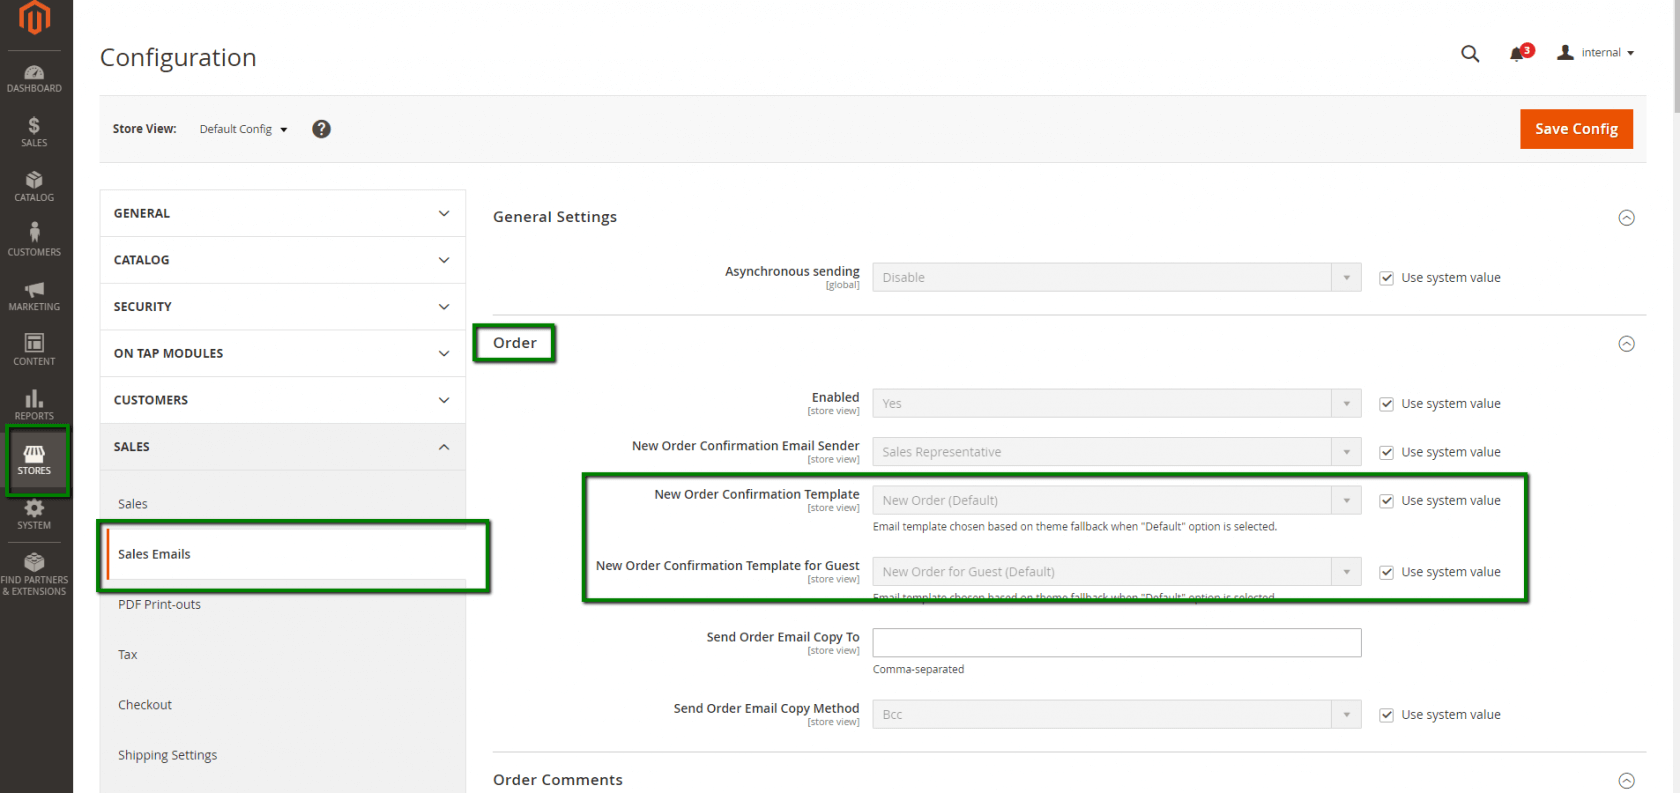
Once you have opened the email template page, add the code just at the end of the email template (right before the footer template).
The code you need to insert is:
{{layout handle="sales_email_order_pay" order_id=$order.entity_id}}
For more information regarding editing email templates, please visit the Magento guide
You'll need to save the template after making changes. Please ensure the template you edited/created is used as a New Order email Confirmation template.
Now, such a link will appear in the Order Confirmation email:
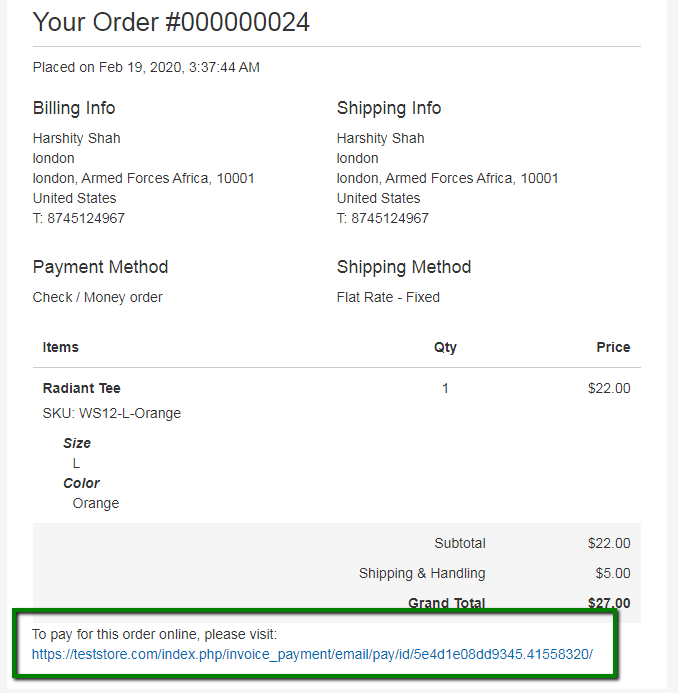
Invoice Payment
Once the customers click the link, they will redirect to your website, and they will see a page with details of their Order ID and the email address they used during the checkout:
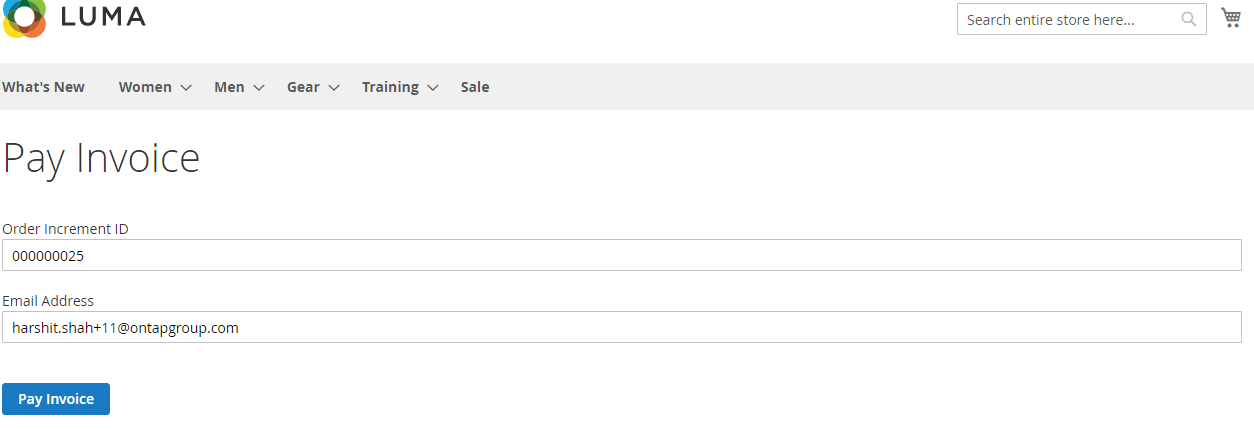
The Order Increment Id and Email address fields will be pre-populated. The customer must verify the details and click the Pay Invoice button.
After that, a popup will appear where the user needs to enter the required details to make a payment.
The popup may vary depending upon the selected Integration Method under Module Configuration.
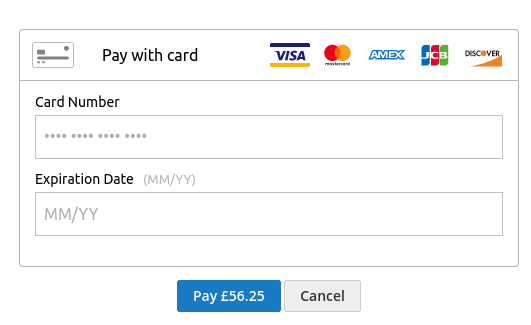
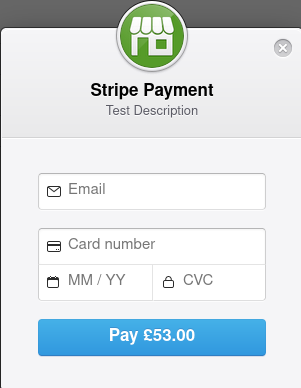
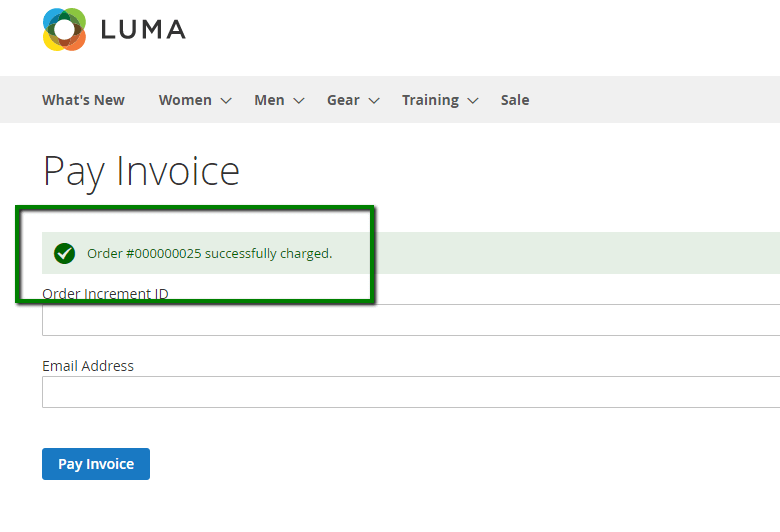
After entering the required payment details in the popup, the customer can click the Pay button. The customer will get a confirmation message and the invoice email.
Make payment for the placed orders.
Suppose any existing customer wants to make an online payment for the order they have placed using the Offline payment method. In that case, they must log into their account and go to the My Order / Order Listing section under their Account Dashboard. Then, they must select the order they want to pay online.
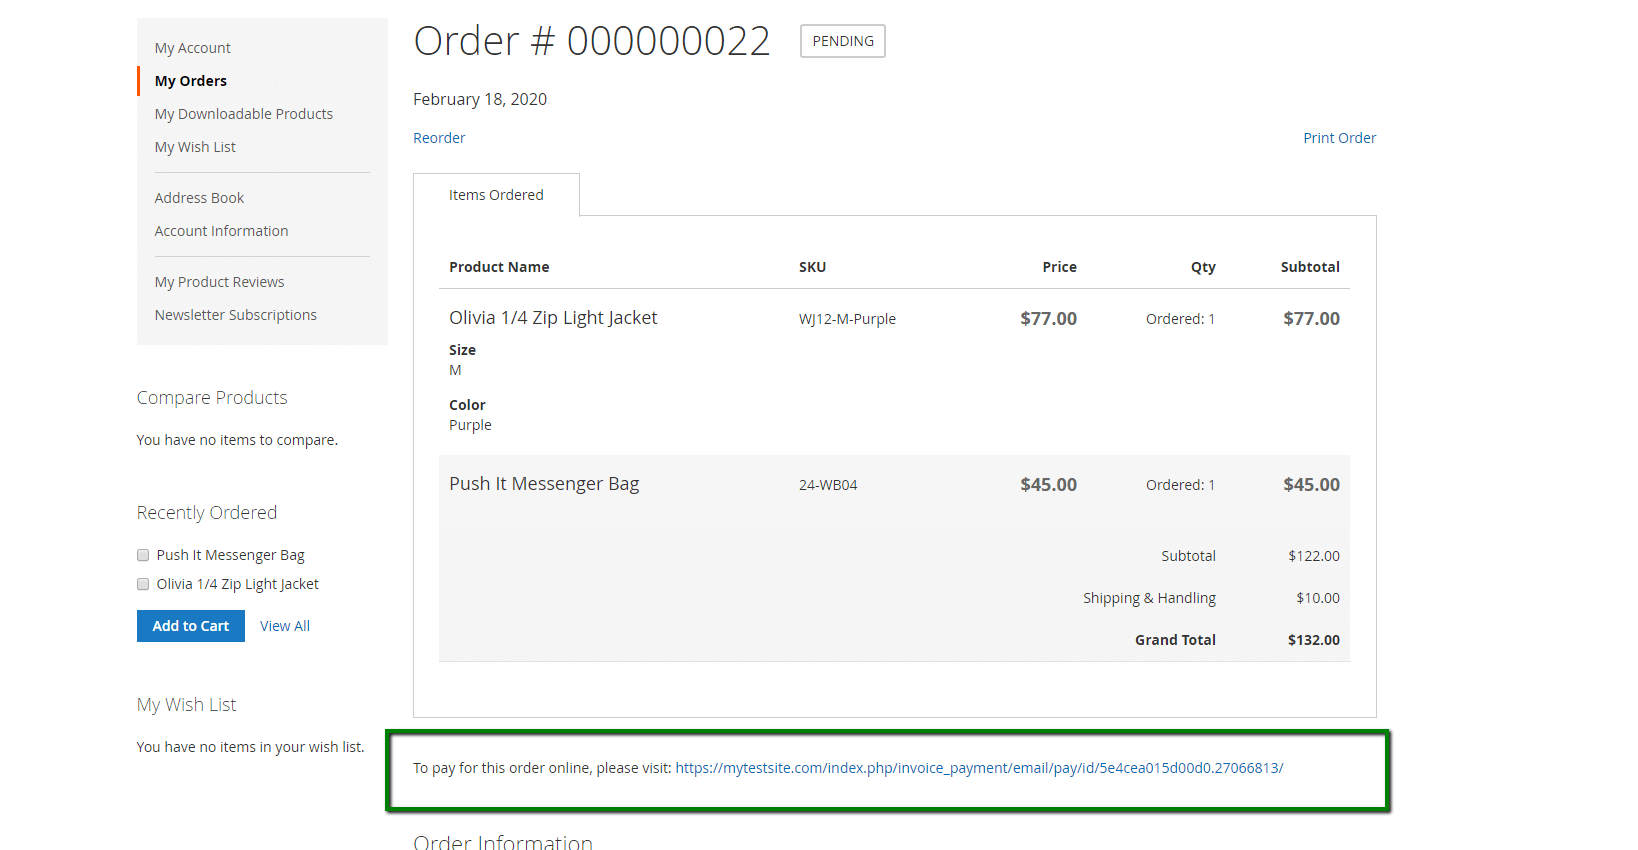
The customer needs to click on this link and follow the abovementioned process.
When the payment link will be available
The Payment link will be available in the email and customer dashboard if the amount paid exceeds Order Total.
That means, for any order, if partial or no payment is made, the customer will see the payment link. Using the payment link, they can pay the remaining order amount.
THANK YOU FOR CHOOSING AITOC EXTENSIONS!