Order Hours
Description
The Order Hours module allows the store owner to display time and message to customers for getting any promotional offer or displaying shipping cut-off notices.
For example, if the business provides next-day delivery to a customer if the order has been placed before 11 am, with the module's help, you can configure and show messages like "Order before 11 am to get next-day delivery".
Compatibility
Order Hours module is compatible with the following Magento platforms:
| Community Edition (Open Source) | Enterprise Edition (Commerce) | Cloud Edition |
|---|---|---|
| 2.3.0 - 2.4.* | 2.3.0 - 2.4.* | 2.3.0 - 2.4.* |
Installation
Installing module using zip file
- Unzip and paste the extension file into your root Magento folder.
- Connect to your server by SSH.
- Go to your Magento root folder.
- To install the extension, perform this command:
php bin/magento setup:upgrade
php bin/magento setup:di:compile
php bin/magento setup:static-content:deploy
Composer installation
If you haven't installed any Aitoc module before, you will need to add your Aitoc composer repository. Please review the document to see how you can add composer repository.
To install the module, you will need to run the following commands:
composer require aitoc/order-hours
php bin/magento setup:upgrade
php bin/magento setup:di:compile
php bin/magento setup:static-content:deploy -f
- To switch the extension on/off, perform these commands:
php bin/magento module:enable Aitoc_OrderHours
php bin/magento module:disable Aitoc_OrderHours
Admin Configuration
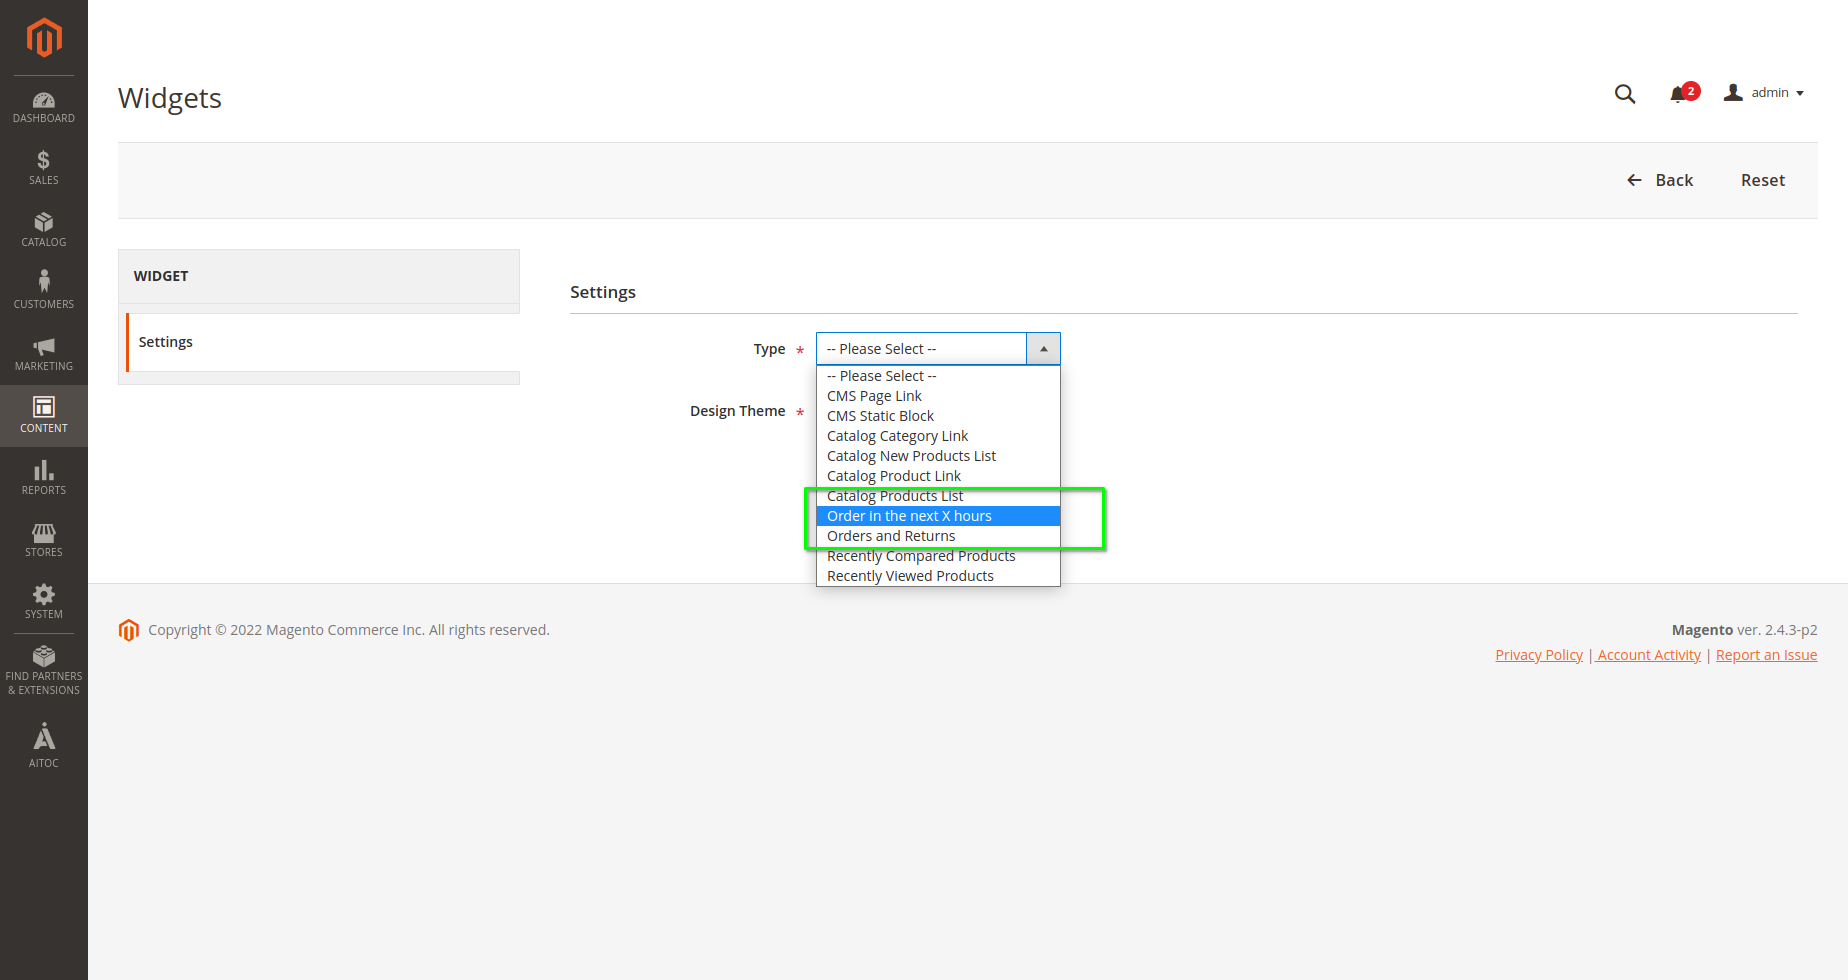
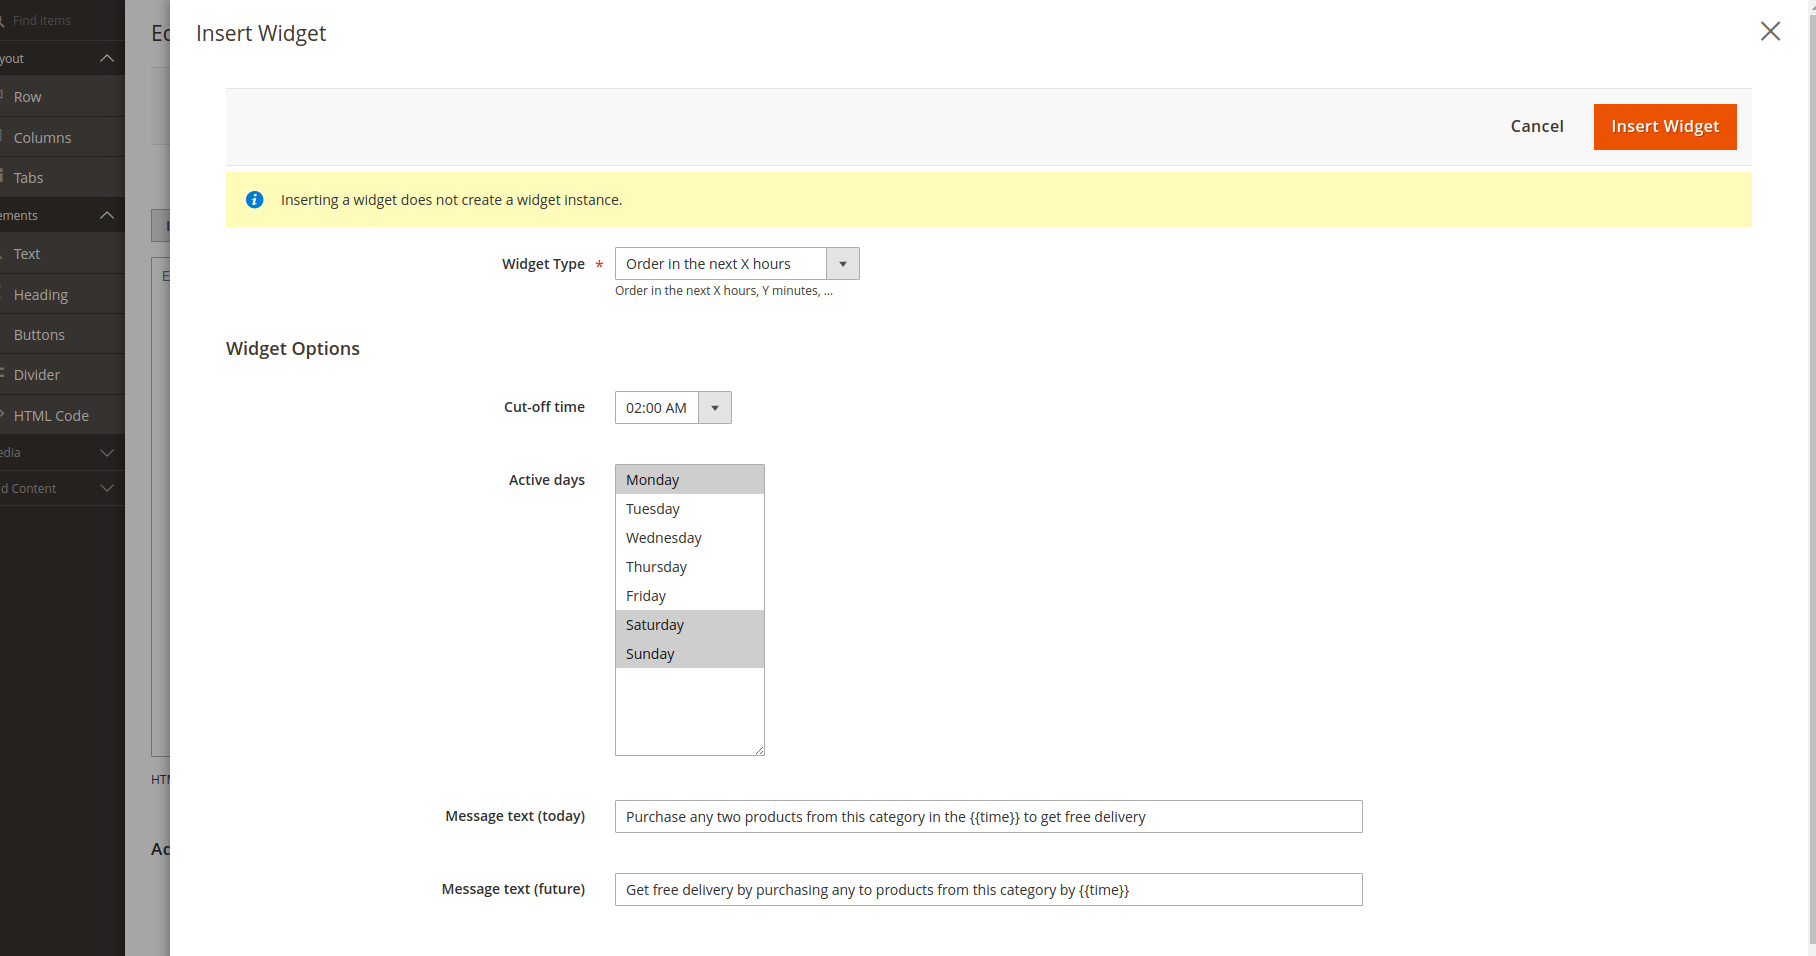
When the module is installed and enabled, a new Widget Type appears " Order in the next X hours."
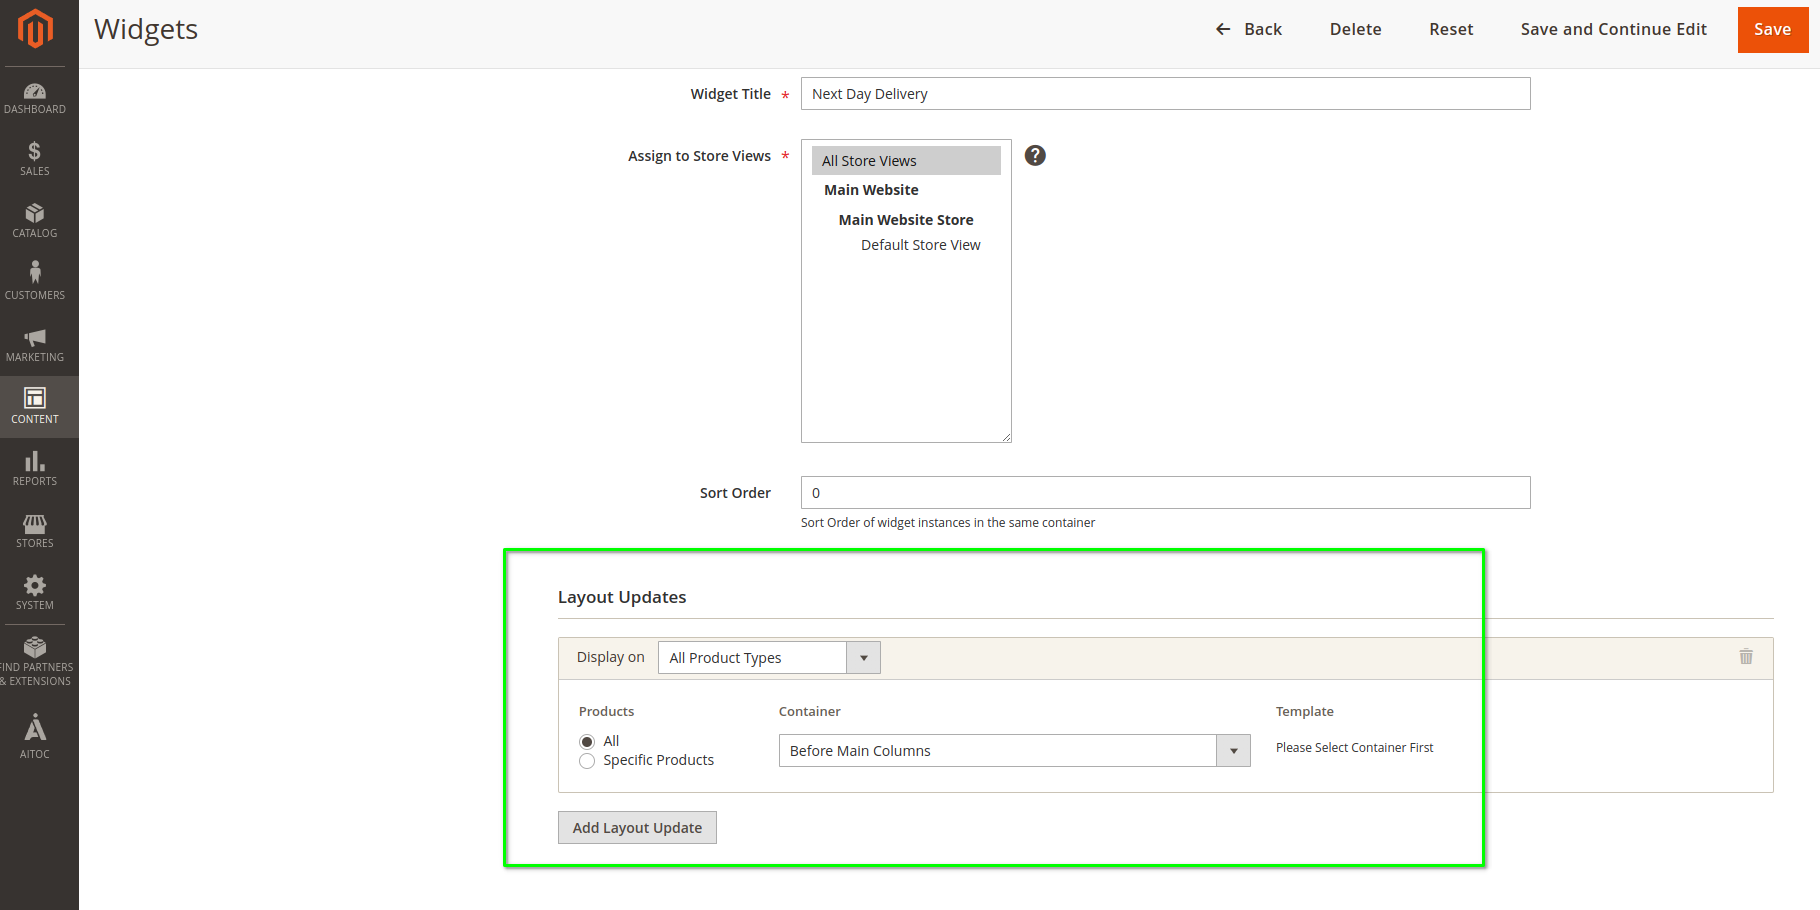
Path: Admin > Content > Widget > Create new Widget
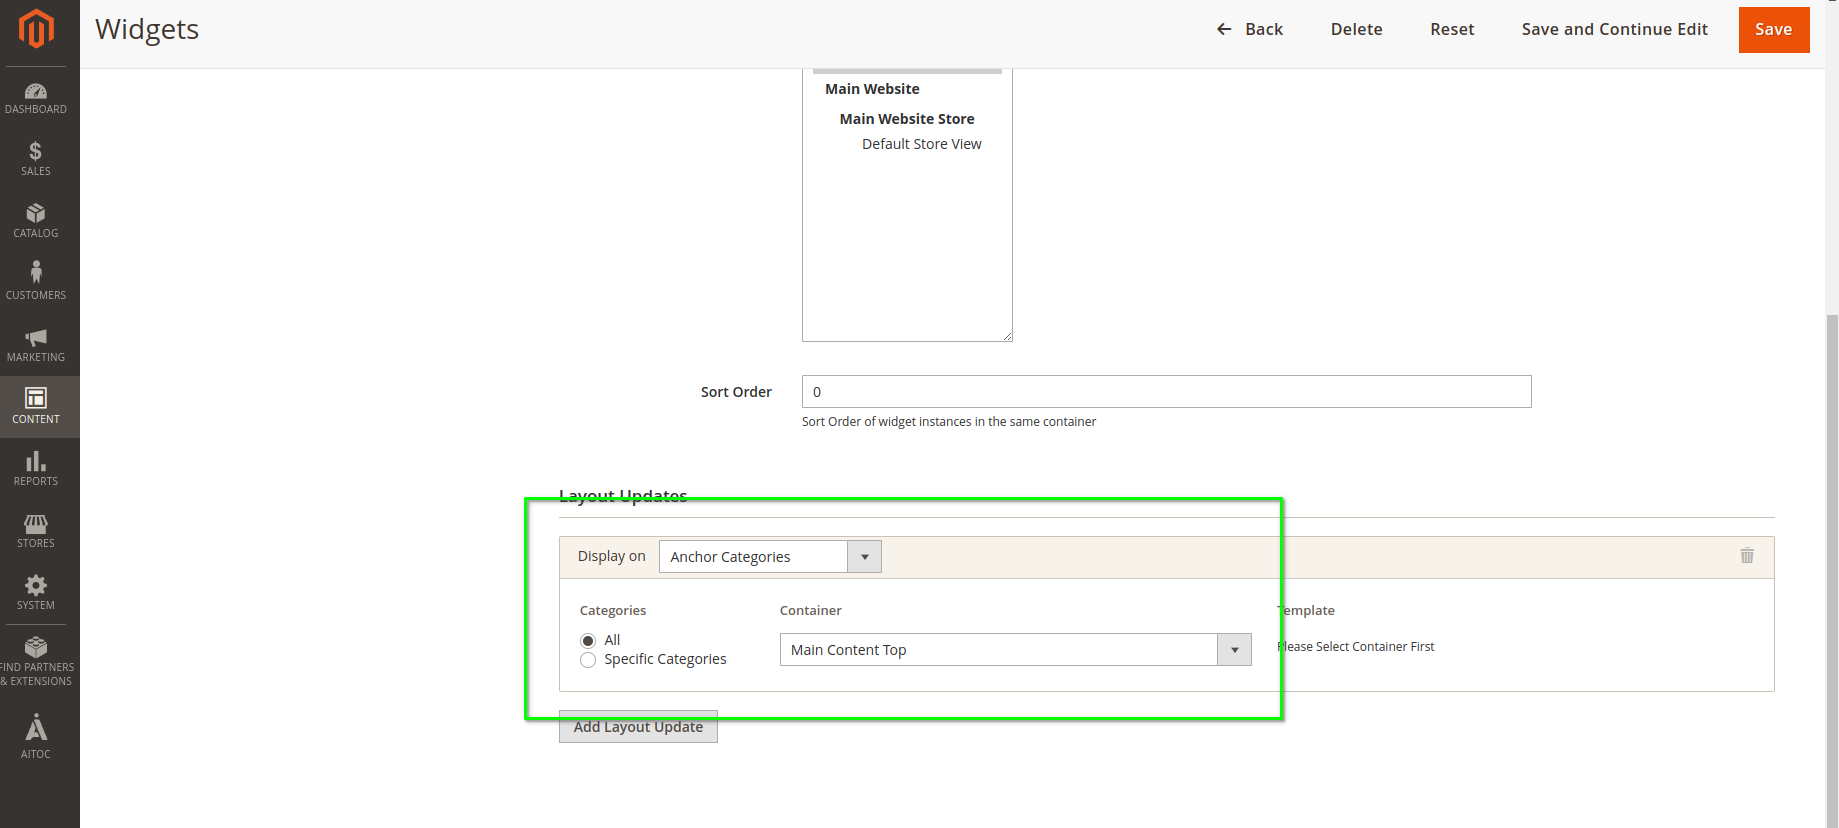
Select the Design theme and click on the continue button. Here, you will need to enter Widget Title, Select the store view and then select the Layout. You will need to choose Layout according to the position/place where you want the message to appear on the front end. Here in the below image, we have selected that the message will appear on all product pages after the header.
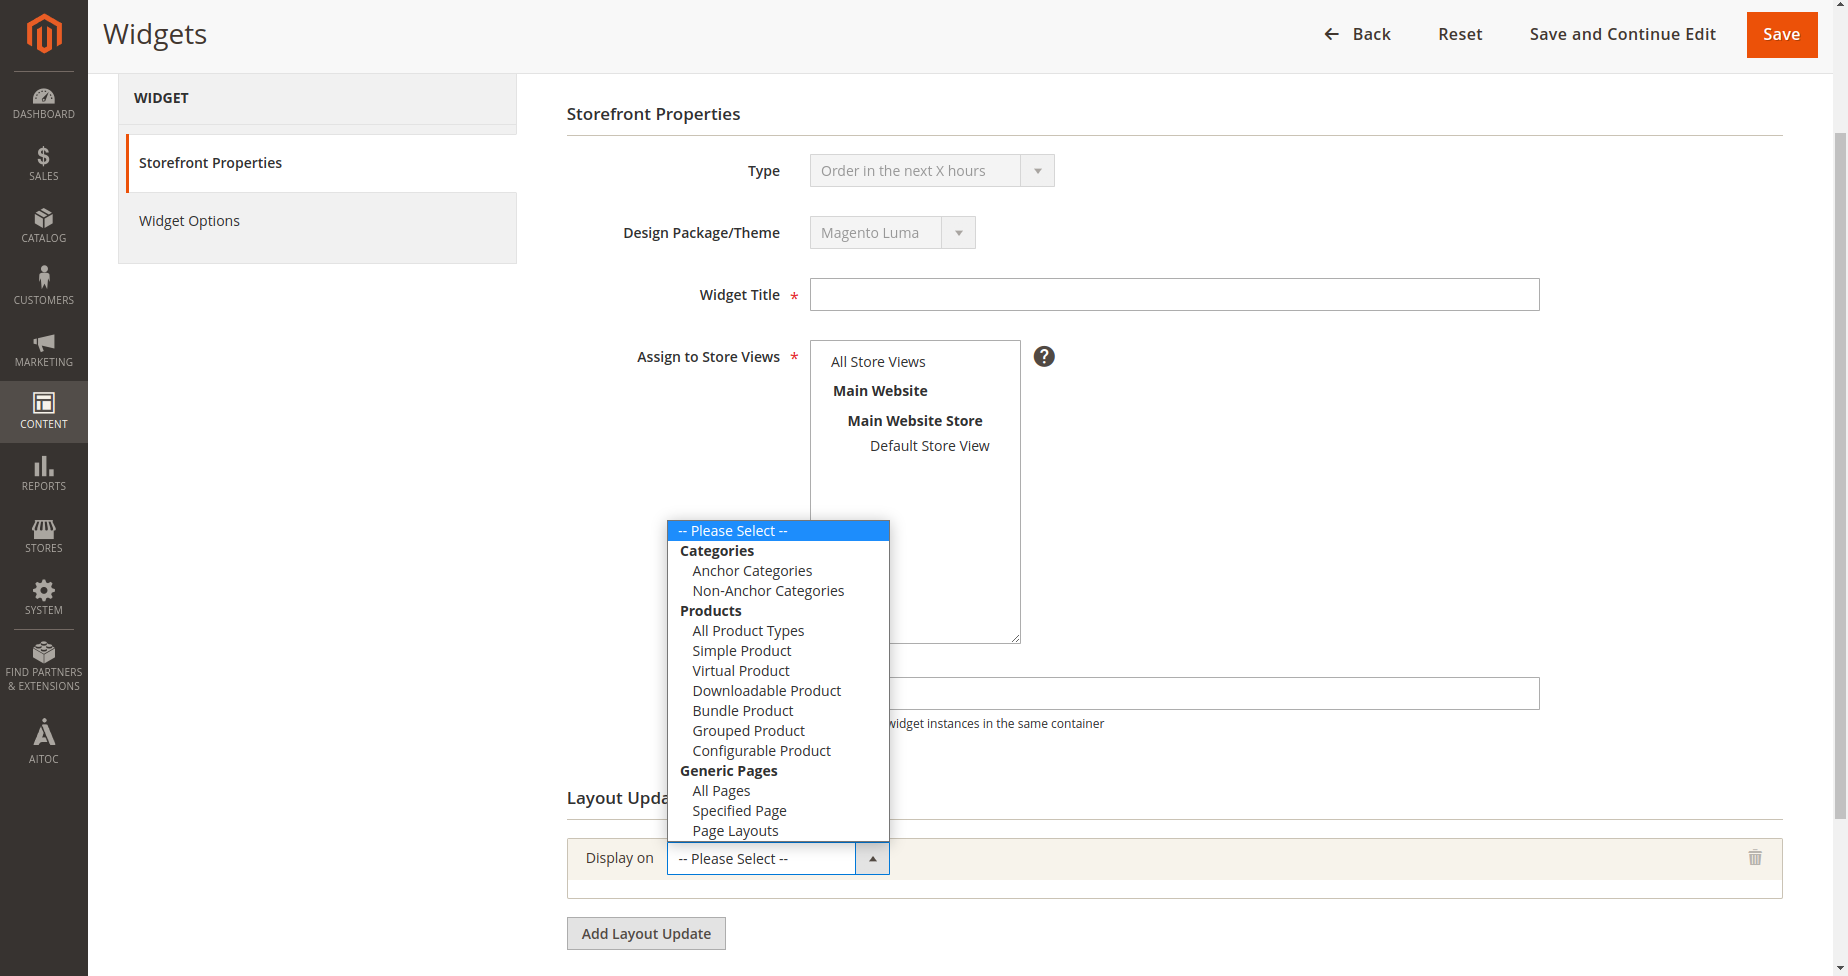
This is similar to how you set up the widget. If you are unsure about setting up a widget and need more information, here is the guide that you can check.
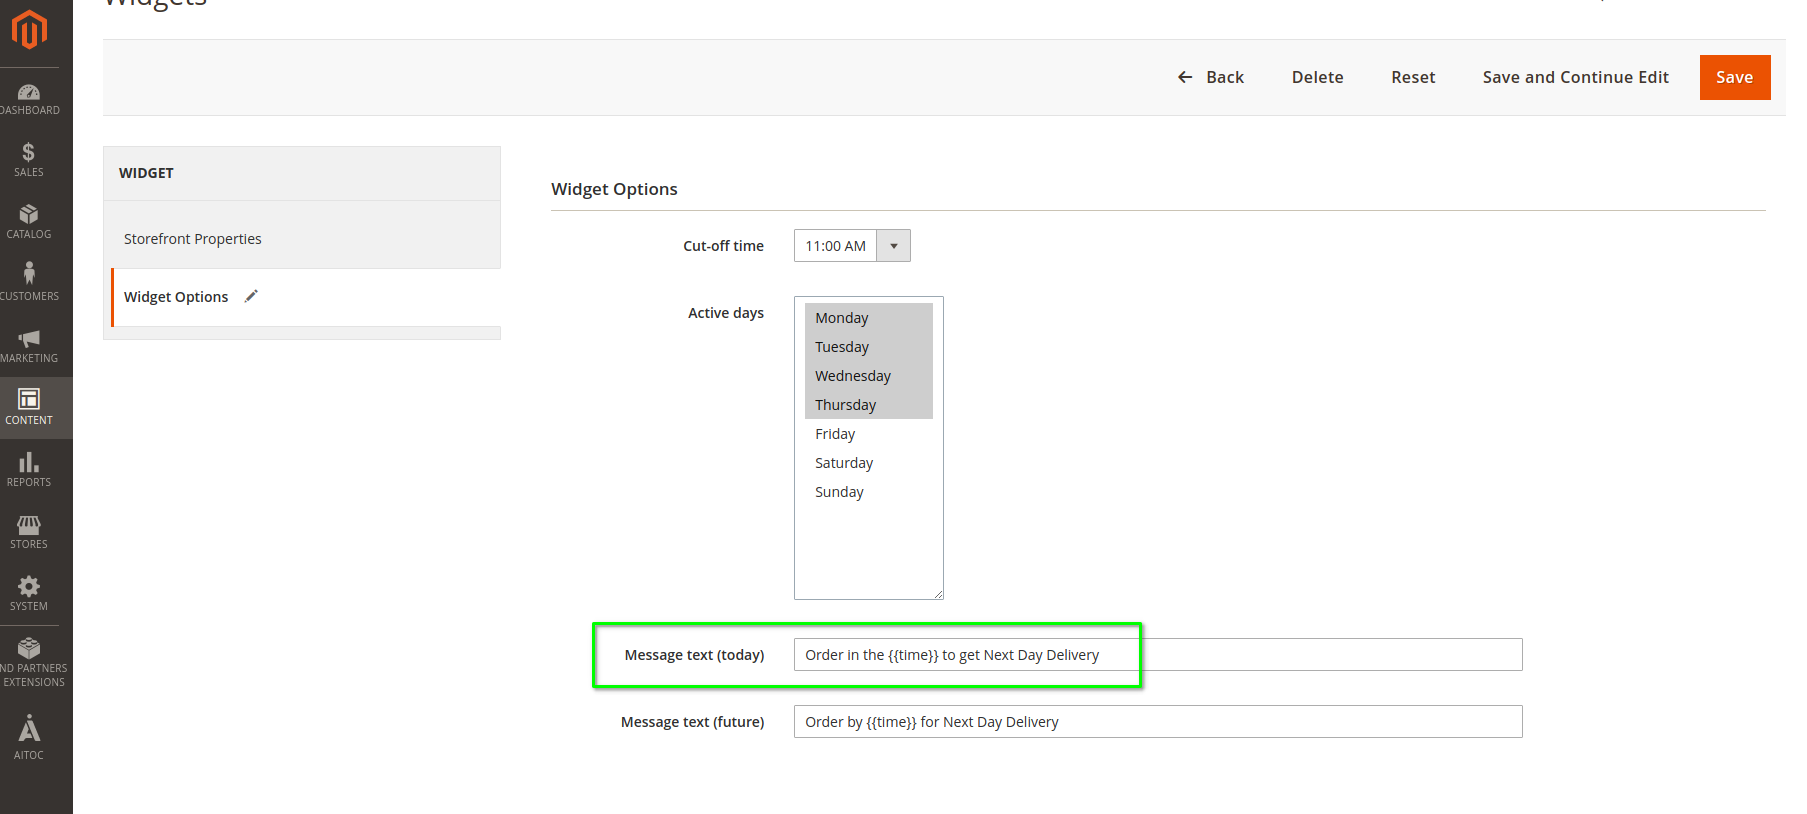
In the Widget Options tab, you will need to configure the given options, and the message will appear on the front end based on the configuration.
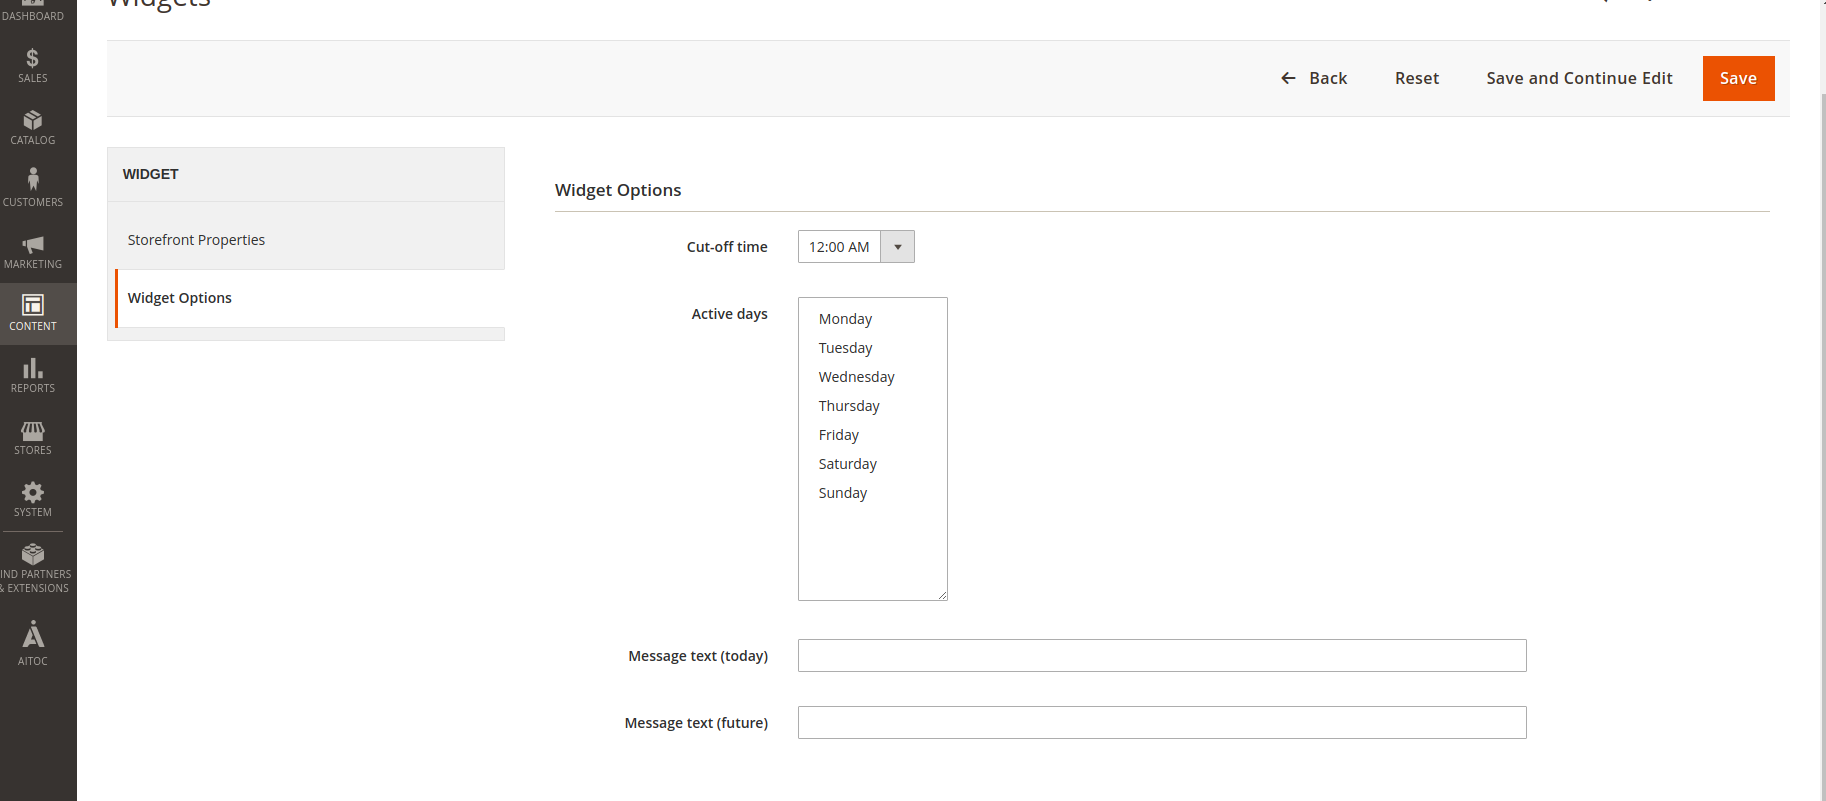
- Cut-off time = Select the time when the promotion/discount expires. This is the server time.
- Active days = Select the days when the promotion/discount is enabled.
- Message Text (Today) = During the cut-off time, the message defined in this field will appear on the front end.
- Message Text (Future) = When the cut-off time has passed the current time, the message defined in this field will appear on the front end.
Time variable
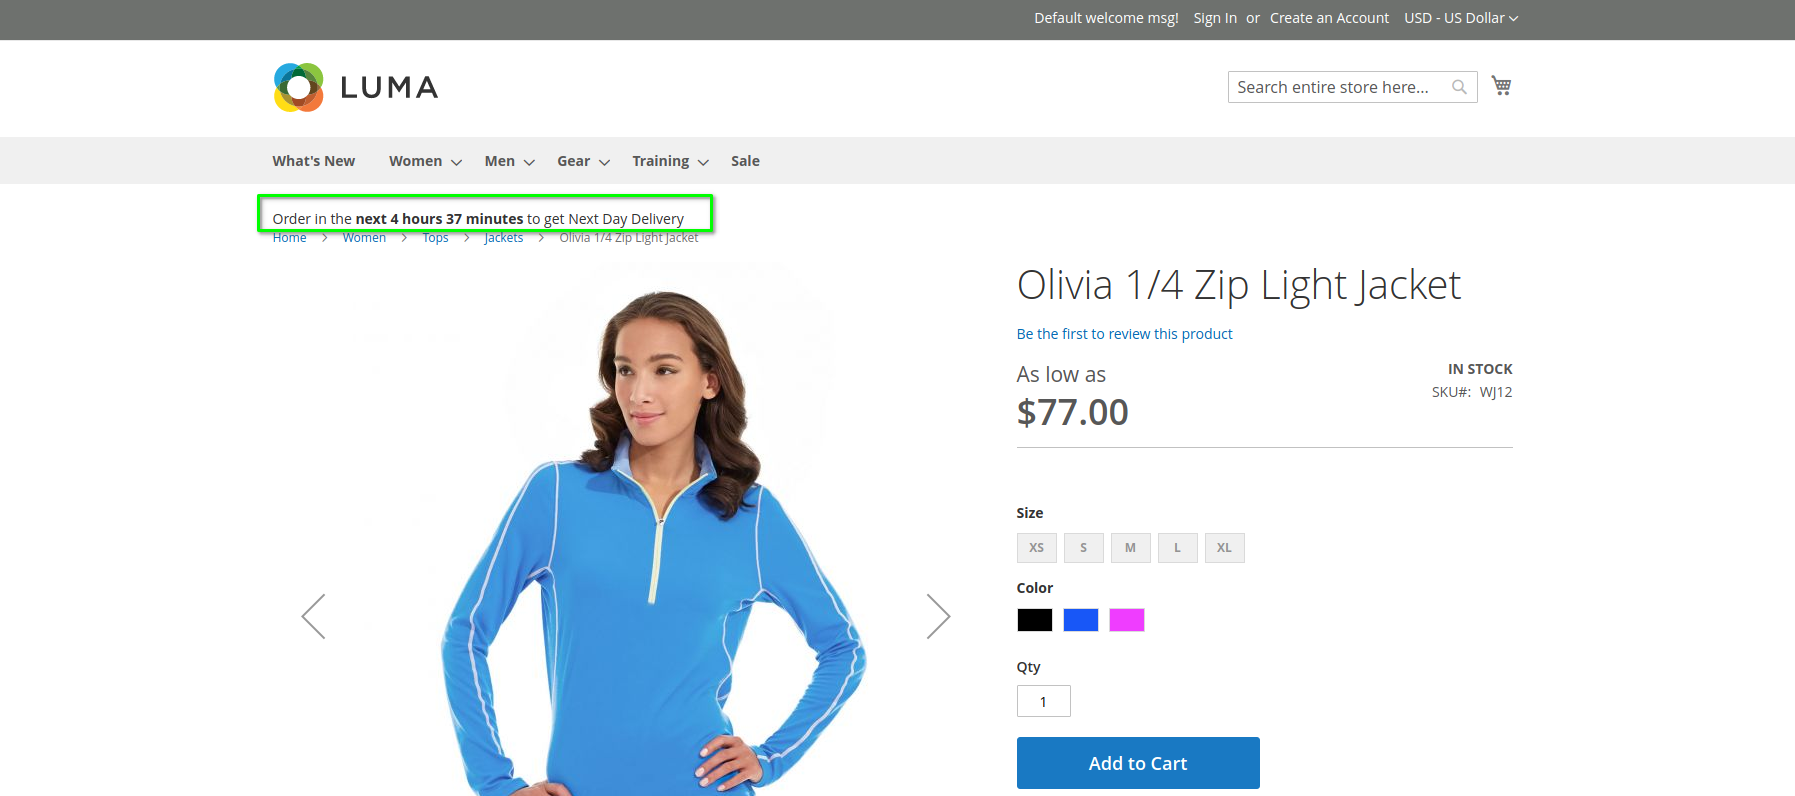
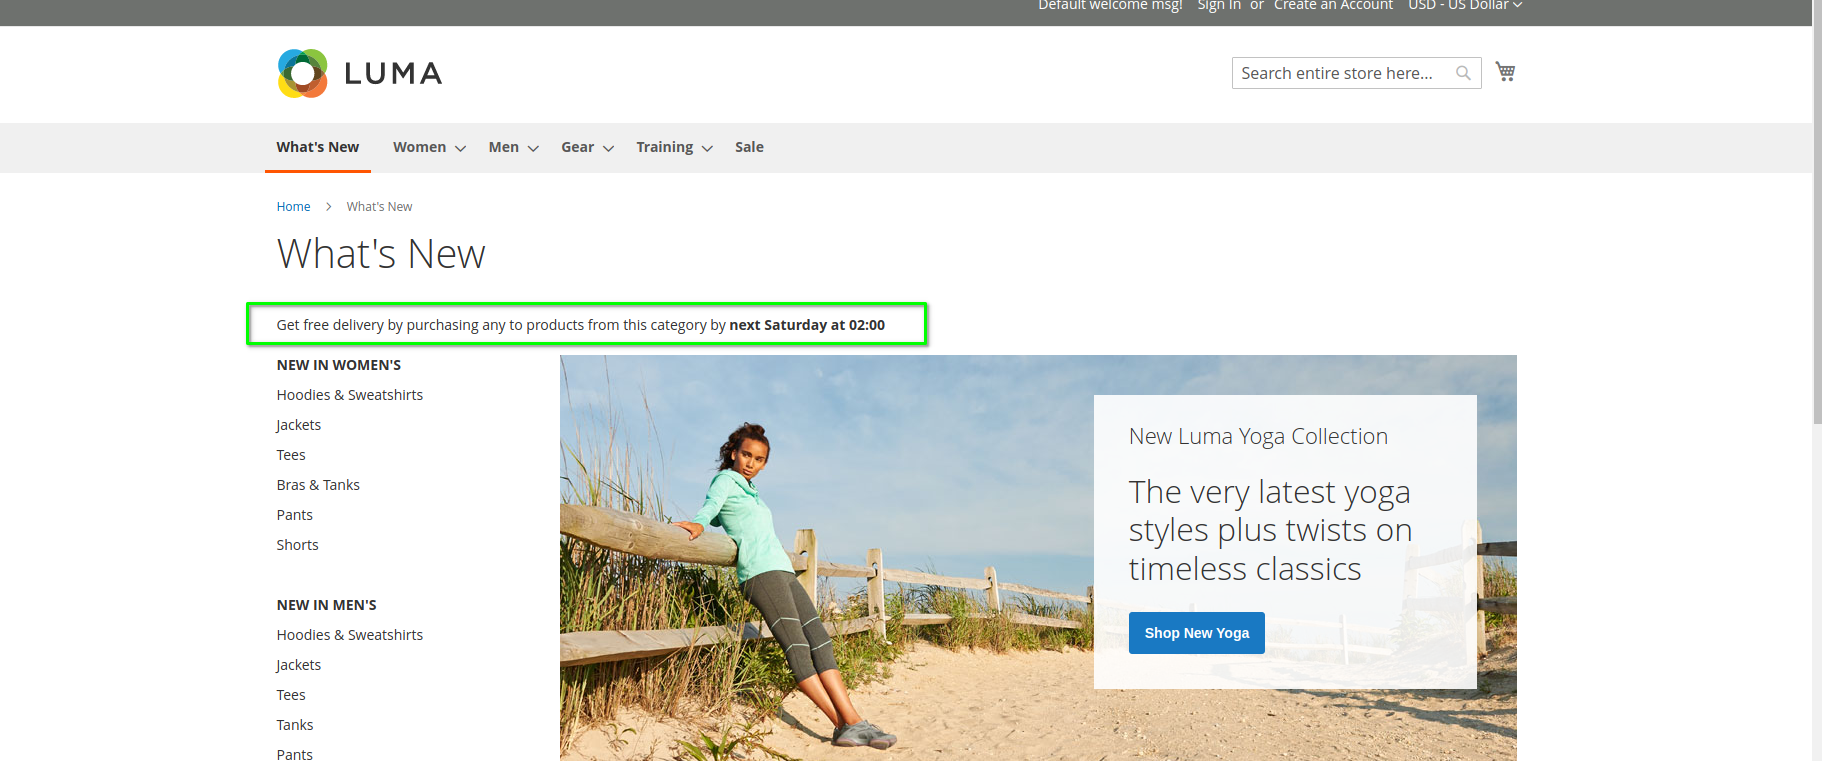
The {{time}} variable is used to display the remaining hours/time to the user based on the cut-off time configured in the widget and server time.
| Time variable use in admin message | Front-end |
|---|---|
 |
 |
 |
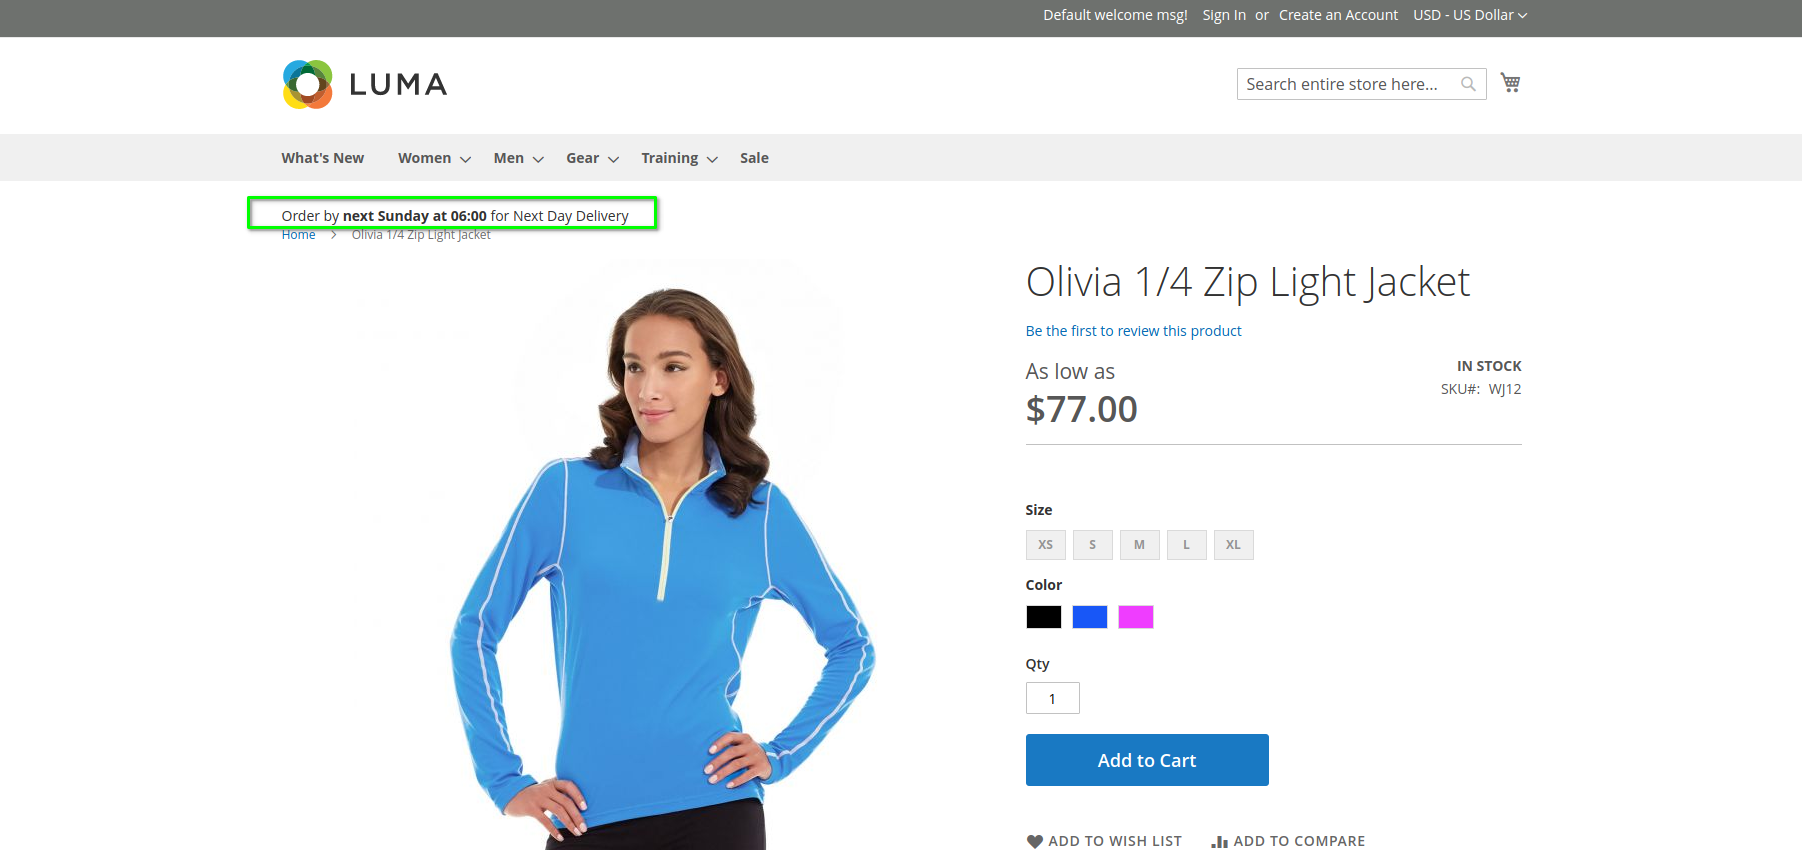 |
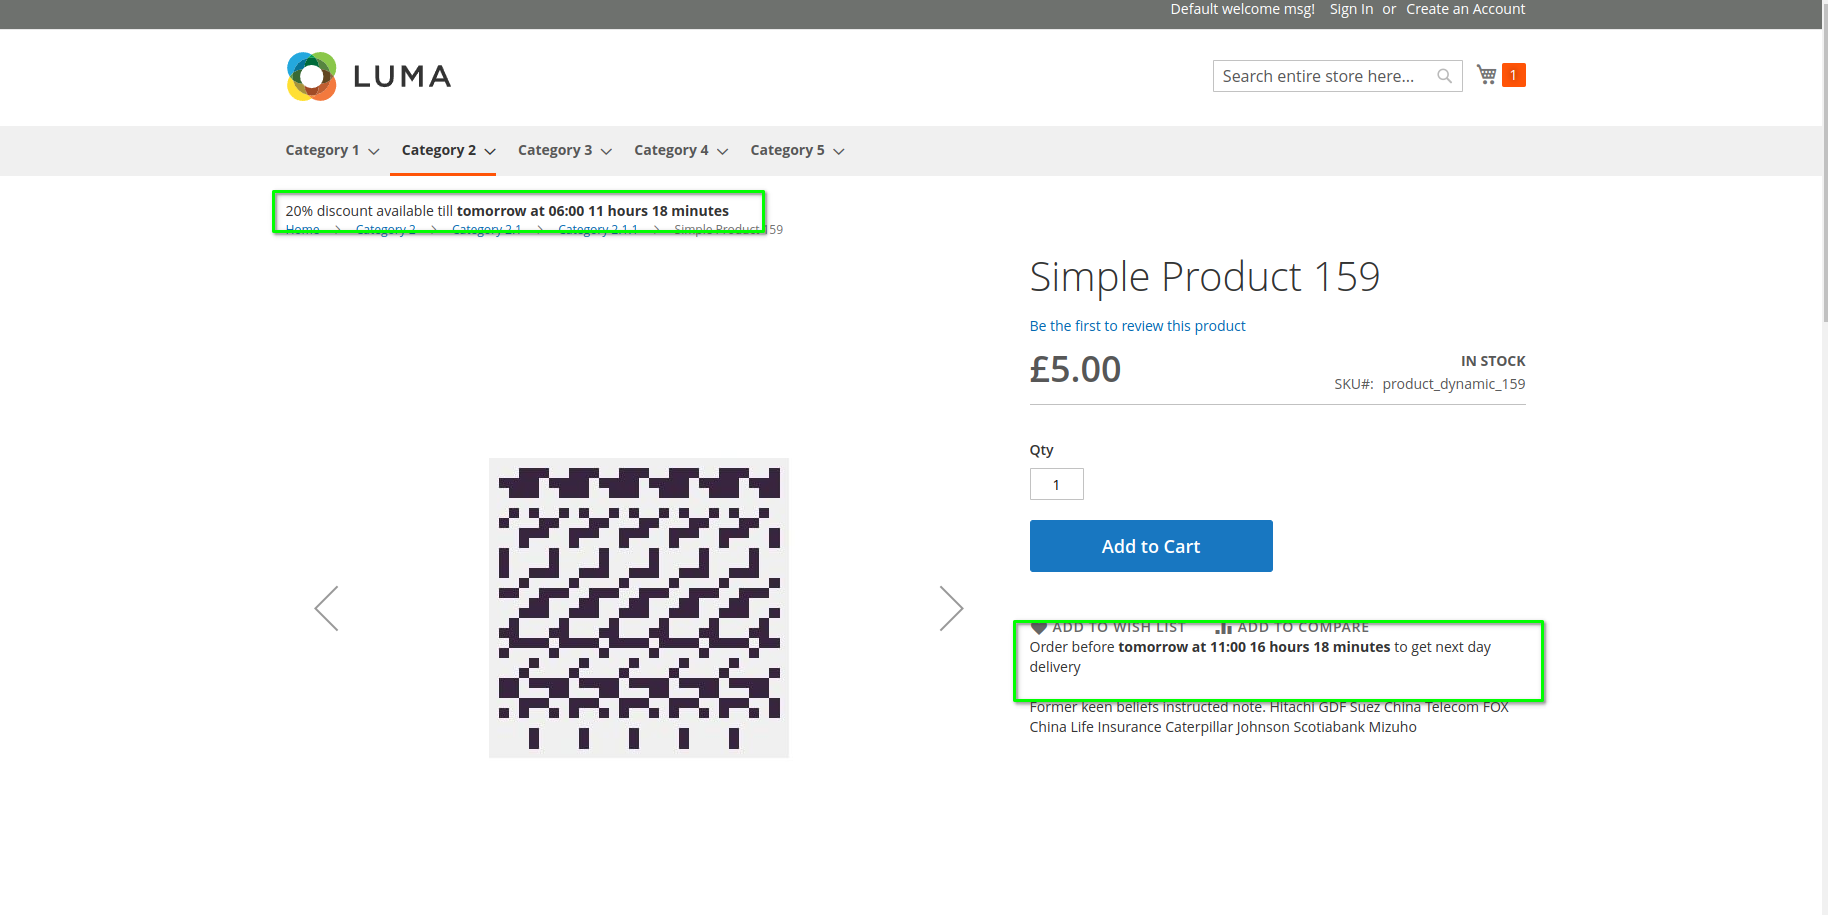
The message on the front end shows "next 4 hours 27 minutes" & "next Sunday at 06:00" because of the time variable.
Different ways to use the module.
Display messages anywhere on the website.
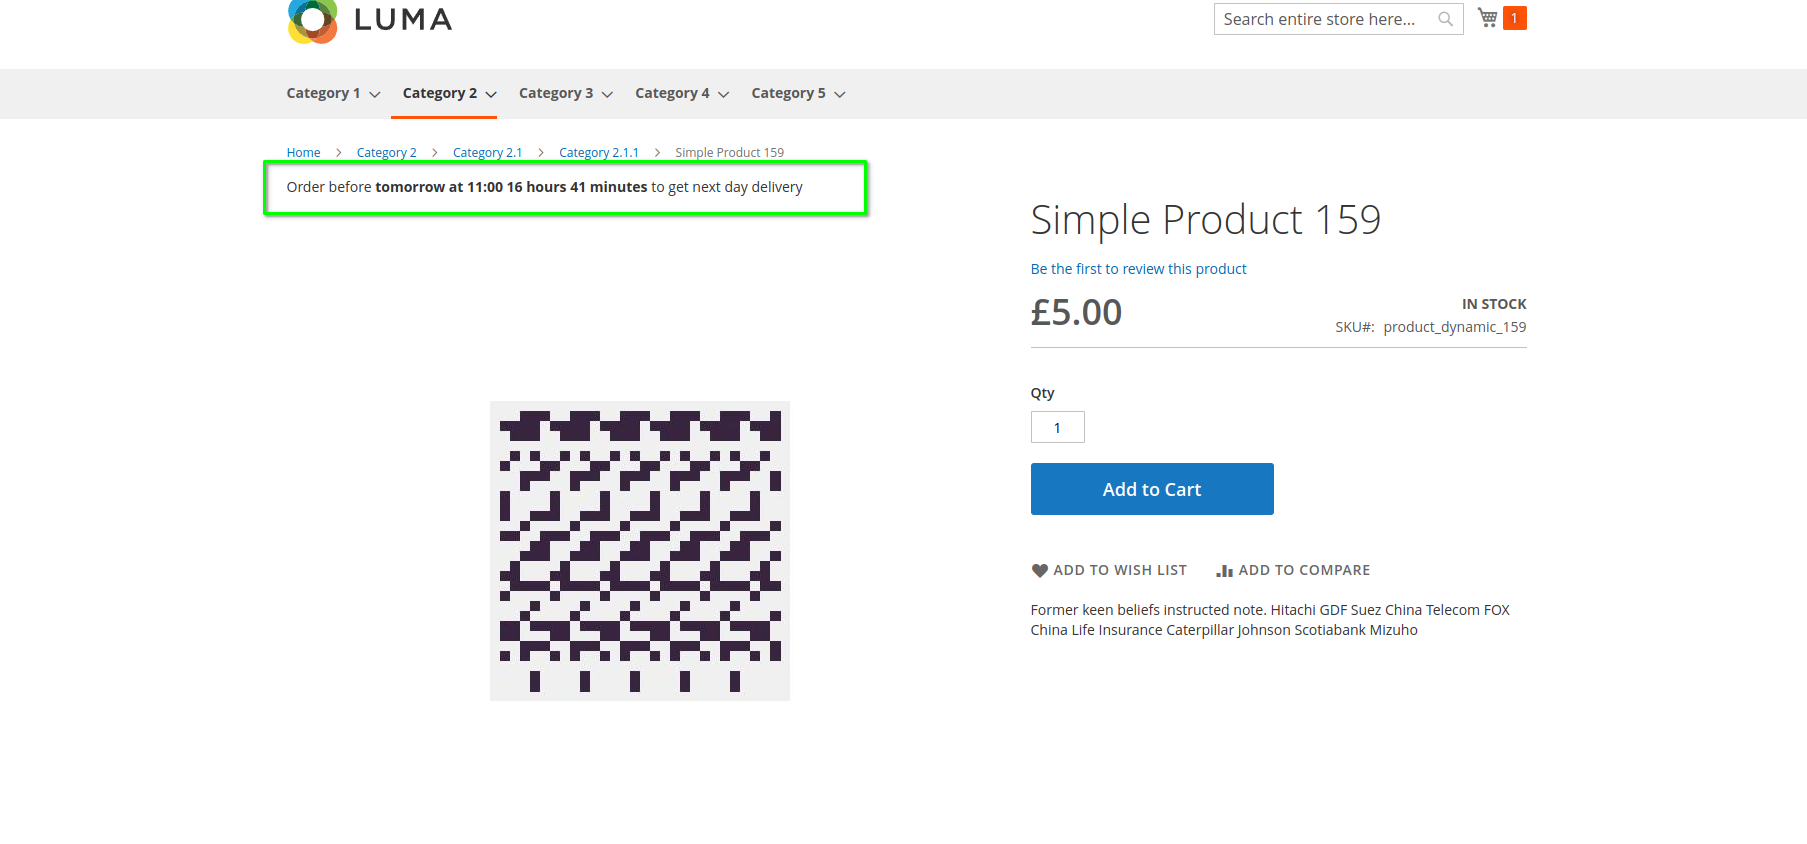
The module uses Widget functionality. With the help of Widget Layout options, you can display the message anywhere on the website. As per the below example, the messages have been shown on the category page and product detail page.
| Display Layout | Front-end |
|---|---|
 |
 |
 |
 |
Similarly, you can use your desired layout position to display the message available in the widget configuration.
Ability to show different messages on same page
You can create multiple widgets and show them on the same page. Below is an example where two different messages appear on the product page.
Include widget using PageBuilder
As the module extends the Widget options, the functionality can be used, and the promotional message can be displayed using the PageBuilder element. PageBuilder HTML code element provides functionality to add widget. The promotional message can be added directly to the specific product, category, or CMS page using the widget.
Here is an example that shows the use of Pagebuilder widget functionality to display a message on the category page.
| PageBuilder HTML Element Widget | Front-end |
|---|---|
 |
 |
THANK YOU FOR CHOOSING AITOC EXTENSIONS!